

12 Clever Studio Apartment Layout Ideas for a More Functional Space
A studio apartment has to support sleeping, relaxing, working, and often dining—all within one open room. The right arrangement can make each activity feel more intentional without making the space feel crowded or closed off.
These studio apartment layout ideas use furniture placement, rugs, storage, and vertical space to create practical zones. Some keep the floor plan open, while others add a subtle or more defined divider between living and sleeping areas.
Use the ideas as starting points, then adjust them to suit your room’s shape, windows, doors, and daily routine. A clear walking path and furniture that fits comfortably matter more than copying any layout exactly.
Quick Answer
The best studio apartment layout ideas are floating the bed behind a low console, an L-shaped sleeping and living arrangement, a media unit room divider, parallel furniture zones and a desk tucked behind the sofa. Other layouts place the bed beside the window, separate zones with two area rugs, share one table for dining and work, partition the room with a wardrobe, add a loft bed over a lounge, keep furniture on the perimeter or install a Murphy bed.
1. Float the Bed Behind a Low Console
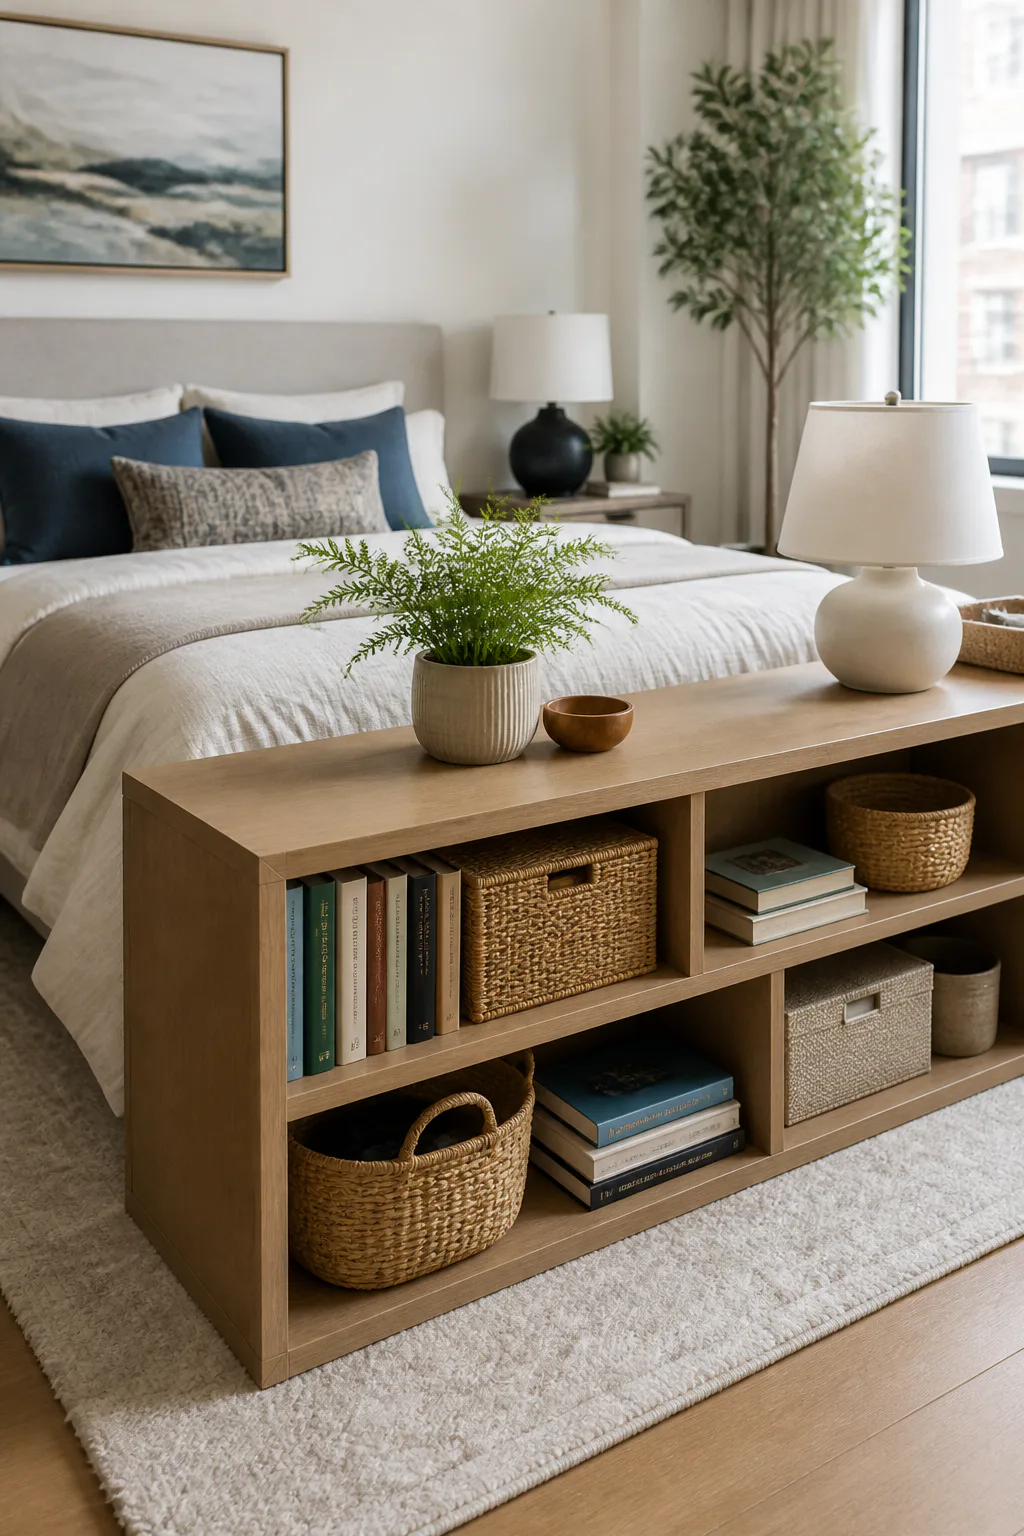
Pulling the bed away from the wall can make a studio feel more like a thoughtfully arranged home than a single room with a bed in it. Position the headboard against a wall or near a corner, then place a low console or open bookcase at the foot of the bed to suggest where the sleeping zone ends.
An area rug beneath the bed helps anchor the arrangement and gives the bedroom area its own visual footprint. Because the console stays low, it separates the bed from the living space without blocking daylight or making the room feel divided into narrow sections.
How to pull it off
Keep the divider low enough to maintain a view across the room, and leave room to walk around the bed comfortably. An open-sided console can hold books and small essentials while allowing light to pass through.
- Choose a rug large enough to extend beyond the sides of the bed.
- Use the console for baskets, books, or a lamp rather than bulky storage.
- Check that the bed remains easy to access from the side you use most.
This layout works especially well when you want a clear sleeping zone but prefer not to install a permanent partition.
2. Create an L-Shaped Sleeping and Living Zone
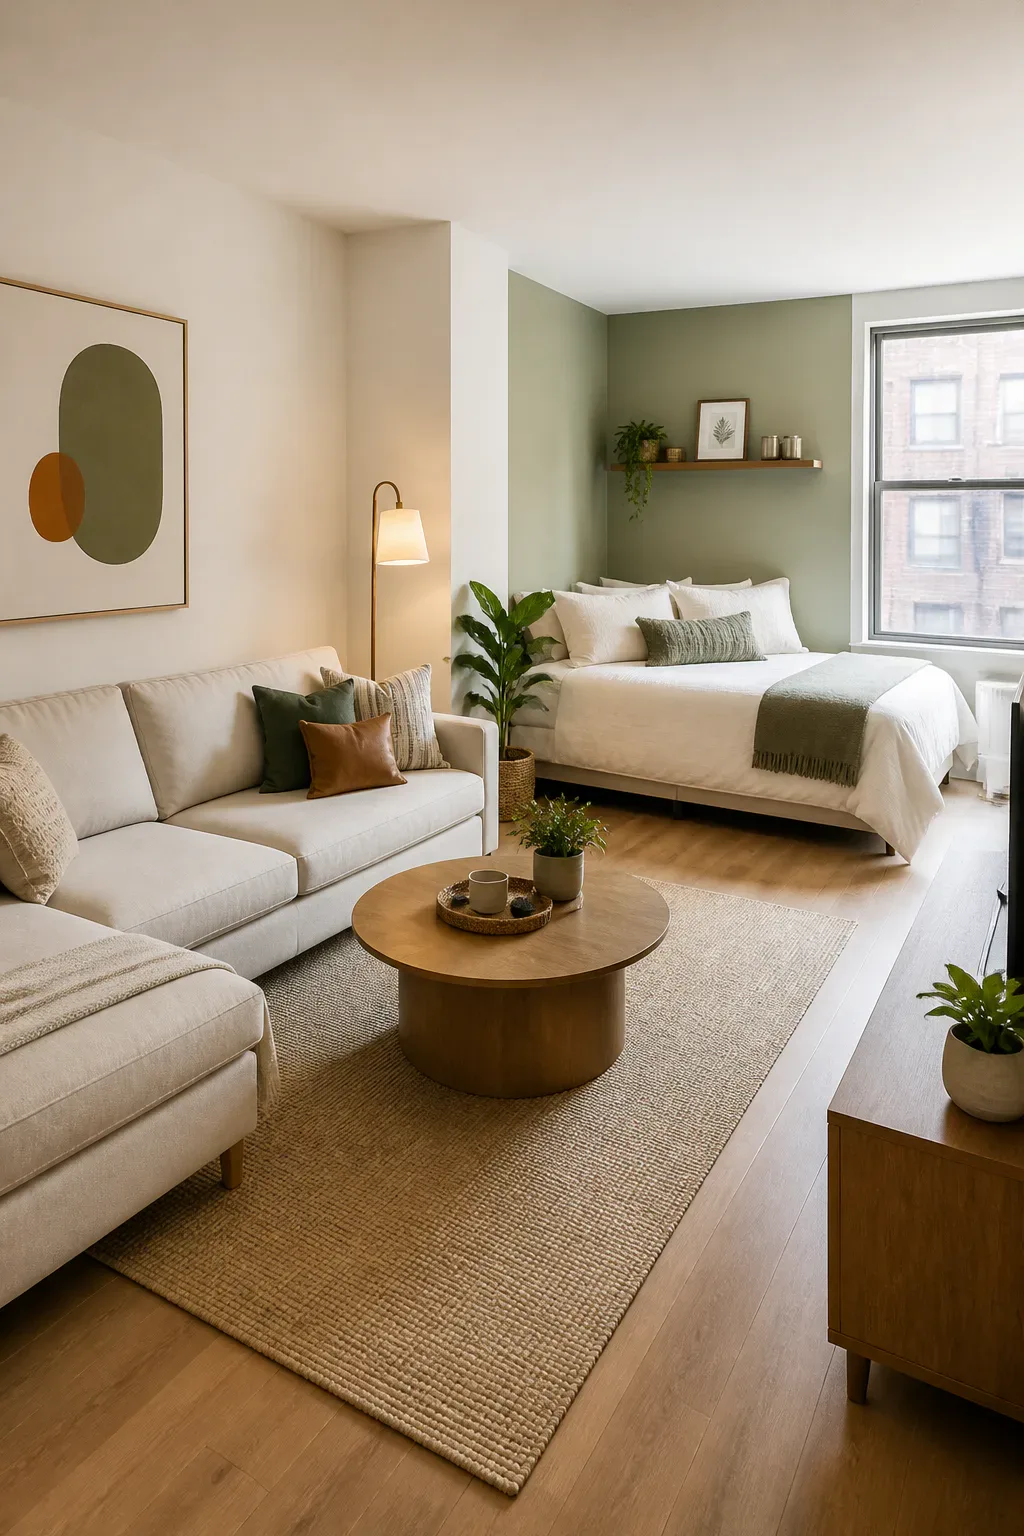
For an L-shaped arrangement, tuck the bed into a back corner and place the sofa along the adjoining side of the room. The sofa and bed visually define separate uses while keeping the center of the studio open for walking or other activities.
A coffee table can complete the living area without needing to line up directly with the bed. This layout is useful in rectangular studios where furniture can sit along two adjoining walls, and it helps make the seating area feel like a destination rather than leftover space.
Design tips
Keep the sofa’s placement deliberate: it should face a focal point, such as a TV or a clear wall, rather than turn its back to the main path through the apartment. A small side table can replace a larger coffee table if circulation feels tight.
- Place the bed in the corner farthest from the entry when possible.
- Use a compact sofa that leaves room for a comfortable walkway.
- Choose a coffee table with rounded edges for easier movement.
- Add a lamp near the sofa to give the living zone its own lighting.
The result is an open center with two distinct areas that still feel connected.
3. Divide the Studio with a Media Credenza

A long, low media credenza can do two jobs at once: support a television and create a boundary between the sleeping nook and the living area. Set it between the bed and sofa, with the screen facing the seating zone, so each side of the room has a clear purpose.
This approach offers more separation than a rug alone, but it generally feels lighter than a tall wall or full-height shelving unit. It can be a good fit when you want the bed to feel less visible from the sofa or the apartment entry without sacrificing an open sightline.
Make the divider useful
Look for a console with storage that suits what you need to keep close at hand. If the back of the piece is visible from the bed, treat that side as part of the room rather than leaving it as an afterthought.
- Measure the console against the room’s main walking route before placing it.
- Use enclosed cabinets for clutter and open shelves for a few display items.
- Keep the top surface simple so the divider does not feel visually heavy.
- Manage cords along the wall or behind the console for a tidier setup.
A well-chosen credenza makes the transition between sleep and lounging feel intentional while adding everyday storage.
4. Build Parallel Furniture Zones
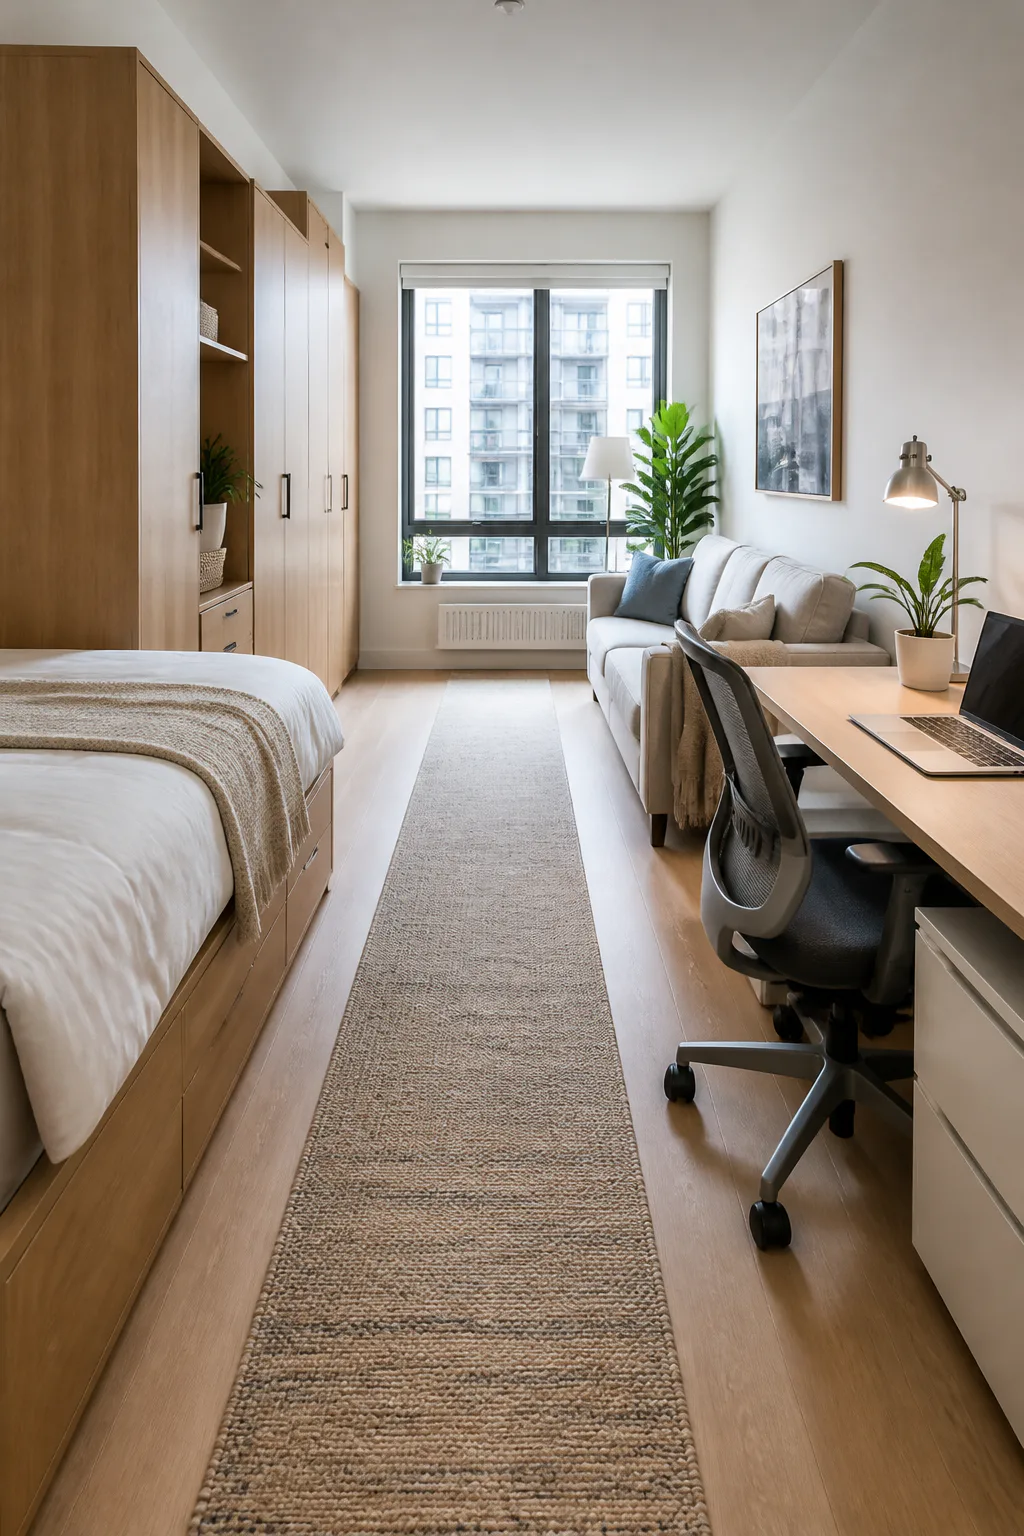
When a studio is long and narrow, arranging furniture in parallel tracks can make the floor plan easier to navigate. Place the bed and wardrobe along one long wall, then line up the desk and sofa along the opposite side, leaving a central walkway between them.
The open path gives the room a sense of order and can make it simpler to move from the entry toward the window or kitchen. This layout is especially helpful when furniture placed across the middle would interrupt circulation or make the studio feel divided into small compartments.
Keep the center clear
Think of the walkway as a key part of the layout, not as leftover space to fill. Choose furniture depths that allow you to pass through comfortably, and avoid letting chairs or drawers project too far into the route.
- Keep frequently used storage accessible without blocking the path.
- Use a narrower desk or sofa if the room feels pinched.
- Place a runner along the central route to reinforce the direction of travel.
- Leave enough clearance for wardrobe and cabinet doors to open.
Parallel zones bring structure to a narrow studio while preserving a straightforward flow through the room.
5. Tuck a Desk Behind the Sofa
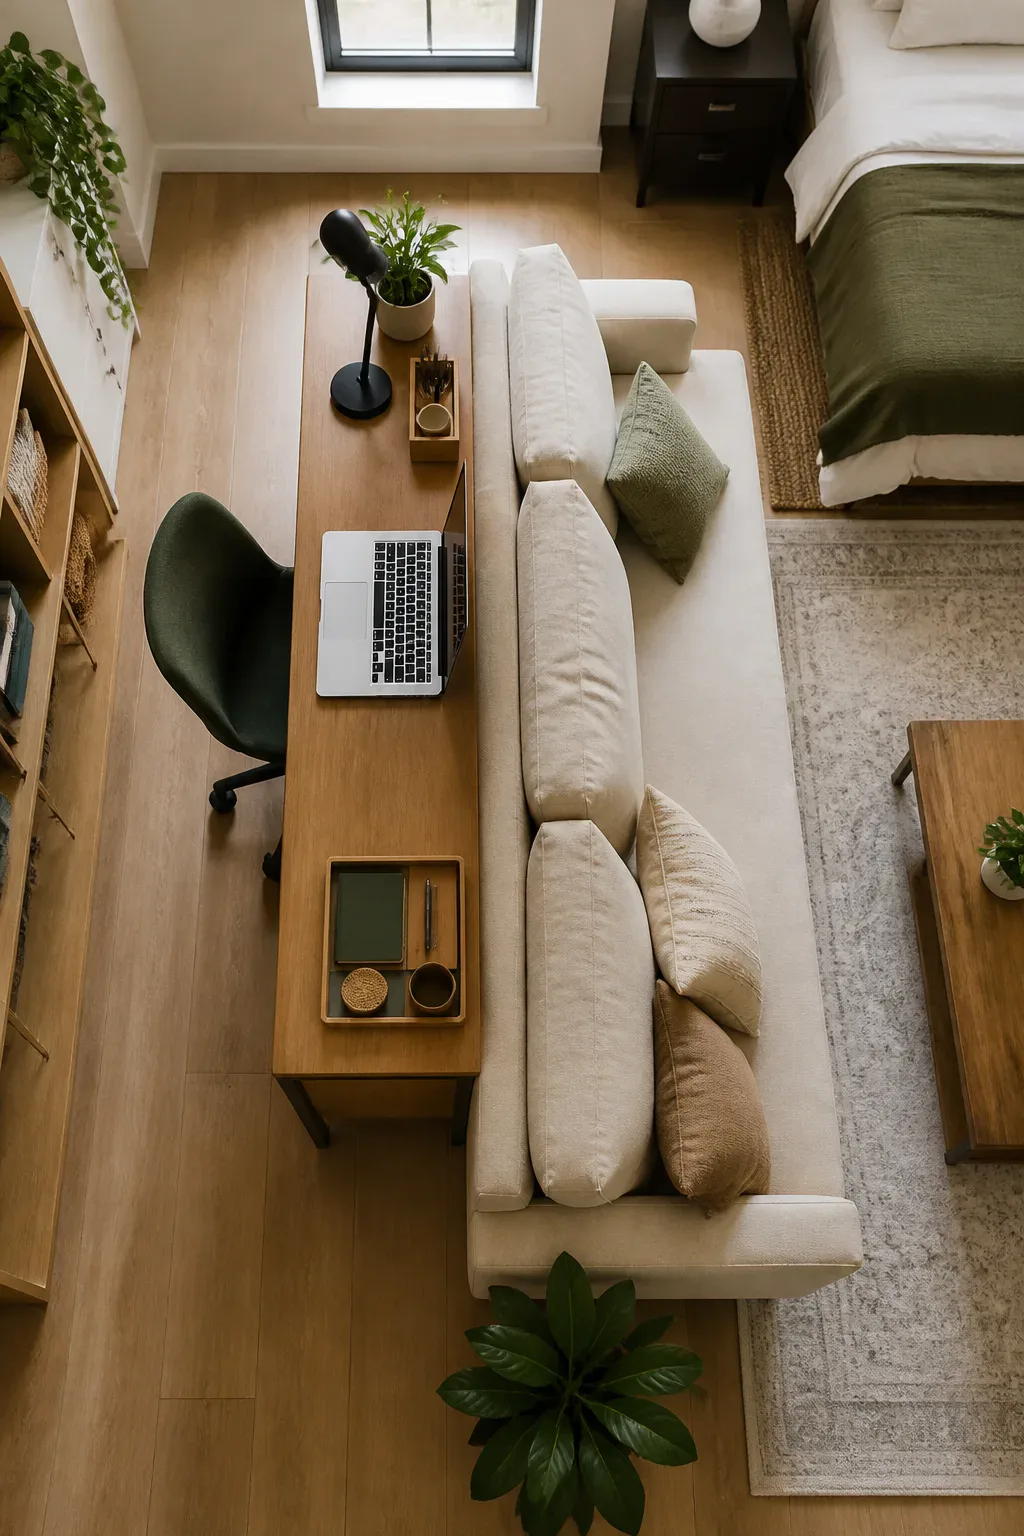
A desk behind the sofa can create a compact work area without giving the studio an office-dominated feel. The sofa acts as a visual boundary between work and relaxation, while the desk uses space that might otherwise be left empty behind the seating area.
If the sofa sits close to a wall or the room is too tight for a desk behind it, a wall-mounted desk in a nearby corner can provide a similar tucked-away workspace. In either arrangement, a defined work surface helps keep papers and devices from spreading across the dining table or bed.
Set up a focused nook
Check that you can pull out the chair and sit comfortably without interfering with the sofa or main walkway. A simple task light and a small organizer can make the nook functional without adding much visual clutter.
- Choose a desk depth that fits the room and your work essentials.
- Use a chair that can slide under the desk when not in use.
- Keep cords close to the wall to reduce clutter underfoot.
- Store work materials in one tray or drawer when the workday ends.
This arrangement gives work a home of its own while allowing the living area to remain the room’s main focus.
6. Place the Bed Beside the Window
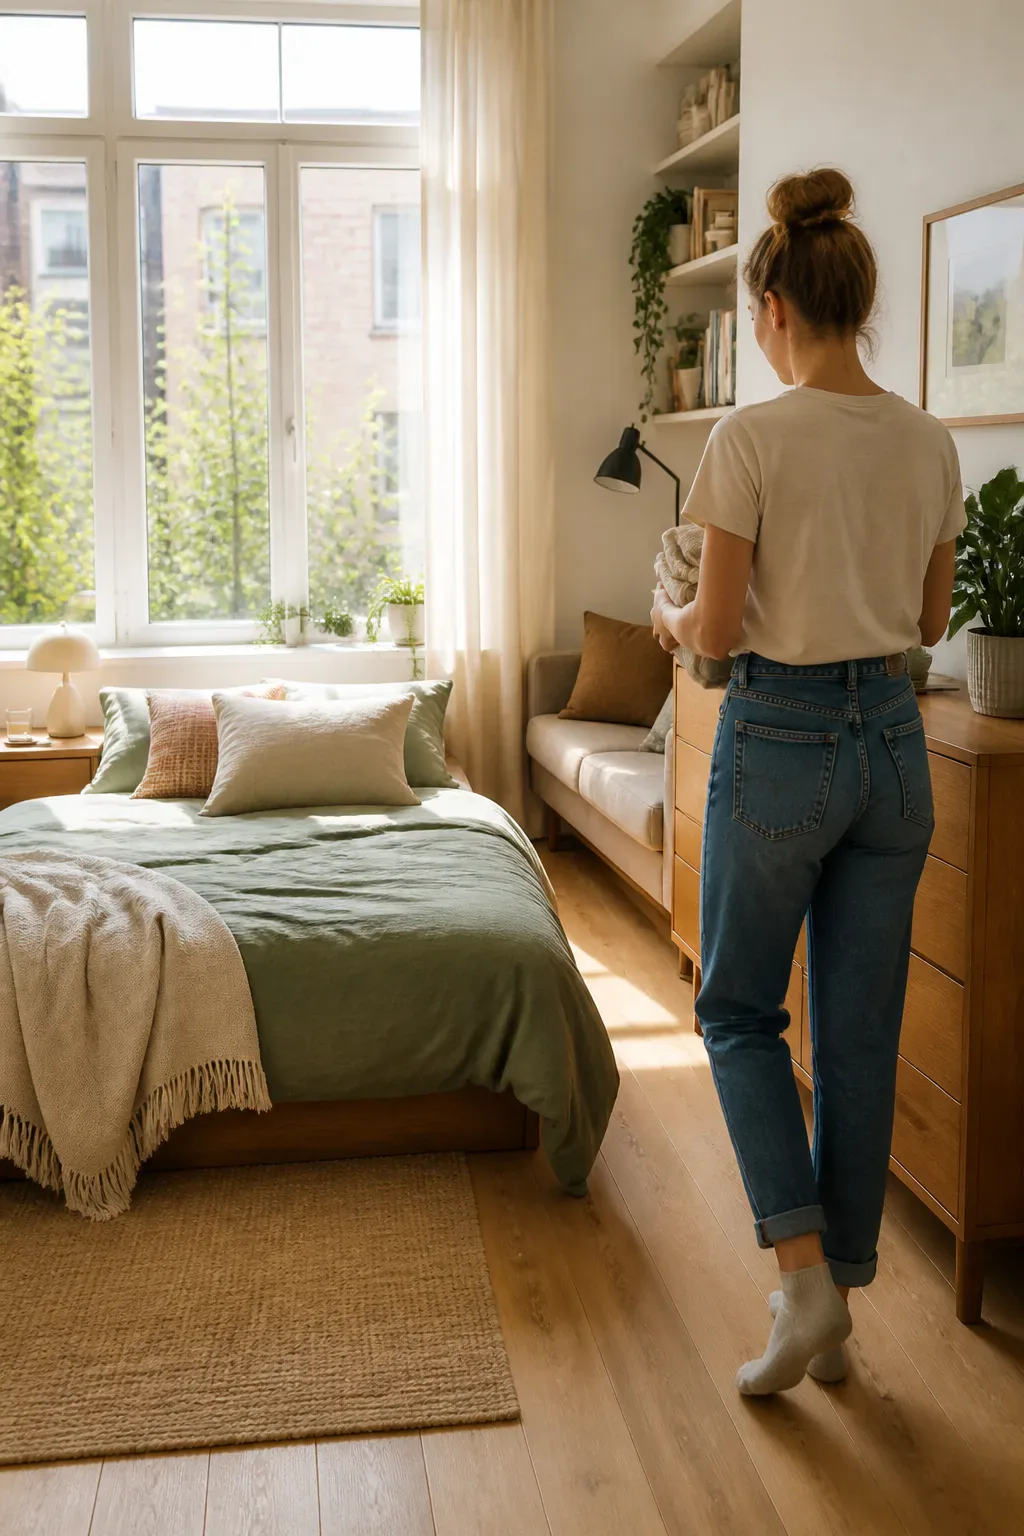
Positioning the bed under or beside a window can make the sleeping area feel bright and connected to the outdoors. It can also free up a more private wall for storage or a sofa, which may be useful when the studio has limited uninterrupted wall space.
The key is to keep the window area from becoming crowded. Tall furniture beside the bed can block light, restrict airflow, or make the sleeping zone feel enclosed, so this layout tends to work best with a low-profile nightstand and modest surrounding storage.
Preserve light and access
Before settling on the placement, consider how the window opens and whether curtains or blinds need room to move. Leave a clear route to the window, and avoid placing furniture where it could make ventilation awkward.
- Use a low bed frame or keep nearby furniture below the window line.
- Choose a small bedside table instead of a wide chest.
- Keep window coverings easy to reach from the bed.
- Check that the bed does not block a radiator or other built-in feature.
With careful spacing, a window-side bed can make the sleeping zone feel airy rather than tucked away.
7. Separate Zones with Two Area Rugs

Two area rugs can distinguish the bedroom and living room without adding a physical divider. Place one rug beneath or around the bed and another beneath the sofa and coffee table, giving each zone a clear visual anchor while keeping the floor plan open.
The rugs do not need to match exactly. A coordinated palette can create a sense of connection, while a difference in color, pattern, or texture helps each area read as its own. This idea suits studios where privacy is less important than a calm, organized feeling.
Choose rugs that work together
Measure the furniture first so each rug relates to its zone rather than appearing like a small mat dropped in the middle of the floor. Consider how the edges sit against doorways, kitchen flooring, and the route between the bed and entry.
- Use one rug to anchor the bed and another to define the seating area.
- Repeat one color or texture in both rugs for a cohesive look.
- Choose low-pile styles where doors or chairs need to move easily.
- Use a nonslip pad to help keep rugs in place.
This simple zoning method adds warmth and definition while keeping daylight and sightlines unobstructed.
8. Use One Table for Dining and Work

A compact table can serve as a dining spot, a desk, and extra kitchen prep space when the studio does not have room for separate surfaces. Place it near the kitchen if possible, but leave enough clearance for chairs and a direct route through the room.
This setup can also free up space elsewhere by replacing a traditional coffee table or a dedicated desk. The table may become a visual anchor for the apartment, so its size and placement should support everyday movement rather than simply fill an empty corner.
Make a shared surface practical
Plan how the table will transition between uses. A small tray can gather work supplies when it is time to eat, while a nearby shelf or cabinet can store items that should not stay out all day.
- Choose a table size that fits both meals and the tasks you do regularly.
- Use chairs that tuck underneath to keep the walkway clear.
- Keep work supplies in a portable caddy or drawer.
- Leave the tabletop mostly clear between activities.
A single well-placed table can make a small studio more flexible without adding another bulky piece of furniture.
9. Partition the Room with a Wardrobe
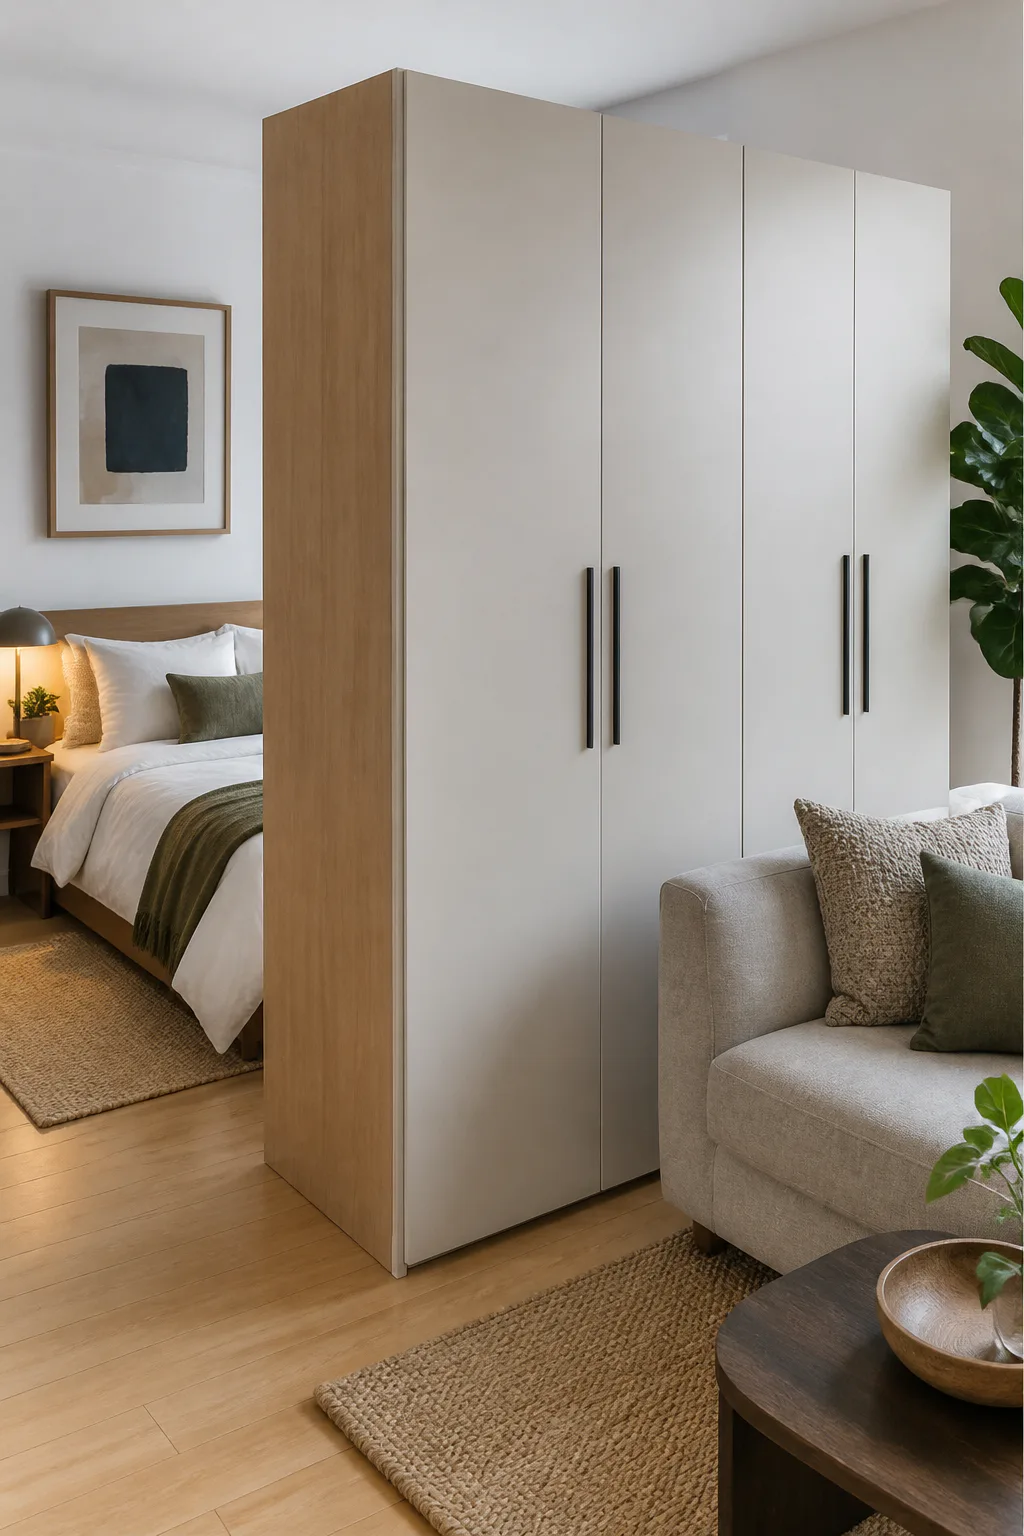
A freestanding wardrobe placed perpendicular to a wall can create a more private sleeping area and a defined living room. Unlike an open divider, it also provides substantial enclosed storage, which can help reduce visual clutter in a studio with limited closets.
Because the wardrobe is tall and solid, its placement matters. It can make the room feel more separated, but positioning it carelessly may block light or interrupt the route through the apartment. Aim for a layout that offers privacy from the sofa or entry while keeping the remaining space easy to navigate.
Finish both sides thoughtfully
The living-room-facing side of the wardrobe may be visible every day, so consider how it looks from that angle. Secure the unit as appropriate for its design, and check that doors and drawers can open without hitting nearby furniture.
- Choose a wardrobe depth and height that suit the room’s proportions.
- Leave a clear path around the partition and to the sleeping area.
- Style the exposed side with art or a simple, tidy finish.
- Use the interior for clothing and bedding to reduce other storage needs.
This layout is a strong option when both privacy and clothing storage are priorities.
10. Build a Loft Bed over a Lounge Nook

A loft bed uses vertical space to make room for another activity below, such as a lounge area or a compact workspace. This can be a useful solution in a studio with sufficiently high ceilings, especially when a standard bed would take up much of the available floor area.
The space underneath should feel like a deliberate zone, not simply the leftover area beneath the mattress. A small sofa, chair, or desk can make it useful, while lighting and textiles help it feel comfortable despite its more tucked-away position.
Plan for comfort and clearance
Check the ceiling height, the bed’s structure, and the space needed to sit up and move safely. A loft is not right for every room, so consider how easily you can reach the bed and whether the area below will have enough headroom for its intended use.
- Confirm there is adequate clearance above and below the bed.
- Choose a secure design with a practical way to climb up.
- Use a compact chair or desk that fits the lower nook.
- Add lighting below so the area does not feel shadowy.
When the room’s height allows it, a loft can give one small footprint two distinct functions.
11. Open the Center with Perimeter Furniture
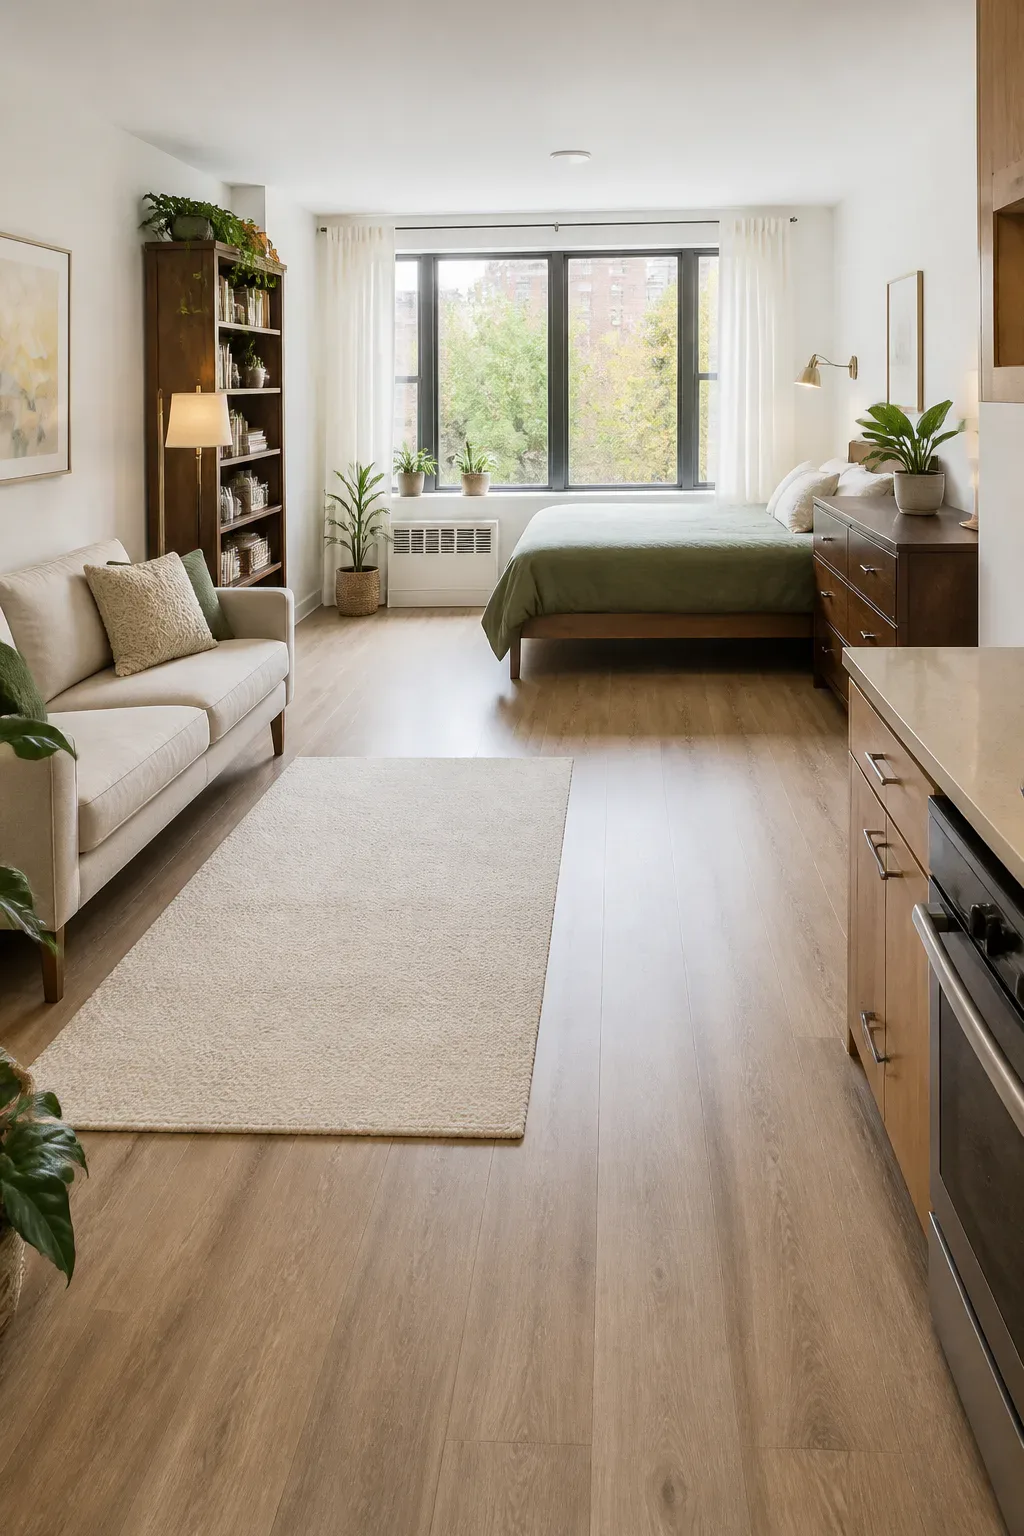
Arranging the bed, sofa, and storage along the perimeter leaves the middle of the studio open. That clear center can make the room feel less crowded and gives you more flexibility for walking, stretching, or moving furniture when needed.
This layout works best when the walls can support the main pieces without creating a cluttered ring around the room. Avoid filling the open area with small tables or extra storage simply because it is available; the sense of space comes from keeping the center visually and physically clear.
Use the edges with intention
Group furniture according to how you use the room, and consider placing taller storage where it is least likely to block a window. Keep pathways between the door, bed, kitchen, and seating area easy to follow.
- Push larger pieces close to the walls while preserving access to doors.
- Use a small side table instead of a large central coffee table.
- Choose wall-mounted lighting to reduce floor and tabletop clutter.
- Keep only essential items in the central area.
An open middle gives a studio breathing room and makes the layout adaptable to everyday changes.
12. Install a Murphy Bed for Flexible Floor Space
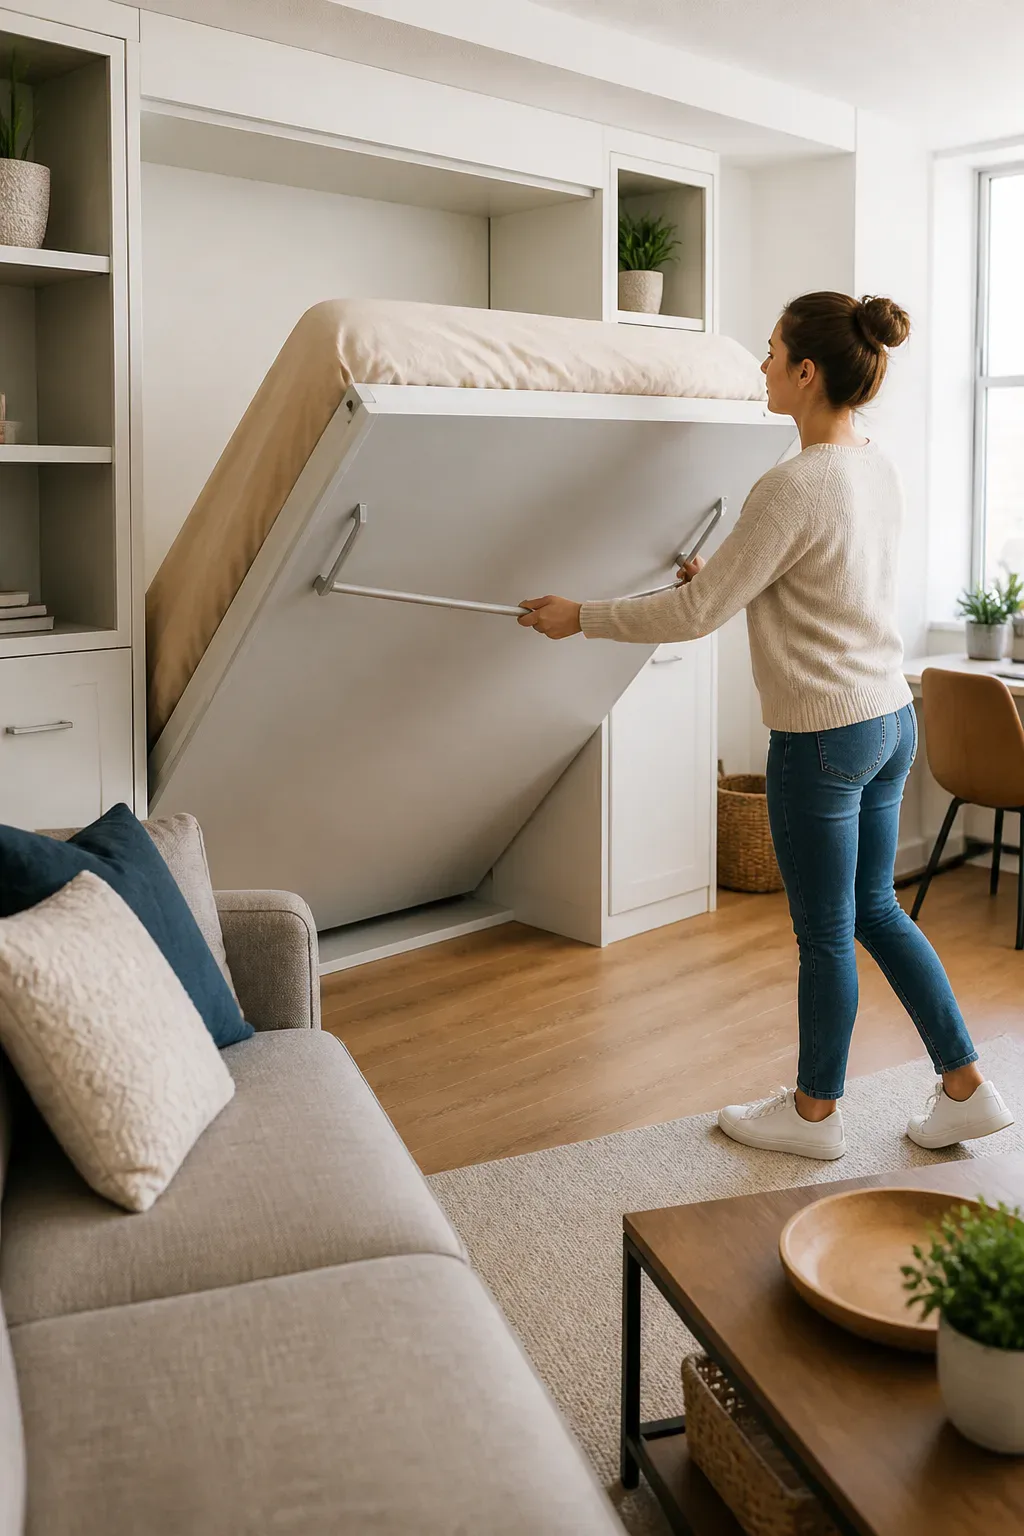
A Murphy bed folds up against a wall when it is not in use, freeing the floor for daytime activities. It can help a studio shift between sleeping, relaxing, working, and entertaining without keeping a full-size bed in the middle of the room all day.
This arrangement works best when there is enough clear space for the bed to open fully and when the surrounding furniture can adapt to both positions. A sofa or table may need to sit outside the bed’s folding path, so map out the open and closed configurations before committing to the layout.
Plan the room in both modes
Think about what the room needs during the day and at night. Keep bedding storage nearby, and make sure the bed is easy to operate without having to move several pieces of furniture first.
- Measure the full open footprint, including space needed to walk around it.
- Keep tables, chairs, and decor outside the folding path.
- Choose nearby storage for bedding and pillows.
- Arrange lighting and outlets so they work in both configurations.
A fold-down bed offers a practical way to make the same studio serve different needs throughout the day.
Frequently Asked Questions
How do you separate the bed from the living area in a studio?
Use furniture as a divider: a low console, open bookcase, media unit or wardrobe can screen the bed while letting light through. Rugs also help define each zone.
Where should the bed go in a studio apartment?
A corner or the wall farthest from the entry usually feels most private. Placing it near the window works if you want the living area by the door.
How can I make a studio apartment feel bigger?
Keep pathways clear, choose furniture with exposed legs, use vertical storage and pick pieces that do two jobs, such as a storage bed or a dining table that doubles as a desk.
Final Thoughts
A successful studio layout does not depend on adding more furniture or building permanent walls. Thoughtful placement, clear paths, rugs, low dividers, and useful multipurpose pieces can make an open room feel organized and comfortable.
Start by identifying the activities that matter most in your home, then try a layout that supports them. Measure before moving larger pieces, pay attention to light and circulation, and adjust as you learn what feels natural in your space.
Making the most of a small home? See our small apartment decorating ideas and small living room ideas on a budget.



