13 Clever Studio Apartment Ideas to Make the Most of Your Space
A studio apartment asks one room to handle nearly everything: sleeping, relaxing, working, eating, and storing the things you use every day. The best layouts make those activities feel distinct without filling the floor with bulky dividers or furniture.
These studio apartment ideas focus on practical ways to create zones, add storage, improve light, and make compact furniture work harder. Many can be adapted for rentals, and none require turning an open room into a maze of partitions.
Whether you’re furnishing a first apartment or reworking a layout that feels cluttered, start with the ideas that solve your biggest daily frustrations. A few thoughtful changes can make the whole space feel more comfortable and intentional.
1. Float the Sofa to Divide Living and Sleeping Zones

When a sofa sits with its back toward the bed, it creates a visual boundary between the living area and sleeping zone. Unlike a solid partition, it keeps the room open and allows daylight and conversation to move through the space.
This layout works especially well when the bed and living area share one long room. Position the sofa so it faces the main seating or media area, then use its back to signal where the bedroom begins. Even a modest sofa can define the transition without making the studio feel boxed in.
How to pull it off
Before moving furniture, check that you can walk comfortably around both the sofa and the bed. The sofa should define a zone, not block the route from the entry to the window or kitchen. A narrow console behind it can add a landing surface, but leave enough space for circulation.
- Measure walkways before committing to the sofa’s position.
- Use a slim console behind the sofa for a lamp or everyday essentials.
- Keep the sofa back tidy, since it becomes part of the room’s view.
A rug beneath the seating group can reinforce the living zone and make the arrangement feel complete.
2. Separate the Bed with an Open-Back Bookcase

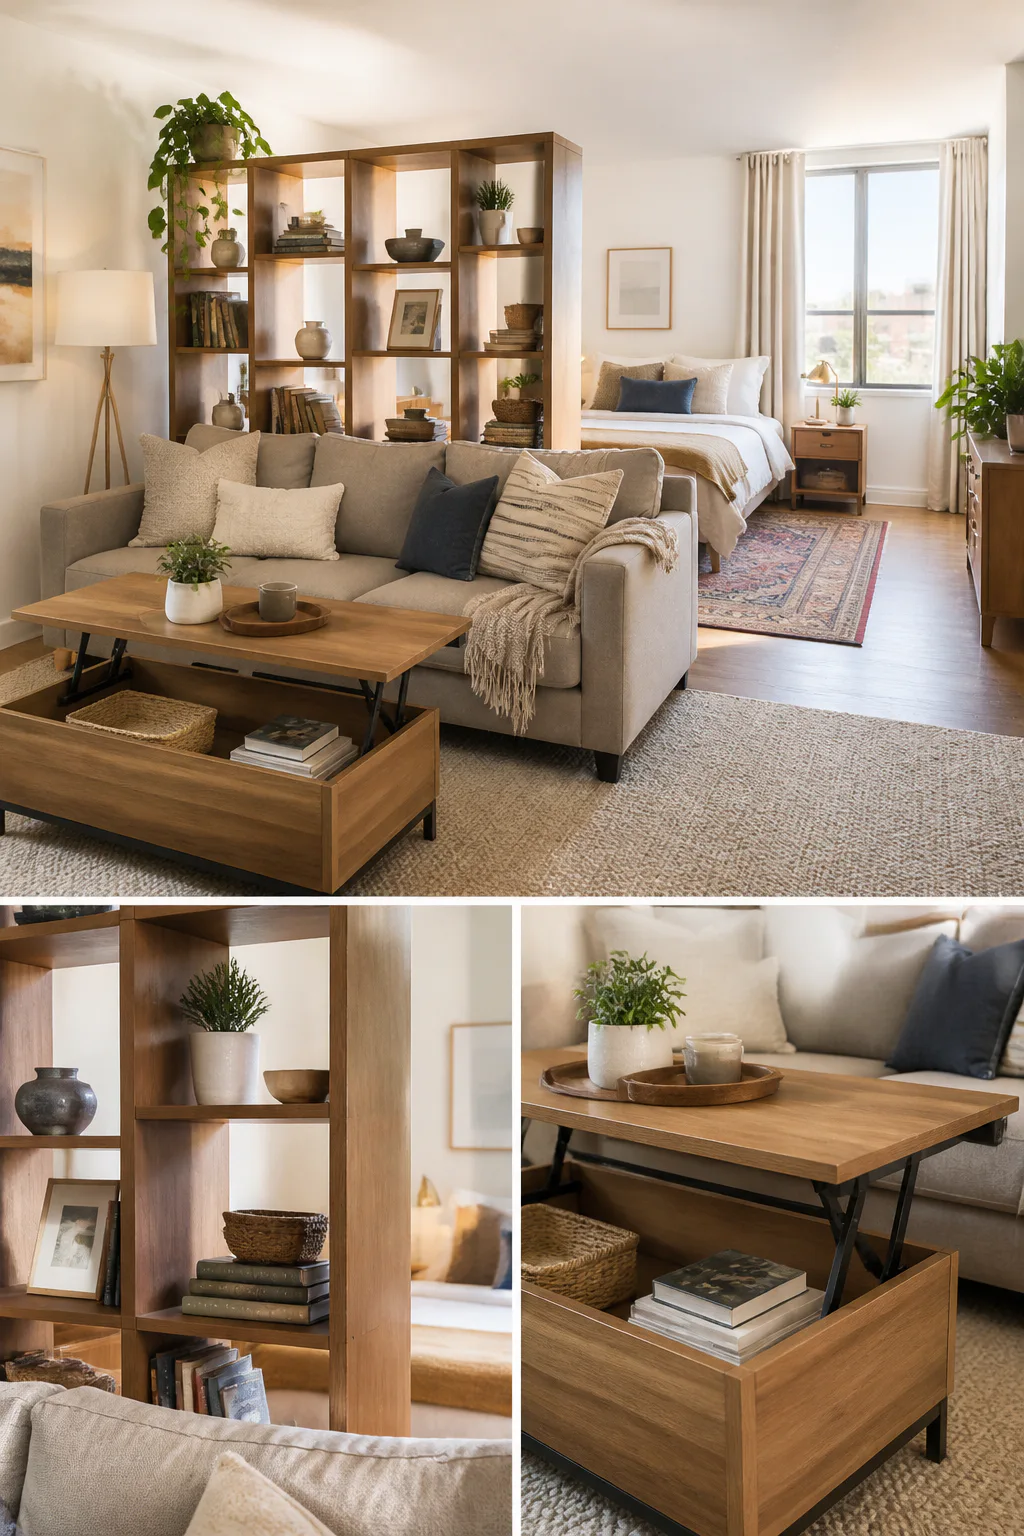
A slim open-back bookcase can create a gentle boundary beside the bed while preserving the studio’s open feel. The shelves offer a little visual privacy, but gaps between them allow light to pass through instead of creating the heavy effect of a full wall.
Place the unit perpendicular to a wall near the bed, or use it to mark the edge of the sleeping area. It can also provide storage for books, plants, folded linens, or baskets, making the divider useful from both sides. This approach suits rooms where the bed is visible from the entry or living area.
Design tips
Choose a depth and height that fit the room’s traffic pattern. A tall, packed bookcase may feel imposing, while a lower or more open unit can establish separation without blocking sightlines. Secure a freestanding unit appropriately, especially if it is tall or holds heavier objects.
- Leave some shelves open so the divider stays visually light.
- Use baskets on the bed-facing side for small items.
- Keep frequently used belongings within easy reach.
- Check that the unit does not obstruct a window or walkway.
Thoughtful styling helps the bookcase read as part of the room rather than a barrier placed in the middle of it.
3. Add a Lift-Top Coffee Table That Doubles as a Desk

A lift-top coffee table can turn the living area into a compact workspace or dining spot without requiring a permanent desk. The top rises toward you, bringing a laptop or meal closer to a comfortable height, then lowers again when the table returns to coffee-table duty.
This is especially useful in a studio where a separate work surface would take up valuable floor space. Some designs also include hidden storage, which can keep notebooks, chargers, or placemats close at hand but out of sight. The table works best when there is room to sit comfortably in front of it.
Make the table work harder
Think about how you plan to use it before choosing a size. A larger top may offer more working room but can crowd the seating area, so measure the clearance around your sofa and any nearby chairs. Keep a supportive seat nearby if you expect to work there regularly.
- Measure the raised tabletop height against your usual seat.
- Choose a shape that leaves a clear route through the living zone.
- Store work supplies inside to make setup and cleanup quick.
- Use a tray for meals so the surface is easy to clear.
A convertible table helps one small footprint serve several daily routines without making the room feel like an office.
4. Define Each Zone with a Different Area Rug

Area rugs can make an open studio feel organized even when there are no walls or doors between activities. A rug under the bed marks the sleeping zone, while another beneath the sofa and coffee table gives the living area its own visual footprint.
The rugs do not need to match exactly. Choosing designs that share a color, texture, or general mood keeps the room connected while still giving each area a distinct identity. This is a simple way to define zones without introducing furniture that blocks light or interrupts movement.
Choose rugs that work together
Start by measuring the furniture grouping rather than buying a rug based only on the open floor. In the living area, a rug should relate to the sofa and chairs; near the bed, it can sit under the lower portion of the bed or along its sides. Leave enough exposed floor to keep the arrangement from feeling crowded.
- Repeat one color or material across both rugs.
- Use a rug pad to help keep each rug in place.
- Choose a practical pile for doors, chairs, and daily cleaning.
- Align rug edges with nearby furniture for a deliberate look.
When rugs relate to one another, the studio feels like a collection of comfortable zones rather than one undefined room.
5. Pair Plug-In Bedside Sconces with a Floor Lamp
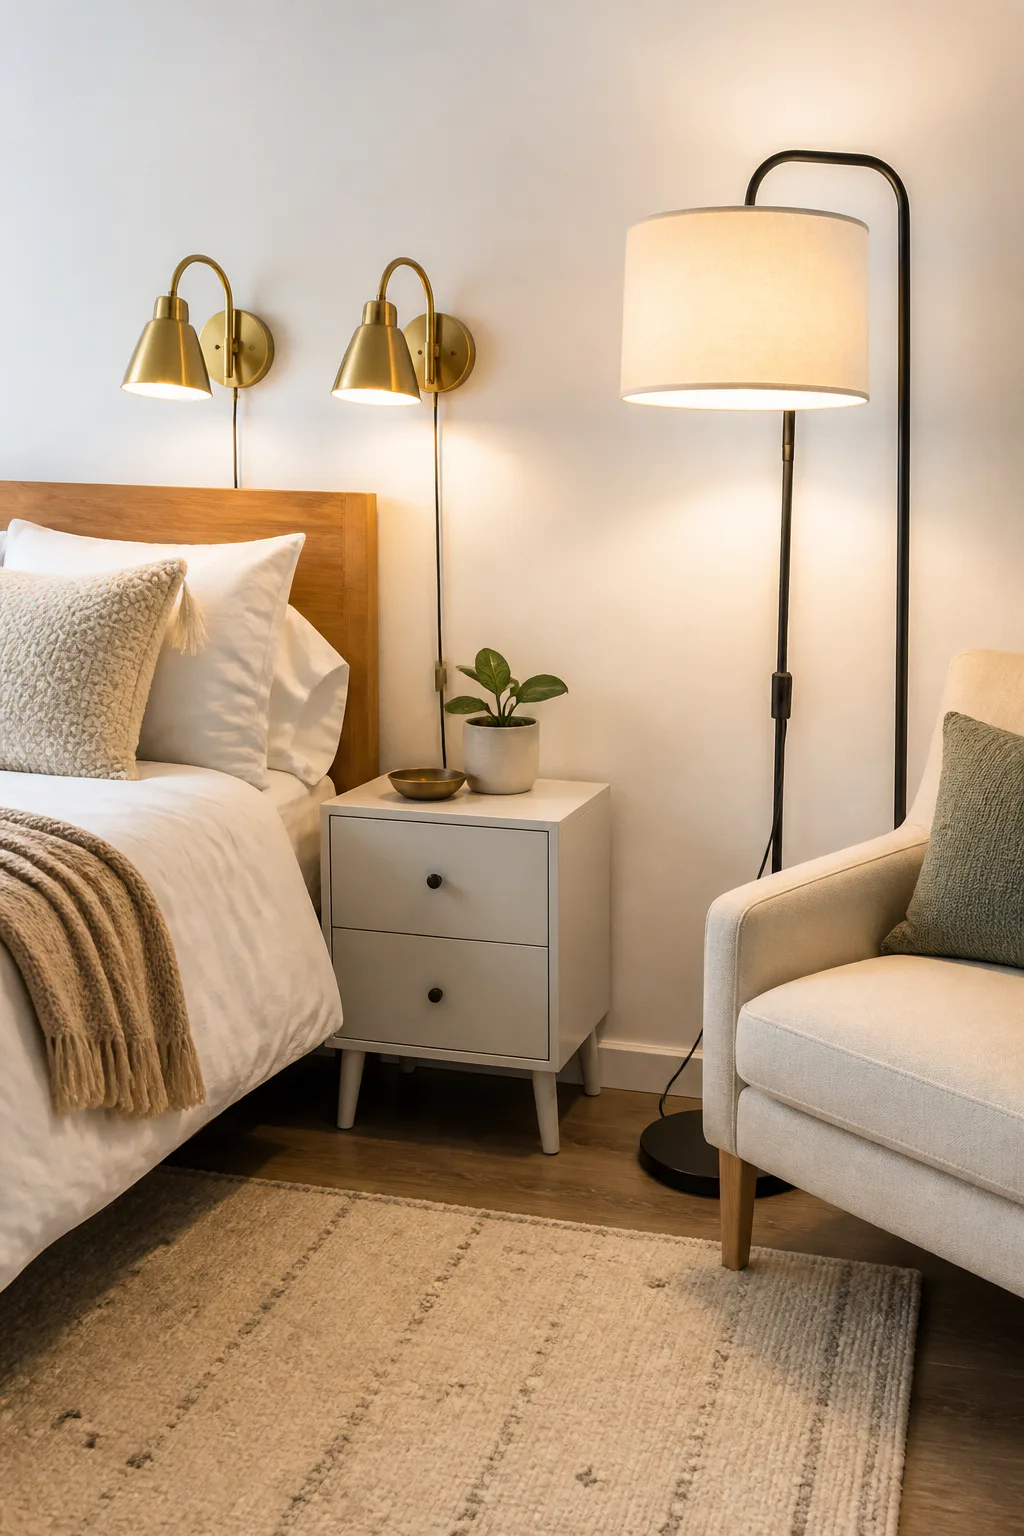
Layered lighting makes a studio more comfortable than relying on one bright ceiling fixture. Plug-in sconces can provide focused light beside the bed, while a floor lamp adds a softer glow to the living zone. Together, they help the room shift from daytime tasks to a calmer evening atmosphere.
This combination is especially useful when the bed and sofa are close together but need different kinds of light. Sconces free up bedside surface space, and a floor lamp can illuminate a reading corner without requiring hardwiring. In a rental, plug-in options offer flexibility, though cords should be routed safely and neatly.
Build a flexible lighting plan
Consider what each area needs: reading light by the bed, comfortable ambient light near the sofa, and enough general illumination for everyday tasks. Position lamps so they do not create glare on a screen or shine directly into your eyes. A warm-toned bulb can help the different fixtures feel cohesive.
- Mount or place bedside lights within easy reach.
- Use cord clips or a cover to keep plug-in wires organized.
- Choose a floor lamp with a stable base for a busy walkway.
- Use separate switches so each zone can be lit independently.
Distinct light sources make one room feel adaptable instead of uniformly bright.
6. Build Floor-to-Ceiling Shelving for Vertical Storage

When floor space is limited, tall shelving makes use of the wall area above it. Floor-to-ceiling storage can hold books, baskets, display pieces, and supplies while leaving more room for movement at ground level. It can also draw the eye upward, making the room feel taller.
A mix of open shelves and closed containers helps balance display with everyday storage. Open shelves keep frequently used items accessible, while baskets or bins conceal the smaller belongings that can make a compact room look busy. Consider placing the unit on a wall that does not interrupt natural light or block a key route.
Keep vertical storage visually calm
Plan what the shelves need to hold before arranging them. Heavy items belong on lower shelves, while lighter objects and decor can sit higher. If the shelving is tall or freestanding, secure it according to its installation instructions and the requirements of your home.
- Use matching or coordinating baskets to contain small clutter.
- Leave some shelf space open to avoid a packed-in look.
- Store daily essentials at a comfortable reaching height.
- Use the highest shelves for items you access less often.
Good vertical storage turns an overlooked wall into a practical part of the studio’s layout.
7. Enclose the Bed with Ceiling-Track Curtains
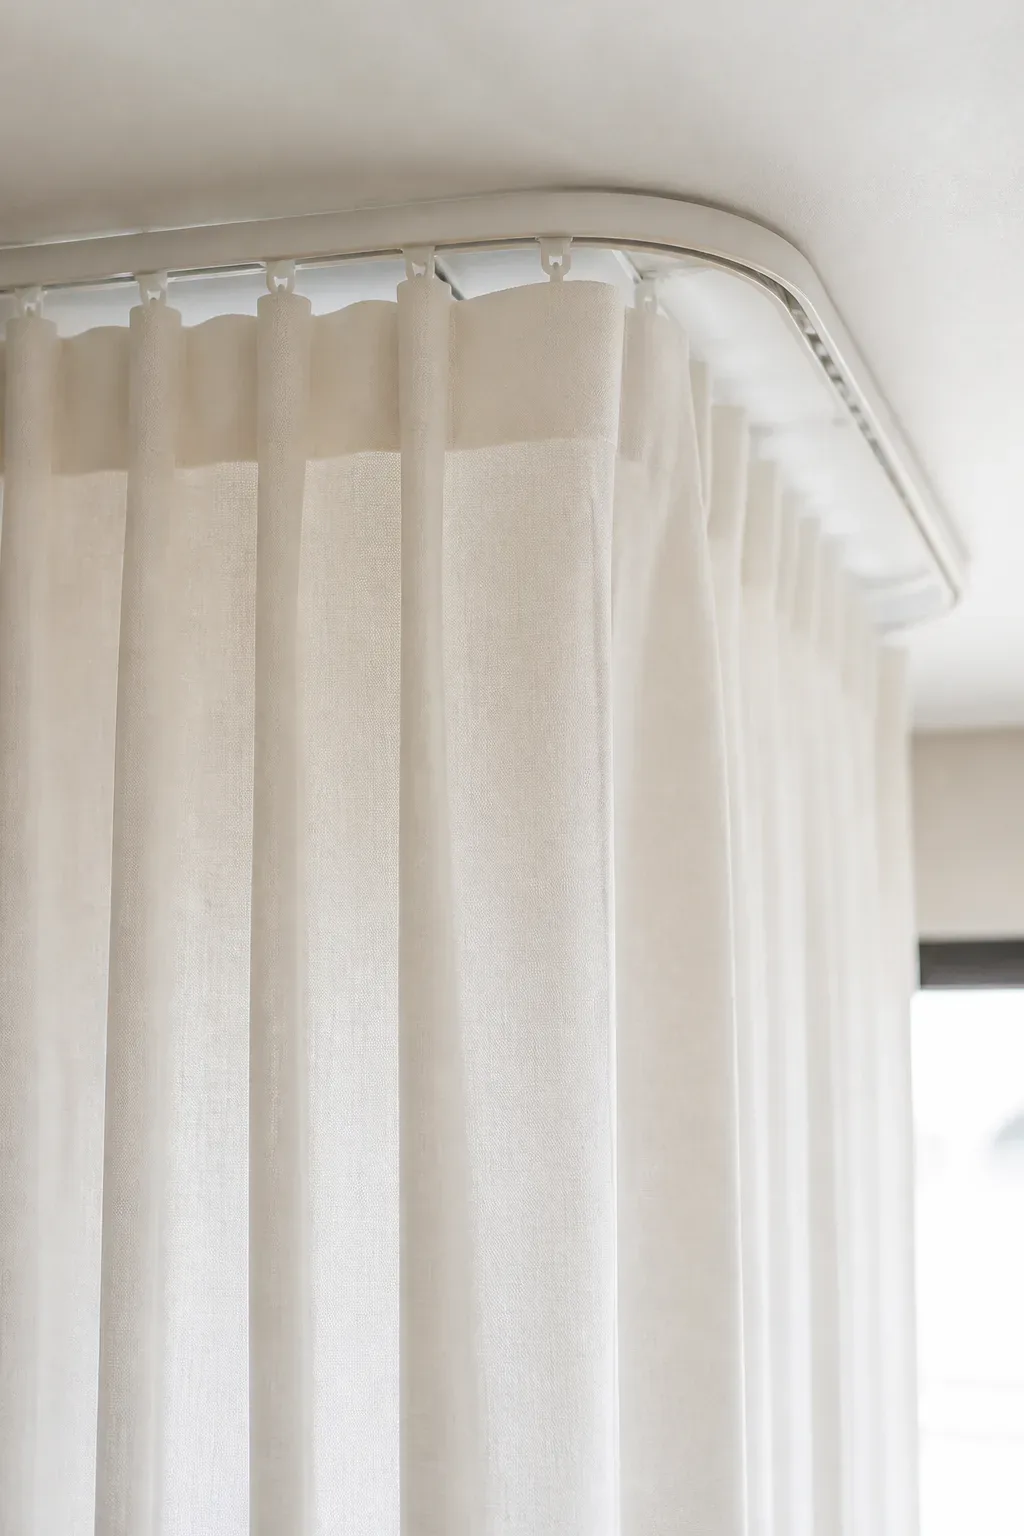
Lightweight curtains on a ceiling track can give the bed a sense of privacy without building a permanent partition. Draw them closed at night to create a cozy sleeping nook, then open them during the day so the room feels larger and brighter.
This idea is useful when the bed is visible from the entry or when you want a clearer boundary between sleep and daily activities. Sheer fabric keeps the separation airy, while a slightly heavier curtain offers more visual coverage. The track can follow a simple line around the bed or form a partial enclosure, depending on the room.
Plan the curtain layout
Measure the bed and the desired curtain path before choosing fabric or hardware. Make sure the curtains can open fully without covering a window, blocking a closet, or catching on nearby furniture. For rentals, check what installation is allowed and whether a ceiling track can be fitted securely.
- Choose fabric that suits the amount of privacy you want.
- Leave room for the curtains to stack neatly when open.
- Use a track that follows the bed’s shape without crowding it.
- Keep fabric clear of heaters and other heat sources.
When open, the curtains can nearly disappear; when closed, they make the sleeping area feel intentionally separate.
8. Create a Dining Nook with a Round Pedestal Table
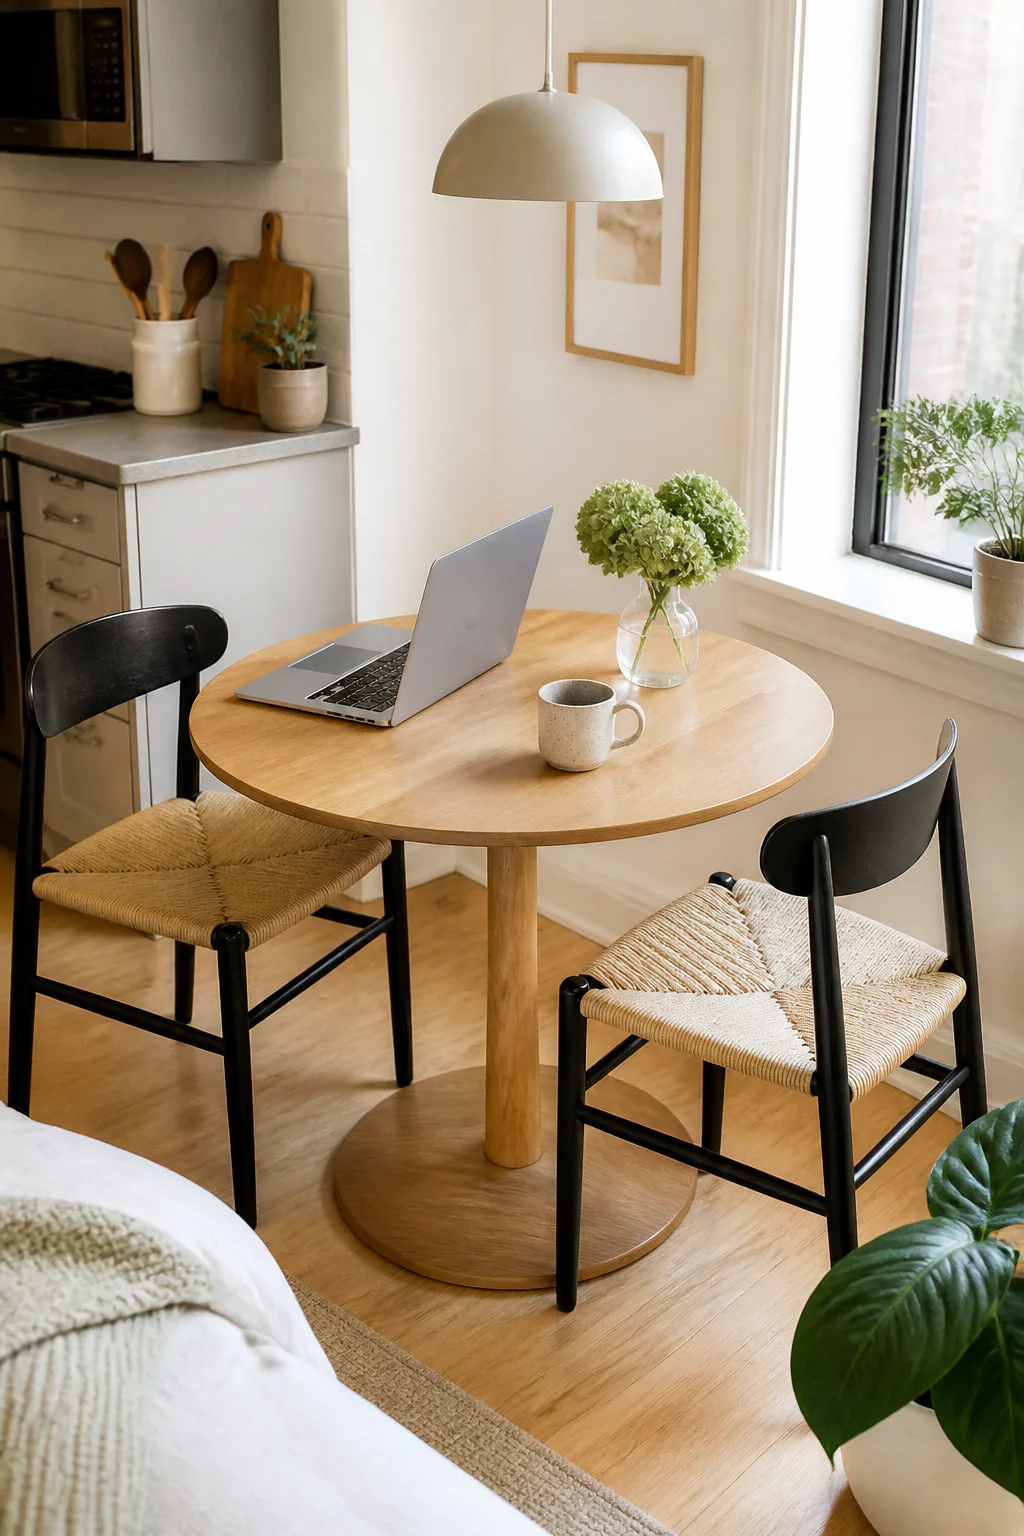
A compact round pedestal table can serve as a dining spot, laptop station, or place to enjoy coffee without demanding a large footprint. Its central base leaves more flexibility for chairs and knees than a table with four legs at the corners, which can be helpful in a tight circulation area.
Position the table near the kitchen if possible, or in a bright corner that can work for both meals and daytime tasks. A round shape softens the lines of a small room and is easy to move around, but the table still needs enough clearance for chairs to pull out comfortably.
Choose a useful size and spot
Consider who will use the table and how often it needs to shift between functions. If it is also a work surface, make sure there is room for a laptop and a drink without crowding the edges. Chairs that tuck fully beneath the top can help keep the walkway open when the table is not in use.
- Measure the chair space as well as the tabletop.
- Choose lightweight seating that is easy to reposition.
- Keep the table close to the kitchen if meals are the priority.
- Use a small pendant or lamp to give the nook a clear identity.
A thoughtfully placed table gives the studio a dedicated dining area without needing a separate room.
9. Carry a Calm Neutral Palette Across the Studio

A consistent color palette helps the different parts of an open studio feel connected. Neutral walls, textiles, or larger furniture can create a calm foundation, while a few repeating accent colors bring personality to the bed, sofa, and dining nook.
Repeating colors across zones also makes the layout feel more deliberate. For example, a tone in the bedding can appear again in a cushion or piece of art near the sofa. The goal is not to make every surface identical, but to avoid a collection of unrelated colors competing in one small view.
Build a palette with variation
Start with a base you enjoy living with, then choose a small set of accent colors to repeat in different ways. Vary textures and materials so a neutral room does not feel flat: woven fabric, smooth wood, and soft bedding can all add contrast without introducing more colors. Try samples in the room’s natural and evening light.
- Use larger pieces and surfaces for the quietest colors.
- Repeat accent shades in several zones for continuity.
- Mix textures to add depth without visual clutter.
- Let artwork or plants provide small notes of contrast.
A considered palette helps separate areas through furniture and rugs while keeping the overall studio harmonious.
10. Place a Large Mirror Opposite the Window

A large mirror can reflect daylight and make a studio feel brighter. Placing it opposite or near the main window allows it to bounce light back into the room, while the reflection adds a sense of depth beyond the mirror itself.
A full-length mirror can lean or hang near the sleeping area, while a wide wall mirror may suit a living or dining zone. The most effective spot depends on what it reflects: a pleasant view, a light-filled part of the room, or an attractive arrangement can enhance the effect. Avoid aiming it at an area you would rather not draw attention to.
Find the right position
Move the mirror around or test its angle before fixing it in place. Check the reflection from the main seating area and the entry, and make sure it does not create glare where you work or relax. If you choose a leaning mirror, position it securely and keep it out of the way of doors and busy paths.
- Reflect the window or another bright part of the room.
- Choose a size that suits the wall and nearby furniture.
- Keep the reflected view simple and appealing.
- Secure a large mirror safely, whether leaning or mounted.
Used thoughtfully, a mirror can amplify the light and openness already present in the studio.
11. Choose Leggy Furniture to Keep Floors Visually Open

Furniture raised on visible legs lets more of the floor show beneath it, which can make a compact room feel less crowded. Sofas, dressers, and consoles with a little clearance often look lighter than pieces that sit directly on the floor.
This approach works across several zones, so it can help the entire studio feel more open without changing the layout. The visible floor creates a sense of continuity from one area to another, especially when the pieces share a similar scale or finish. It is a visual trick rather than a way to create extra storage, so balance openness with practical needs.
Choose pieces with the room in mind
Look for furniture that is stable and proportionate to the space. Slender legs can lighten the look, but they should still support the piece securely and suit your daily use. If you need concealed storage, consider choosing one closed piece and keeping other furniture more open rather than sacrificing function everywhere.
- Prioritize raised legs on larger pieces such as sofas or dressers.
- Check the floor clearance before buying storage containers.
- Keep furniture sizes modest enough for easy circulation.
- Repeat a leg finish or shape for a cohesive look.
A few elevated pieces can make the floor feel more continuous and the studio less visually heavy.
12. Build a Compact Drop Zone beside the Entry

A small drop zone near the front door gives keys, shoes, bags, and coats a designated home before they spill into the rest of the studio. Even a narrow wall or short stretch beside the entry can hold a few useful pieces and make coming and going feel more organized.
Keeping everyday items close to the door also protects the living and sleeping areas from becoming catch-all storage. A combination of wall hooks, a shallow shelf, and a slim shoe cabinet can provide function without taking over the walkway. If floor space is especially tight, prioritize wall-mounted elements and keep the footprint minimal.
Make the entry work for your routine
Think about what you reach for most often and create space for those items first. Keep the shelf shallow enough that it does not interfere with the door, and choose hooks that suit the number of coats or bags you use regularly. A small dish or tray can corral keys and other pocket-sized essentials.
- Use hooks for coats, bags, or a frequently used umbrella.
- Add a slim shelf for keys and small daily items.
- Choose a narrow shoe cabinet if shoes gather by the door.
- Keep the route from the entrance clear and easy to navigate.
A tidy landing spot makes the first few steps into the apartment feel calmer and more functional.
13. Create a Personal Art-and-Plant Display

A focused display of meaningful art and a few plants can give a studio personality without filling every surface with decor. Grouping favorite pieces in one area creates a clear point of interest, while leaving other walls and shelves quieter helps the room breathe.
This idea can work above a console, beside the bed, or in a bright corner near the window. A small arrangement is often easier to care for and style than decor scattered throughout the apartment. Plants add natural texture, while art, photographs, or objects with personal meaning make the space feel like home.
Curate the arrangement
Choose a few items that share a color, shape, or personal story, then arrange them with a little space around each piece. Consider plant light needs before placing pots near a window, and use stable surfaces or suitable wall fixings. Leave room for everyday objects so the display remains a pleasant feature rather than another clutter zone.
- Group a small number of art pieces instead of filling every wall.
- Choose plants suited to the light available in that spot.
- Vary heights with frames, pots, or a low display stand.
- Keep the arrangement clear of frequently used surfaces.
A thoughtfully edited display adds warmth and character while respecting the studio’s limited space.
Final Thoughts
A well-planned studio does not need a separate room for every activity. A floated sofa, open shelving, curtains, rugs, and flexible furniture can create useful boundaries while keeping the apartment bright and easy to move through.
Start with the change that would improve your everyday routine most, then build on it gradually. When storage, lighting, color, and furniture all support how you live, even a compact studio can feel personal, comfortable, and thoughtfully arranged.