

13 Stunning Rock Landscaping Ideas for a Beautiful, Low-Maintenance Yard
Rock landscaping can bring texture, shape, and a more water-wise feel to a yard, whether you want a subtle border or a full outdoor makeover. Gravel, boulders, river stones, and flagstone each create a different look, so choosing a clear purpose for every rock feature helps the finished space feel intentional.
These ideas range from practical solutions, such as a dry creek bed or terraced slope, to calming details like a small raked gravel garden. Many can also reduce routine upkeep, but good preparation still matters: plan drainage, keep access paths comfortable, and choose plants that suit your local conditions.
If you’re refreshing a front yard, adding interest to a backyard, or making a difficult slope easier to use, start with the scale and style of your space. Then borrow one or two ideas that work together rather than filling every open area with stone.
1. Create a Warm Earth-Tone Gravel Field
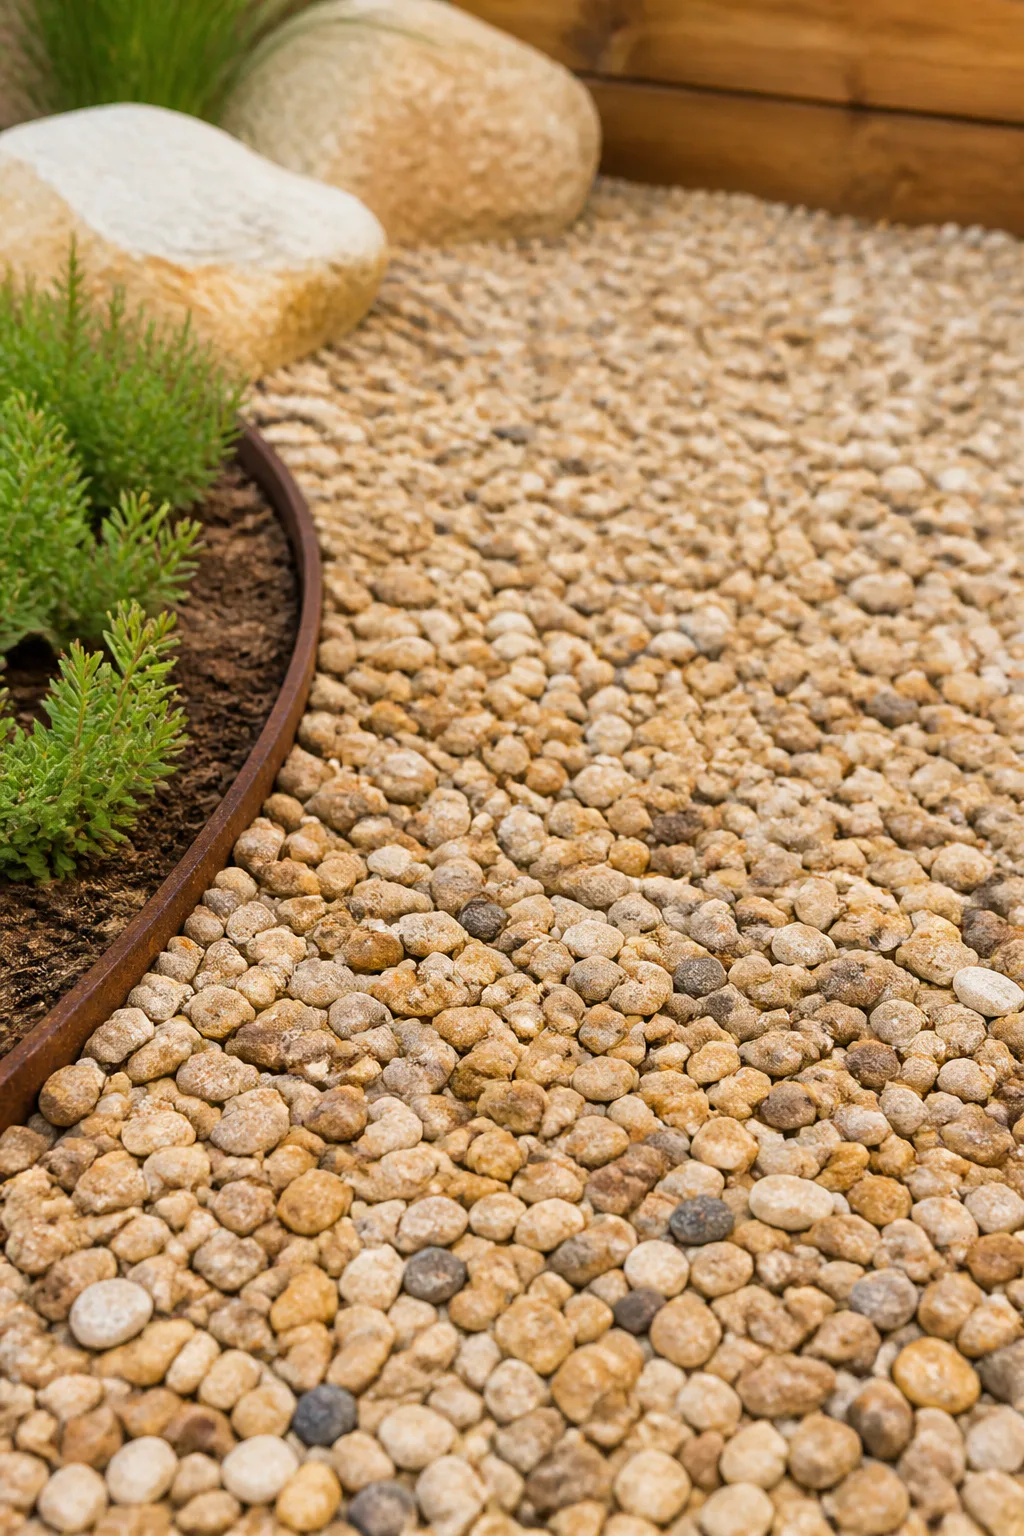
A gravel field in tans, warm golds, and weathered grays gives a yard a soft, natural foundation. These muted colors tend to blend with soil, wood, and nearby stone more easily than stark white chips or high-contrast black rock, making them a useful choice for a front entry, side yard, or open planting bed.
Gravel can also visually connect separate areas, such as a path, a seating spot, and a drought-tolerant garden. The key is to give the material a defined edge and use plants or larger stones to break up broad stretches, so the surface feels designed rather than bare.
How to pull it off
Choose a gravel size that suits how the area will be used. Smaller, compactable material is more comfortable underfoot, while larger pieces can add texture in beds where people do not need to walk.
- Sample warm tan, gold, and gray stones beside your home before choosing.
- Prepare a stable base and manage drainage before spreading gravel.
- Use metal, stone, or another durable edge to keep the field contained.
- Add occasional grasses, shrubs, or boulders to create visual rhythm.
Repeating one gravel palette in nearby areas helps the whole landscape feel cohesive.
2. Anchor a Slope with Statement Boulders
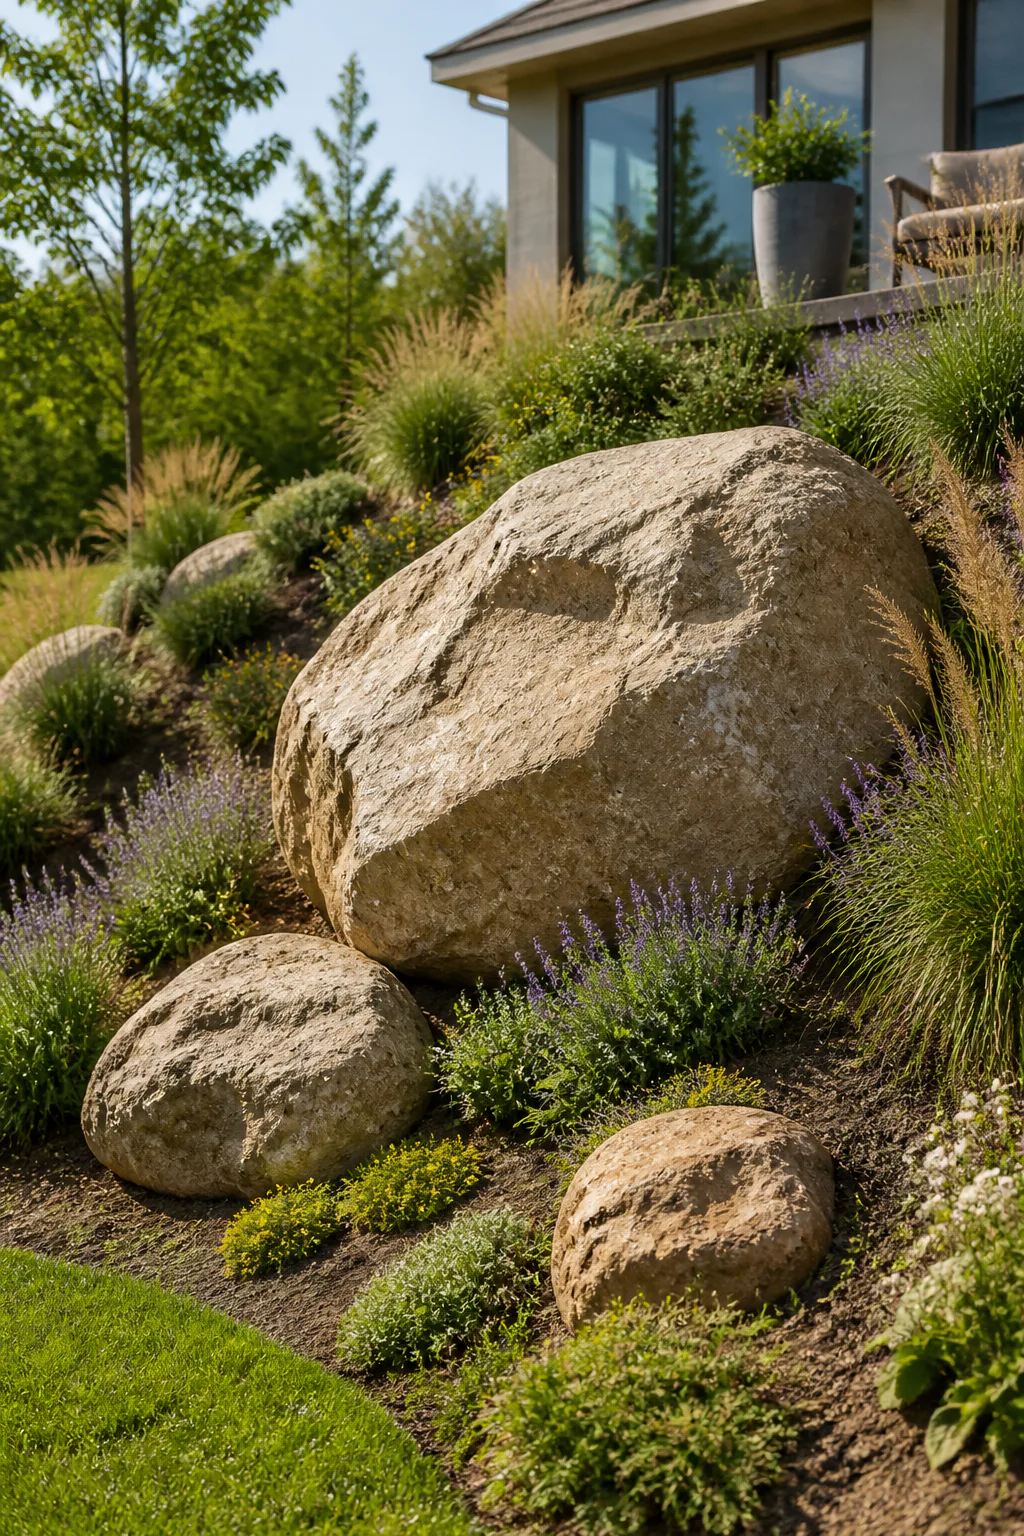
A statement boulder can turn a difficult slope into a focal point instead of a stretch of yard you struggle to mow. One substantial stone feels grounded and sculptural, while a thoughtfully arranged cluster of three creates a more natural composition than scattering many similarly sized rocks across the hillside.
Place the stones where they can be appreciated from a window, path, or seating area. On a slope, partially setting each boulder into the ground helps it look settled into the landscape. The surrounding plants can soften the edges and connect the feature to the rest of the yard.
Designing a natural arrangement
Think about the boulders as a group, considering their shapes, colors, and visible faces before final placement. Heavy stones may require equipment and careful handling, especially on uneven ground.
- Choose a focal location rather than placing boulders at random.
- Use one large boulder or an odd-numbered cluster with varied sizes.
- Set stones partly into the soil so they appear stable and established.
- Plant low groundcovers or grasses around the base to blend the feature.
A well-placed boulder gives a sloped garden structure even when plants are still filling in.
3. Lay a Decomposed Granite Garden Path
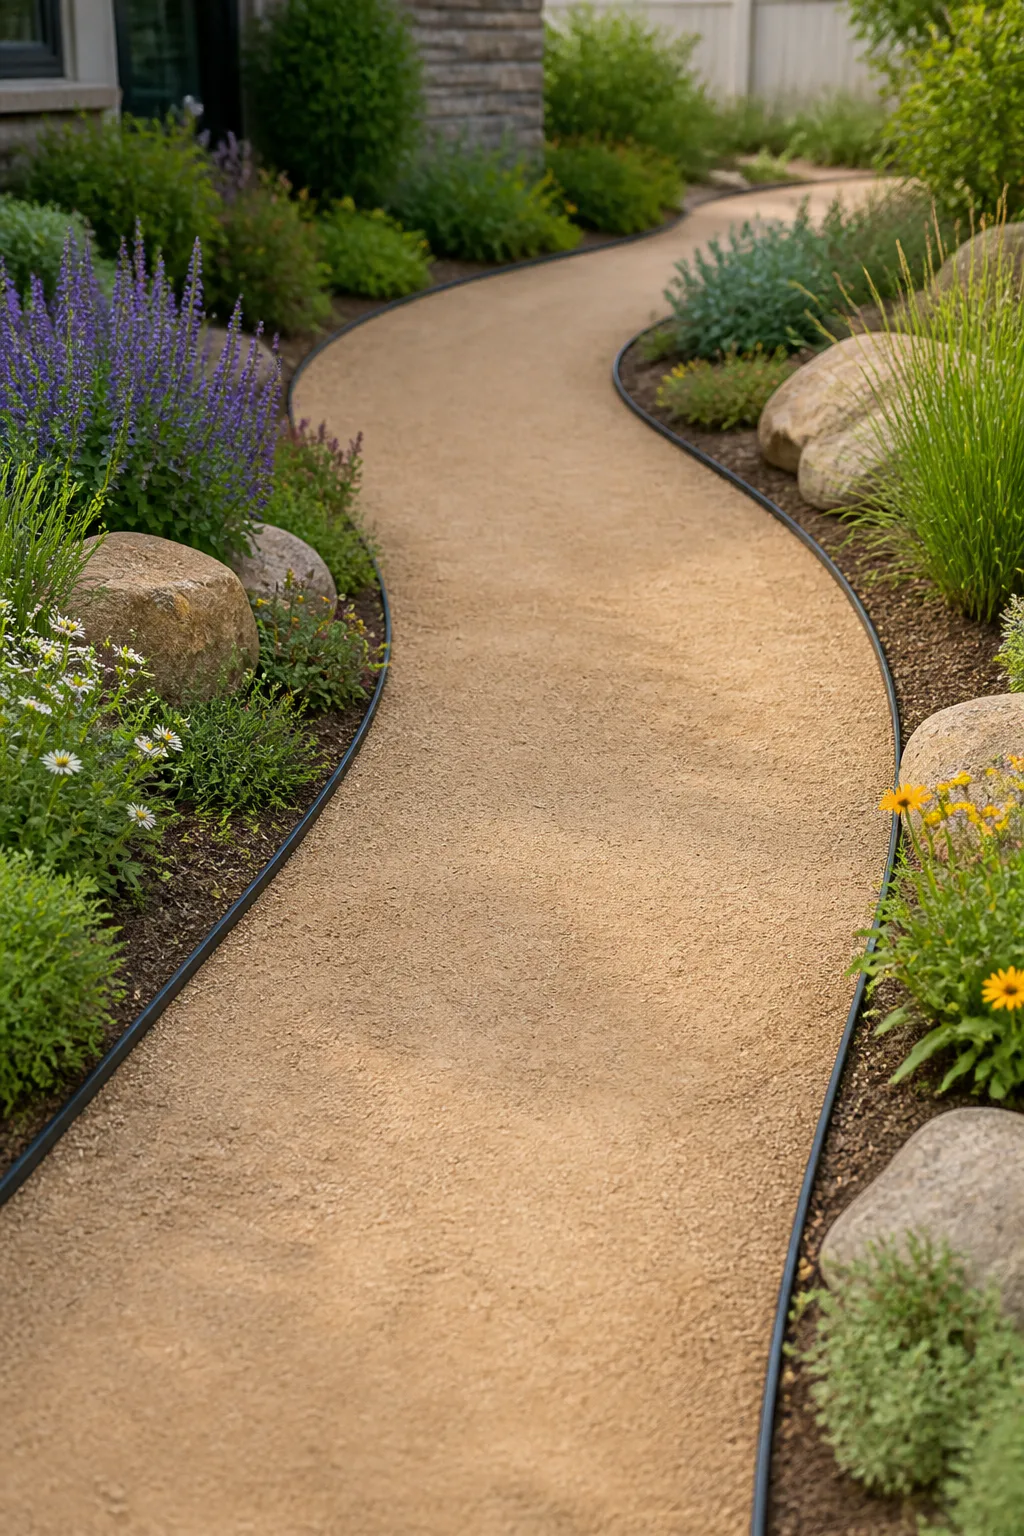
Decomposed granite creates a relaxed walkway with a soft, natural appearance. When properly prepared and compacted, it forms a relatively smooth surface that can feel less rigid than a concrete path and suits cottage gardens, dry landscapes, and casual side-yard routes.
Use it to lead visitors from a gate to a patio, connect planting beds, or create a gentle curve through a yard. Edging is important: a crisp border of steel or stone keeps the path shape clear and helps prevent the granite from migrating into nearby beds or lawn.
Building a tidy, usable walkway
Start by mapping the route and checking how water moves through the area. A path that is too narrow or poorly drained can become uncomfortable, so consider its everyday use before deciding on its final shape and width.
- Mark the route with a hose or stakes before excavating.
- Install firm edging along both sides to define the path.
- Prepare and compact the base according to the material and site.
- Choose a finish that suits the amount of foot traffic.
Pair the path with simple planting along its edges for a welcoming, finished look.
4. Build a Winding Dry Creek Bed

A dry creek bed brings the look of a meandering stream to a garden while helping direct runoff through a planned channel. It can be especially useful in a spot where water naturally gathers, provided the route is designed to move water safely rather than toward a foundation or neighboring property.
Varying the width and using a mix of river rocks and smaller smooth pebbles makes the feature look more like a natural creek. A gentle curve is usually more appealing than a straight trench, and planting at the edges can help the stone channel blend into the surrounding landscape.
Shaping the channel
Before digging, observe the site during rain and identify where water enters and exits. A dry creek bed should work with the yard’s drainage rather than simply conceal a problem.
- Mark a shallow, gently winding route that suits the site.
- Use suitable landscape fabric beneath the stone if appropriate.
- Place larger rocks along the edges and smaller pebbles through the center.
- Check that the outlet does not send runoff somewhere unwanted.
With careful planning, the channel can be both a practical drainage feature and a striking garden detail.
5. Terrace a Hill with Stone Retaining Walls
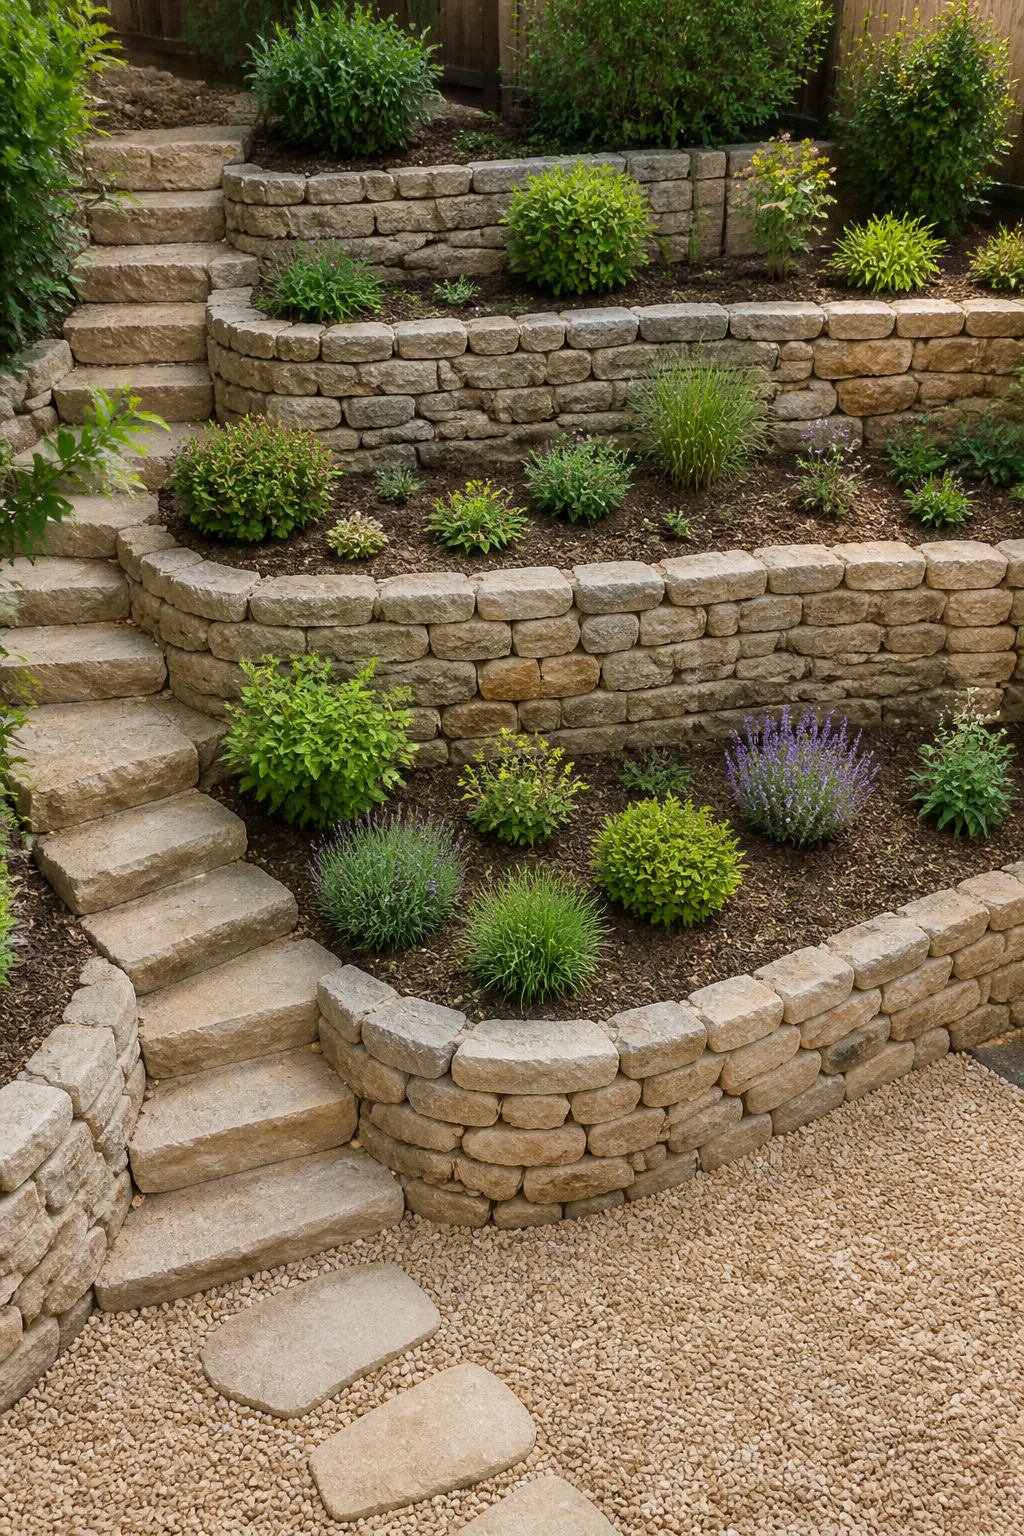
Stone retaining walls can transform a steep, hard-to-maintain hill into a sequence of planting benches. Instead of one uninterrupted slope, the yard gains clear levels for shrubs, flowers, or a path, while the stone adds texture and a strong visual framework.
Natural stacked stone or dry-stacked boulders can suit a rustic landscape, while flatter stones create a more orderly appearance. Wall height, soil pressure, drainage, and local requirements all affect how a retaining wall should be built, so larger or structural projects may need qualified guidance.
Planning useful tiers
Sketch the terraces before construction and consider how you will reach each level for planting and upkeep. A series of lower tiers may fit a garden better than one tall wall, but every wall still needs a stable base and a plan for water behind it.
- Map the slope and decide where each planting bench will sit.
- Choose stone that complements nearby paths or house materials.
- Plan drainage behind the wall to reduce water pressure.
- Leave practical access for planting, pruning, and inspection.
Terraces make a hillside feel purposeful while creating distinct spaces for layered planting.
6. Uplight Boulders and Ornamental Grasses
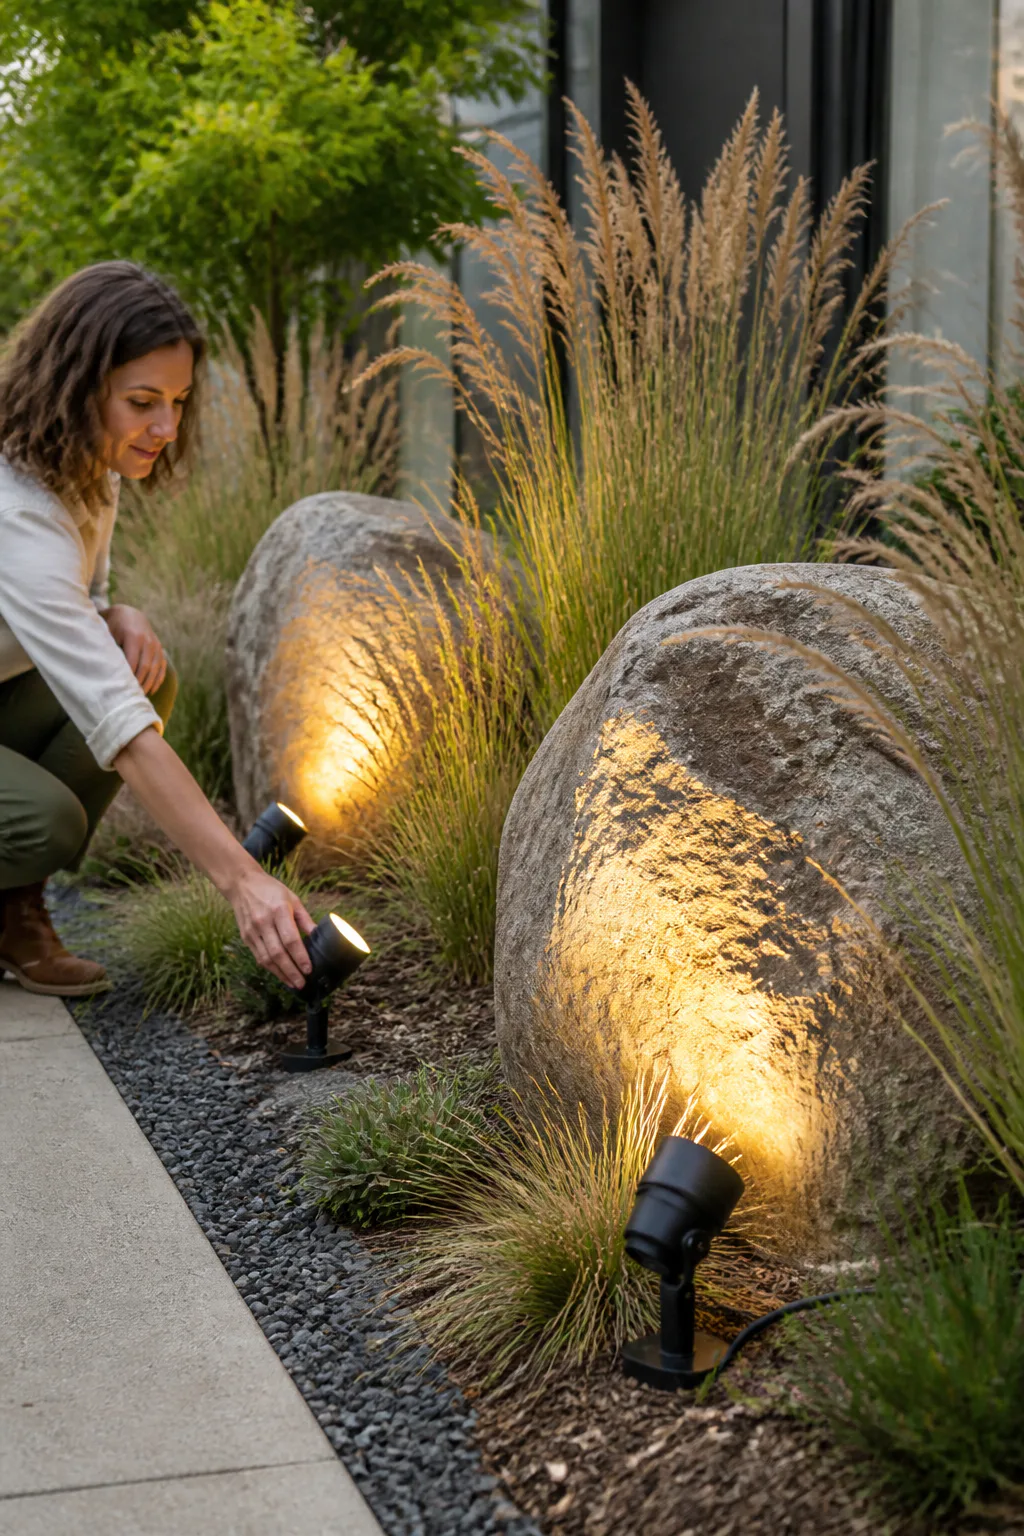
Low-voltage lighting can make a rock garden feel just as inviting after sunset as it does during the day. A warm spotlight near a boulder brings out its shape and surface, while light passing through ornamental grasses creates gentle movement and shadow.
This approach works beside a path, near a patio, or in a front-yard bed visible from indoors. Aim for a few deliberate points of light rather than illuminating every rock. The contrast between lit features and darker planting keeps the scene calm and helps the landscape retain depth at night.
Creating a soft nighttime glow
Test fixture placement after dark before settling on the final arrangement. Lighting should highlight a feature without shining directly into windows, seating areas, or the eyes of people walking through the yard.
- Place warm, low-voltage spotlights near selected boulders.
- Angle lights through grasses for a layered effect.
- Keep fixtures discreet and route wiring safely.
- Use fewer lights to avoid a flat or overly bright result.
Thoughtful uplighting draws attention to the forms you enjoy most and extends the atmosphere of the garden into the evening.
7. Build a Stone-Filled Gabion Planter
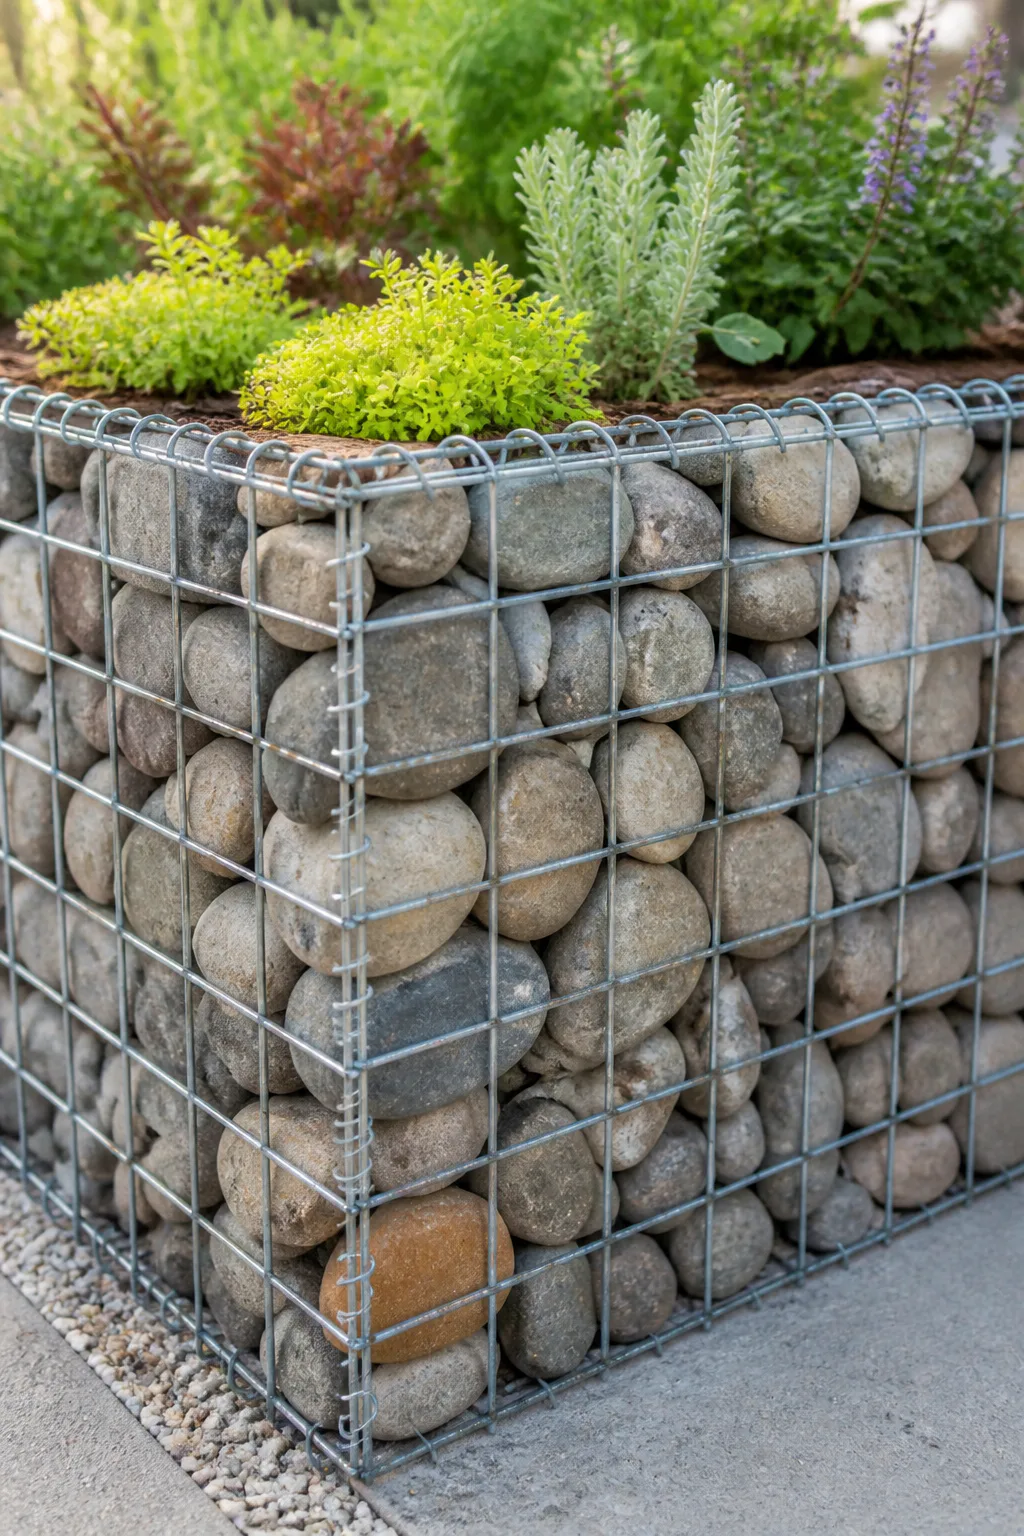
A gabion planter uses a sturdy wire mesh cage filled with stone to create a crisp, contemporary garden feature. It can serve as a raised planting bed, a low divider, or a short garden wall, bringing strong texture without relying on a solid masonry surface.
Local river stones can give the cage a rounded, natural look, while crushed slate creates a sharper, more graphic finish. The open mesh also makes the choice and arrangement of fill part of the design, so stone size and color should be considered alongside the plants that will grow above it.
Choosing the right materials
Use a cage designed for outdoor use and filled with stones that fit securely within the mesh. A gabion can be heavy once assembled, so choose its location and base carefully before adding the fill.
- Select durable mesh suited to the intended outdoor use.
- Choose stone that fits the cage openings and matches your palette.
- Prepare a level, stable base before filling the structure.
- Allow enough depth and suitable growing conditions for the plants.
Repeating the stone elsewhere in the yard can help a bold gabion feature feel connected to its surroundings.
8. Plant Succulent Pockets Among the Rocks

Planting small pockets among rocks keeps a stone garden from feeling like one uninterrupted surface. Succulents, drought-tolerant grasses, and other plants suited to your climate add color and movement, while the surrounding stones frame each grouping and emphasize its shape.
This idea works in a sunny front-yard bed, beside a gravel path, or around a cluster of boulders. Rather than planting every gap, leave room for the rocks to show and repeat a few plant varieties so the arrangement feels calm and intentional.
Making room for plants
Plants still need suitable soil, drainage, and enough space to establish roots. Match species to local growing conditions, and avoid placing plants where the stones will make watering or maintenance difficult.
- Choose drought-tolerant plants that suit your climate and light.
- Create distinct pockets of soil rather than scattering tiny plants everywhere.
- Repeat a few varieties for a cohesive look.
- Leave room for mature growth and occasional maintenance.
These living accents make the rock bed feel layered, soften hard edges, and bring seasonal interest to the garden.
9. Set Flagstone Steppers in Pea Gravel

Broad flagstone steppers set in pea gravel create a defined surface for a patio, side-yard walkway, or casual route between garden areas. The flat stones provide clear places to walk or stand, while the smaller gravel fills the gaps and gives the space a relaxed, textured finish.
This combination can be a practical alternative to a solid paved area where you want a softer appearance. It is especially useful in a narrow breezeway or a compact sitting area, where the contrast between large slabs and fine gravel adds visual interest without introducing many materials.
Setting stones for everyday use
Arrange the flagstones before placing them permanently so their spacing feels comfortable for walking. A stable, level base helps keep them from rocking, and edging helps hold the gravel in place over time.
- Choose broad, reasonably flat stones with a consistent walking surface.
- Test the spacing by walking the route before final placement.
- Prepare a firm base so the stones sit securely.
- Use edging to contain the pea gravel or crushed rock.
Add a chair or a simple planter nearby to make a small gravel patio feel like a destination.
10. Mulch Shrub Beds with Dark River Rock

Dark river rock gives shrub beds a neat, lasting surface and a strong contrast against green foliage. Its smooth shape can suit a clean, contemporary garden, and it can reduce the need to replenish organic mulch as it breaks down, though the bed still needs occasional weeding and care.
This look works around established shrubs, along a foundation, or in a contained bed where a consistent finish is welcome. Stone is not a substitute for healthy soil or suitable watering, so consider plant needs before covering a large area, especially around trees and shrubs that benefit from organic matter.
Using stone thoughtfully
Prepare the bed before adding rock, removing weeds and shaping the soil so water can reach the plants. Keep stones away from plant crowns and trunks, and use a clear boundary to prevent the material from spreading into lawn or paths.
- Choose a dark river-rock color that complements nearby surfaces.
- Keep the stones clear of trunks and plant bases.
- Check that the bed remains suitable for the plants’ water needs.
- Define the edges for a clean, contained finish.
Used in the right place, river rock brings a polished look without requiring a uniform stone layer across the whole yard.
11. Create a Raked Gravel Zen Garden
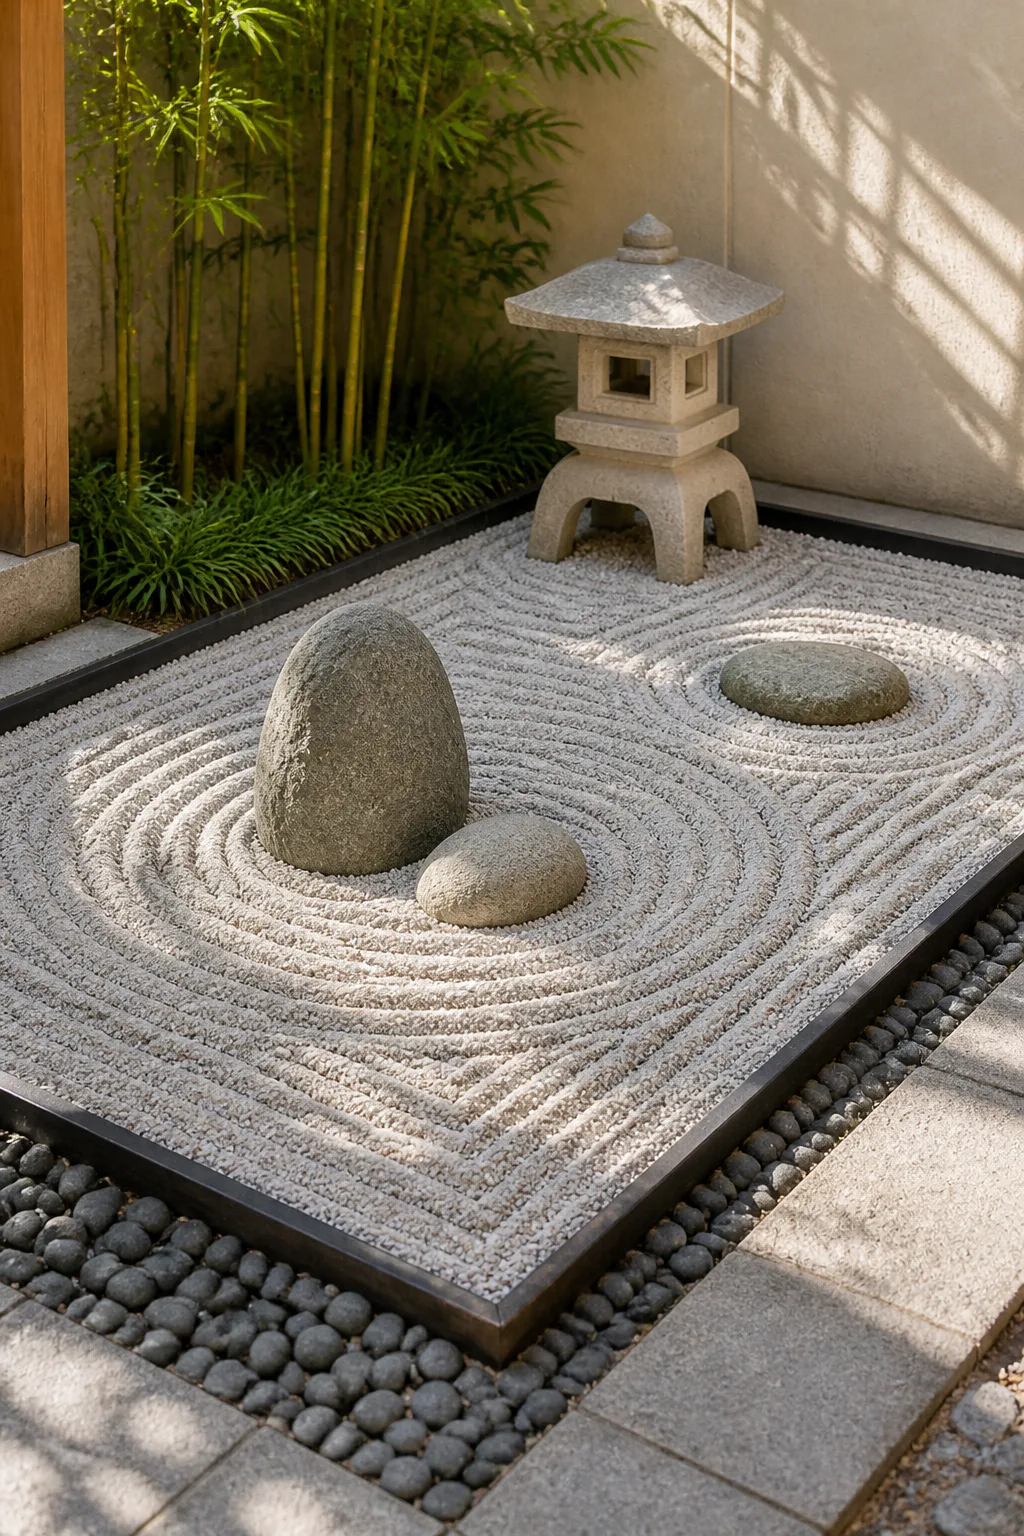
A small raked gravel garden creates a quiet focal point in a courtyard, tucked-away corner, or sheltered spot beside a path. Fine gravel can be shaped into simple lines around smooth stones, giving the area a composed, meditative quality without requiring a large planting scheme.
A weathered stone lantern or restrained bamboo accent can add height and character, but keeping the palette limited is part of the appeal. The garden should feel calm from the place where you view or sit beside it, so consider sightlines and the surrounding architecture before arranging its elements.
Keeping the composition simple
Choose a contained area that is easy to maintain and protect from heavy foot traffic. Raking patterns can be refreshed as needed, while a carefully chosen stone arrangement gives the garden a stable focal point.
- Use fine gravel that is suitable for raking into patterns.
- Arrange a small number of smooth stones as the main feature.
- Add a lantern or bamboo detail only if it suits the setting.
- Keep nearby colors and planting restrained to preserve the calm mood.
Even a compact gravel garden can offer a peaceful pause within a busier landscape.
12. Edge Flower Beds with River Stones

A ribbon of river stones or cobbles gives flower beds a visible, natural-looking boundary. The edge can separate planting from lawn or gravel, highlight the shape of a curved bed, and add texture without drawing attention away from the flowers.
One orderly row tends to look more deliberate than a deep scatter of mixed stones. Choose cobbles of a fairly consistent scale and a color that relates to nearby paths, walls, or gravel. This simple treatment can work along a front foundation bed or as a border around a small island planting.
Making a clean border
Prepare the line before placing the stones so the edge follows the bed’s shape smoothly. A shallow, even base helps keep cobbles from shifting, and a clear division between stone and soil makes later garden maintenance easier.
- Mark the desired curve before setting any stones.
- Choose a consistent size and complementary stone color.
- Set the cobbles in a shallow, stable base.
- Keep the ribbon narrow enough to frame rather than overwhelm the flowers.
The result is a tidy transition that makes the planting bed’s outline easier to see.
13. Build a Stone Fire Pit Patio
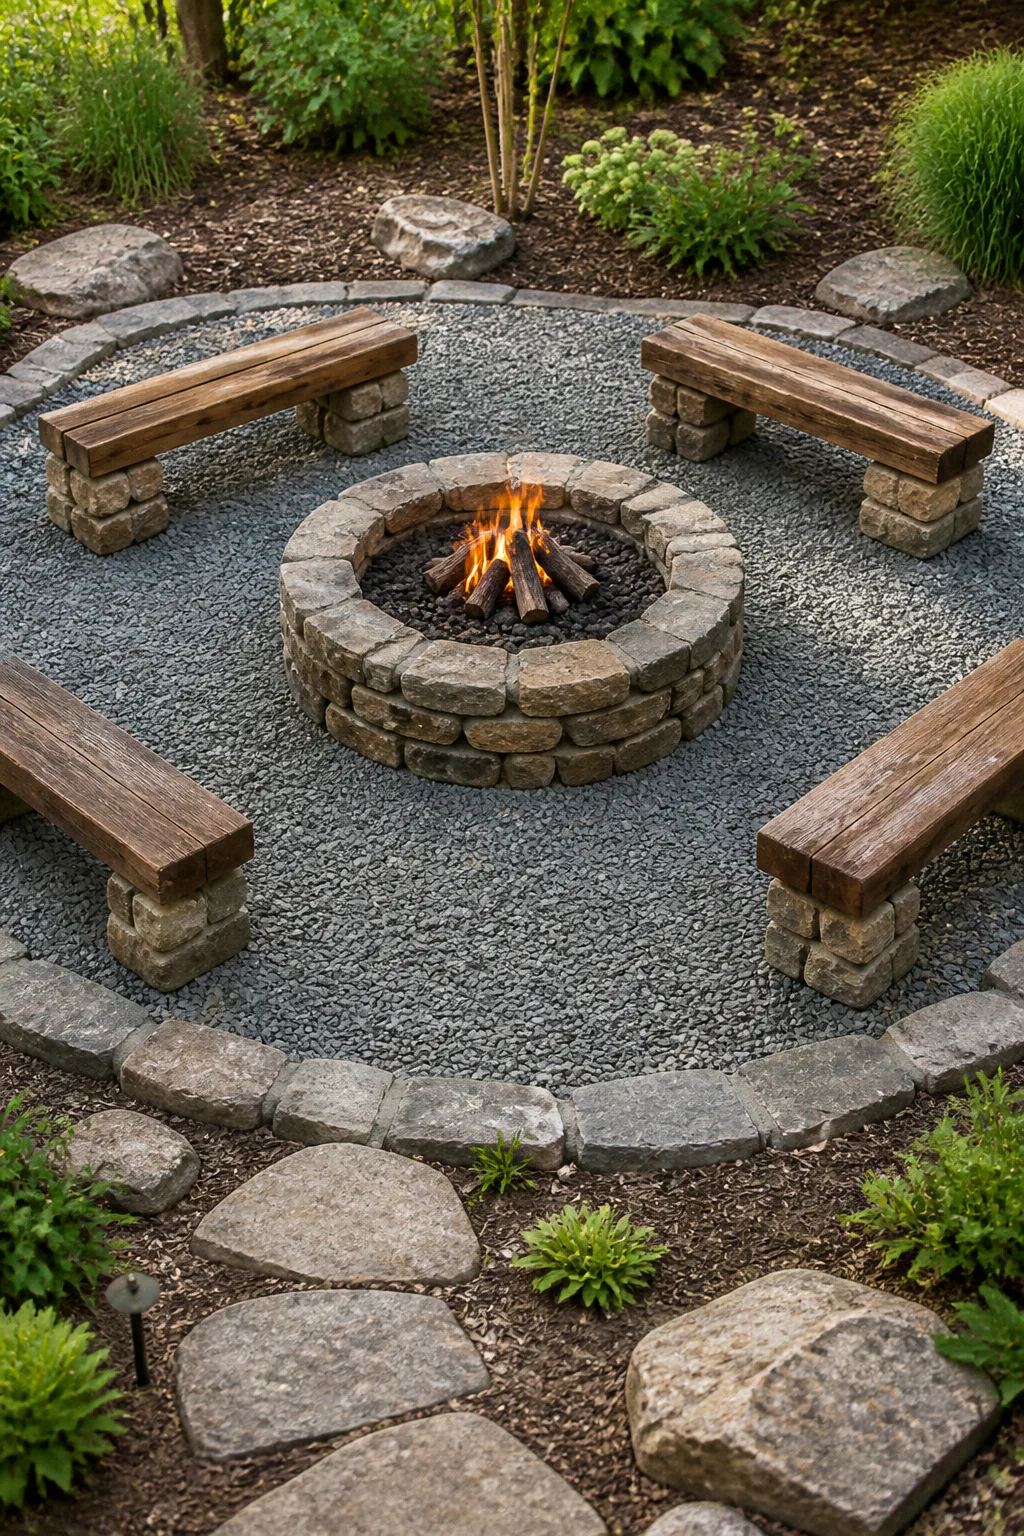
A stone fire pit patio can turn an open part of the yard into a natural gathering place. A circular fire pit made from stacked fieldstones creates a rustic focal point, while a crushed-rock floor gives the seating area a defined surface that feels connected to the landscape.
Place sturdy benches around the pit with enough room for people to move comfortably. Before building, check local fire rules and choose a location with appropriate clearance from structures, trees, and other combustible materials. A thoughtful layout is as important as the stonework for making the space practical.
Planning a comfortable gathering spot
Start by mapping the fire pit, seating, and walking routes. Select materials intended for the heat and outdoor conditions, and follow applicable guidance for construction and safe use.
- Choose a level location with suitable clearance around the fire feature.
- Use fieldstone and other materials appropriate for a fire pit.
- Prepare a stable crushed-rock patio floor with defined edges.
- Arrange sturdy benches to allow comfortable access and conversation.
Stone, gravel, and simple seating work together to make the fire pit feel like a natural extension of the yard.
Final Thoughts
Rock landscaping can be as simple as edging a flower bed or as transformative as terracing a hillside. Gravel, boulders, river stones, and flagstone each bring a different texture, so the strongest designs choose materials that suit both the job and the character of the home.
Start with one area you want to improve, then consider drainage, access, plant needs, and maintenance before settling on a layout. With a clear purpose and a restrained mix of materials, you can create an outdoor space that feels welcoming, practical, and distinctly your own.



