

16 Clever Studio Apartment Ideas for a More Functional Space
A studio apartment has to work as a place to sleep, relax, eat, and often work, all within one open room. The trick is to give each activity a sense of its own space without blocking the light or making the layout feel crowded.
These studio apartment ideas focus on practical ways to define zones, make furniture work harder, and use overlooked storage. Some are simple styling changes, while others involve choosing or installing space-saving furniture.
Whether you’re furnishing your first studio or trying to make a familiar layout feel more functional, start with the ideas that address your biggest daily challenges. A few thoughtful changes can make the room feel calmer and easier to use.
1. Divide the Bed with an Open-Shelf Bookcase
A tall open-shelf bookcase can create a gentle boundary between your bed and living area without turning the studio into a set of dark, disconnected boxes. It interrupts the view of the bed from the sofa or entry, while open shelves allow daylight and sightlines to pass through.
Place the bookcase alongside the bed, leaving enough room to walk comfortably around it. The shelves can hold books, baskets, and a few decorative pieces, helping the divider feel useful rather than like an obstacle.
How to make the divider work
Keep the styling relatively open so the furniture continues to feel airy. If the bookcase is tall or freestanding, check that it is stable and secure it appropriately, especially in a home with children or pets.
- Choose open-backed shelves instead of a solid cabinet.
- Use baskets to contain small items and reduce visual clutter.
- Leave some shelves partly empty to let light travel through.
The result is a more restful sleeping zone that still feels connected to the rest of the studio.
2. Float the Sofa Behind the Sleeping Area
When the layout allows, float the sofa with its back toward the bed to create a clear boundary between lounging and sleeping. Instead of pushing every piece of furniture against a wall, this arrangement uses the sofa itself to suggest where one zone ends and another begins.
Position the sofa so it faces the main living-area focal point, such as a media console or television. The bed remains behind it, while the seating area feels like a deliberate destination rather than leftover space.
Plan the walking paths
Before settling on the layout, measure the room and test the sofa’s position. Keep a comfortable route between the entry, kitchen, bed, and windows, and make sure the sofa does not block drawers or closet doors.
- Use a narrow console table behind the sofa for a lamp or books.
- Choose a sofa with a tidy, finished back if it will be visible.
- Keep the gap between zones clear enough for easy movement.
This simple furniture shift can make both the bedroom and living area feel more intentional.
3. Define Studio Zones with Coordinated Rugs
Rugs can visually map out the different jobs a studio needs to do. One rug beneath the bed, another under the sofa and coffee table, and a smaller one near a dining or work area can make the open floor plan feel organized without adding physical barriers.
The rugs do not need to match exactly. A shared color palette or related textures can connect the zones, while differences in shape or pattern give each area its own identity. This approach is especially helpful when walls are limited or furniture cannot be rearranged.
Choose and place rugs with care
Think about furniture placement before choosing rug sizes. A rug should relate clearly to the pieces around it, and it should not create a tripping edge in a busy walkway.
- Place the front legs of living-room seating on the area rug.
- Use a rug beneath the bed that extends beyond its sides.
- Keep colors or materials related for a cohesive overall look.
With a little planning, rugs add softness while quietly reinforcing the studio’s layout.
4. Anchor the Living Area with a Low Media Console
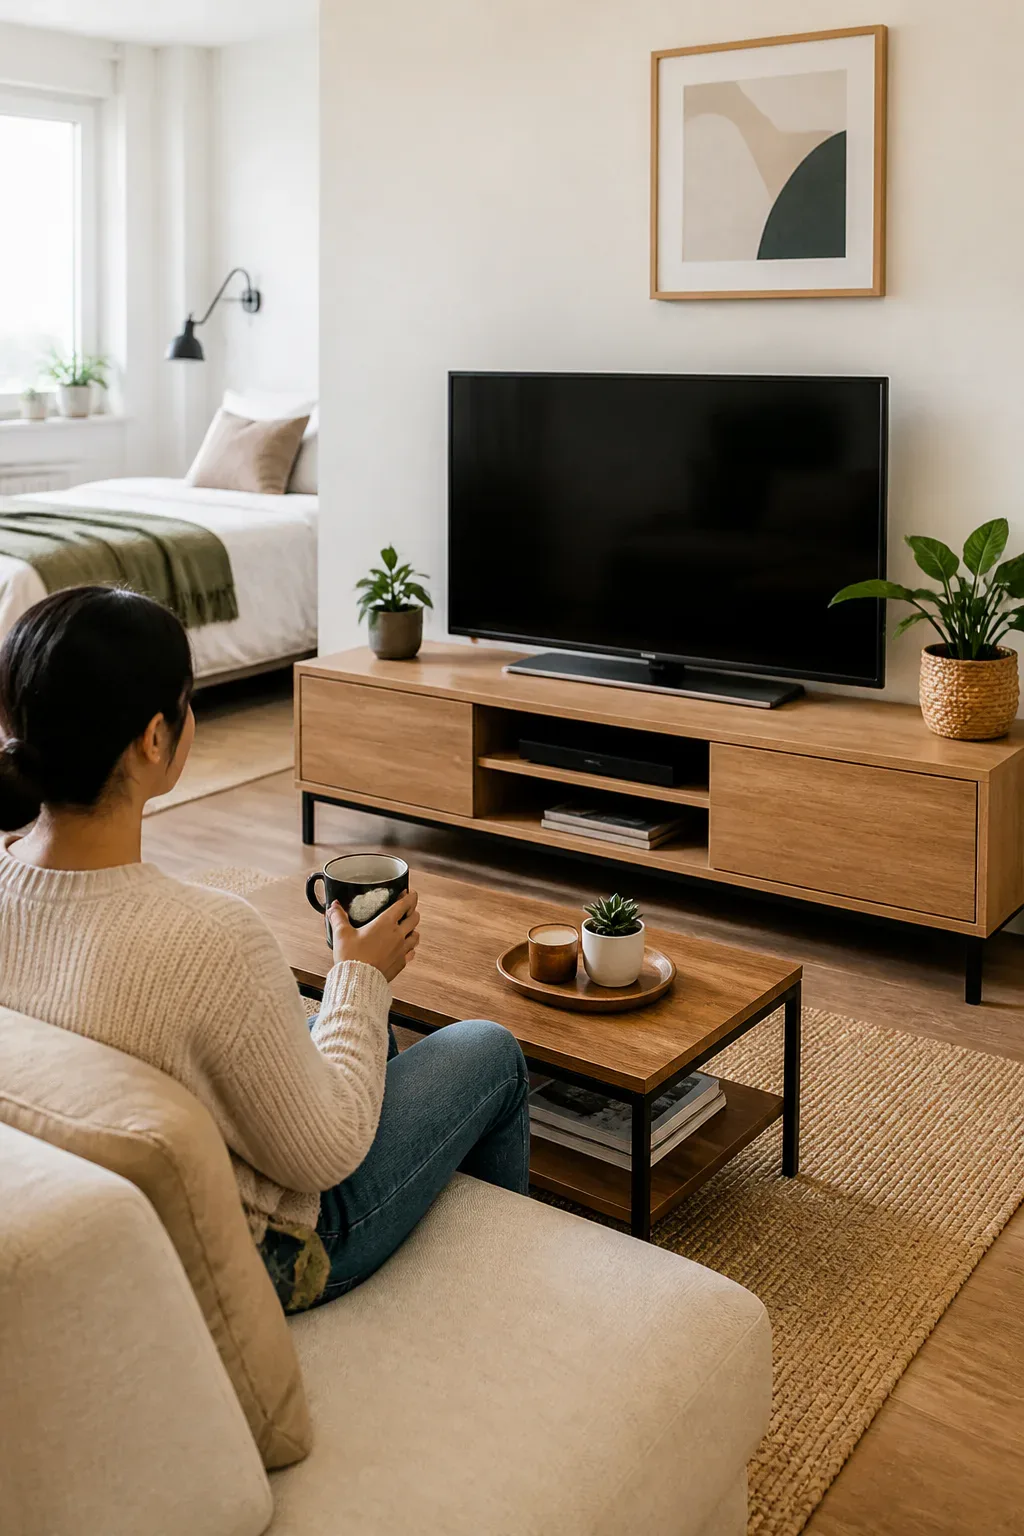
A low media console can give the living zone a distinct focal point and help the rest of the furniture feel arranged with purpose. It provides a natural place to orient the sofa and chairs, creating a defined gathering area even when the studio has no separate living-room walls.
Because a low console keeps more of the wall visible, it can feel less imposing than a tall storage unit. Choose a size that suits the wall and the screen or objects above it, leaving enough breathing room for the area to feel balanced rather than crowded.
Build a comfortable arrangement
Arrange seating around the console while keeping the main paths through the studio open. Use enclosed storage to tuck away cords, remotes, and other small items that can make a compact living area look busy.
- Keep the console low and proportionate to the wall.
- Leave clear access to outlets and any equipment you use.
- Pair it with a rug or sofa placement to define the lounge zone.
A clear focal point makes the living area easier to use and easier on the eyes.
5. Add a Murphy Bed with Built-In Storage
A Murphy bed folds away when it is not in use, opening up valuable floor space for daytime activities. It can be a useful choice when the bed dominates the studio or when you want room for a table, exercise mat, or more open circulation during the day.
If a fold-away bed is not practical for your home, a platform bed with deep pull-out drawers can still make the sleeping area work harder. Both options combine rest and storage, helping keep spare linens, clothing, or other belongings close without spreading extra furniture around the room.
Choose a setup that suits your routine
Consider how often you want to fold the bed away and whether the surrounding layout will accommodate it. Measure the bed in both its open and closed positions, and check that drawers can open without hitting nearby furniture.
- Use a Murphy bed when clearing the floor daily is a priority.
- Choose drawers for easy access to items used regularly.
- Keep the space around the bed uncluttered and functional.
The best option is the one you can use comfortably every day.
6. Use a Lift-Top Coffee Table as a Desk
A lift-top coffee table can shift from a low surface for relaxing to a raised work or dining spot. That flexibility is especially helpful when there is no room for a permanent desk or full-size dining table, and it allows the living area to serve more than one purpose.
Look for a table that suits the height of your sofa and has enough surface area for your usual tasks. Some designs also include storage beneath the lifting top, offering a convenient place for a laptop, notebooks, or chargers when work is done.
Make the table comfortable to use
Check the table’s open position and make sure there is room for your legs and a chair or stool if you plan to work there. Keep a small basket nearby for work essentials so the surface can return to coffee-table duty quickly.
- Measure the raised height against your seating.
- Store a laptop and supplies inside or close at hand.
- Use a tray to keep everyday items organized.
This adaptable piece can make a compact living area more useful without adding another desk.
7. Install a Fold-Down Wall Desk
A fold-down wall desk offers a dedicated place to work without taking up floor space all day. When it is open, it creates a compact workstation; when the workday ends, it folds flat against the wall and helps the room return to its everyday layout.
Choose a wall location with enough light and convenient access to power, ideally away from the busiest walking path. A desk near shelving can keep books and supplies close, while a stool that tucks underneath helps preserve open floor area.
Set up a work zone that can disappear
Check the wall and mounting requirements before installing the desk, and follow the product instructions carefully. Keep the surface limited to what you need so closing it is quick and the studio does not feel like an office after hours.
- Measure the desk fully open and fully folded.
- Choose a supportive seat that can be stored nearby.
- Add a task light and a small organizer for supplies.
A fold-away workstation makes it easier to separate work time from home time.
8. Pair Nesting Tables with Clear Acrylic Chairs
Nesting tables and transparent chairs help a small seating area feel flexible and visually light. The smaller tables slide under the larger one when they are not needed, while clear chairs provide extra seating without adding a heavy block of color to the room.
This pairing works well beside a sofa, near a window, or in a compact dining corner. Pull out a table when you need a place for a drink or snack, then tuck it away again to reopen the floor for walking or relaxing.
Keep the arrangement practical
Choose pieces that are easy to move and comfortable enough for how you plan to use them. Clear furniture still needs regular cleaning, so consider whether its finish and shape suit your household’s everyday routines.
- Slide the smaller table away when floor space is needed.
- Use one nesting table as a side table beside the sofa.
- Choose chairs that fit beneath a table when not in use.
These adaptable pieces can provide useful surfaces and seating without visually weighing down the studio.
9. Hang Ceiling-Height Curtains Beside Tall Shelving
Long curtains and tall shelving draw attention upward, making the studio feel more vertical. Curtains hung close to the ceiling create a taller visual line, while a high bookcase or storage unit uses wall space that might otherwise go unused.
This combination can frame a window, soften a storage wall, or help distinguish a sleeping area. It also brings together two different functions: curtains add softness and flexibility, while shelving provides a home for books, baskets, and everyday essentials.
Use height without crowding the room
Measure carefully before hanging curtains or choosing shelving, and keep the arrangement in proportion to the wall. Leave enough space around windows and doors, and avoid filling every shelf so the vertical look remains calm rather than cluttered.
- Mount curtain hardware near the ceiling to extend the visual line.
- Choose shelving that makes use of available wall height.
- Use coordinated baskets to group smaller belongings.
Making better use of vertical space can free up the floor for living.
10. Build a Wardrobe Wall Along One Side

A line of modular wardrobes along one wall can create a concentrated closet area, keeping clothing and accessories from spreading throughout the studio. It offers a more cohesive look than a mix of separate storage pieces and can make the rest of the room easier to organize.
Choose a wall that will not interfere with windows, heating, or the main walkway. Depending on the layout, the wardrobe wall may sit near the bed or along a side wall, making it easier to get dressed without taking over the living zone.
Plan the storage around what you own
Think through the mix of hanging space, shelves, and drawers you need before settling on a configuration. If you rent or cannot install built-ins, modular freestanding units can still create a unified wall of storage.
- Measure the full wall and check door clearance.
- Combine hanging sections with shelves and drawers.
- Use matching fronts for a calmer, more continuous look.
Gathering storage in one place can make a studio feel less visually scattered.
11. Create an Entry Storage Station Behind the Door
The back of an entry door can hold useful storage without taking up room on the floor. A hanging organizer can corral keys, mail, hats, or small accessories, while hooks provide a quick landing spot for items you reach for when leaving home.
In a studio with limited cupboards, the side of the refrigerator can also offer extra storage for lightweight kitchen essentials. Together, these overlooked surfaces help keep small belongings from collecting on counters, tables, or the nearest chair.
Make use of hidden surfaces
Check that organizers do not prevent doors from opening or closing, and choose attachments suited to the surface. Keep frequently used items easy to reach, and avoid overloading racks so the entry remains tidy and functional.
- Use door pockets for mail, accessories, or small supplies.
- Add hooks for keys, bags, or outer layers.
- Use magnetic storage on the fridge side where appropriate.
A small entry station gives everyday items a dependable place to land.
12. Tuck Rolling Storage Bins Beneath the Bed
The space beneath a bed is a practical place to store items that do not need to stay in view. Low-profile rolling bins make it easier to use that area for seasonal clothing, extra linens, or other belongings while keeping the bedroom zone visually calm.
Wheeled containers are especially convenient when the bed sits close to a wall or when you need to access stored items regularly. Choose bins that fit the available clearance, and group their contents so you do not have to pull out every container to find what you need.
Keep under-bed storage easy to manage
Measure the height and depth beneath the bed before buying bins. Containers with lids can help protect stored items from dust, while labels make it easy to identify what is inside.
- Reserve bins for seasonal or less frequently used belongings.
- Label each container by its contents.
- Leave enough clearance to roll bins out smoothly.
Using this hidden storage keeps extra belongings close without adding another cabinet.
13. Place a Large Mirror Opposite the Window
A full-size mirror placed across from the main window can reflect daylight farther into the studio. It also adds depth to the room, making the open area feel brighter and more expansive without changing the floor plan.
Choose a position where the mirror reflects something pleasant, such as natural light or a tidy part of the room. A leaning mirror can be easier to reposition, while a wall-mounted one keeps the floor clear; whichever you choose, make sure it is secure.
Find the right angle
Try a few possible locations before committing to the placement. A mirror that reflects a cluttered storage area may draw attention to it, so first decide what you want to see repeated in the room.
- Place the mirror where it can catch window light.
- Choose a size that suits the wall and nearby furniture.
- Secure a tall mirror against tipping or shifting.
Used thoughtfully, a mirror adds brightness and visual breathing room.
14. Unify the Studio with Warm Off-White Walls
Warm off-white walls create a continuous backdrop across the studio, helping separate functional zones feel like parts of one home. A soft neutral can also reflect light while bringing a gentle warmth that keeps the room from feeling stark.
Rather than using a different wall color for every area, let furniture, rugs, and textiles provide contrast. This approach can make a small open-plan room feel more connected, while still allowing the bed, living area, and workspace to express their own character.
Choose a shade that suits the light
Colors can look different depending on the direction of the windows and the lighting in the room. If possible, test a few shades in the studio and look at them at different times of day before deciding.
- Consider warm white or a light warm greige.
- Coordinate the wall color with floors and larger furniture.
- Use accessories for small areas of color and pattern.
A consistent wall color makes it easier to layer different uses into one room.
15. Create a Cozy Corner with Layered Lighting
Layered lighting can make a specific work or lounging area feel inviting without relying on a single harsh overhead light. A floor lamp adds a soft glow, a task light helps with reading or working, and warm under-cabinet LEDs can brighten a nearby counter or shelf.
In a studio, separate light sources also help signal how a space is being used. Turn on a focused lamp for work, then switch to softer lighting when it is time to relax, giving one corner a different mood without changing the furniture.
Build light for different activities
Place each source where it is useful and avoid positioning lamps where they create glare on screens or interfere with walking paths. Keep cords tidy and choose warm-toned bulbs for a comfortable evening atmosphere.
- Use a floor lamp beside the sofa or reading chair.
- Add a focused light at a desk or work surface.
- Use warm LED strips under cabinets or shelves.
Thoughtful lighting adds comfort and definition even after the sun goes down.
16. Screen the Bed with a Sheer Curtain or Glass Panel
A sheer curtain or slim glass panel can give the bed a greater sense of privacy while keeping the studio visually open. A ceiling-track curtain can be drawn when you want to hide the sleeping area and pulled aside during the day, making it a flexible option for changing routines.
A glass partition offers a more defined boundary while allowing light to pass through. It can suit a studio where a permanent screen is welcome, while a curtain may be easier to adjust or remove if you want the layout to remain adaptable.
Choose the right level of separation
Think about whether you want a soft, temporary screen or a more permanent architectural feature. Leave enough space for the curtain to move freely or for the partition to fit without narrowing the main walkway.
- Use a ceiling track for a curtain that can open fully.
- Choose sheer fabric to preserve light and openness.
- Consider a slim glass panel for a more structured division.
Either option can make the sleeping area feel more private without closing off the studio.
Final Thoughts
A well-planned studio does not need to feel like one room doing too many jobs. Furniture placement, rugs, lighting, and flexible dividers can give sleeping, living, and working areas their own identities while keeping the overall space connected.
Start with one change that solves a daily frustration, such as adding hidden storage or creating a clearer boundary around the bed. As you learn what works for your routine, layer in other ideas to make your studio feel more comfortable, organized, and distinctly yours.



