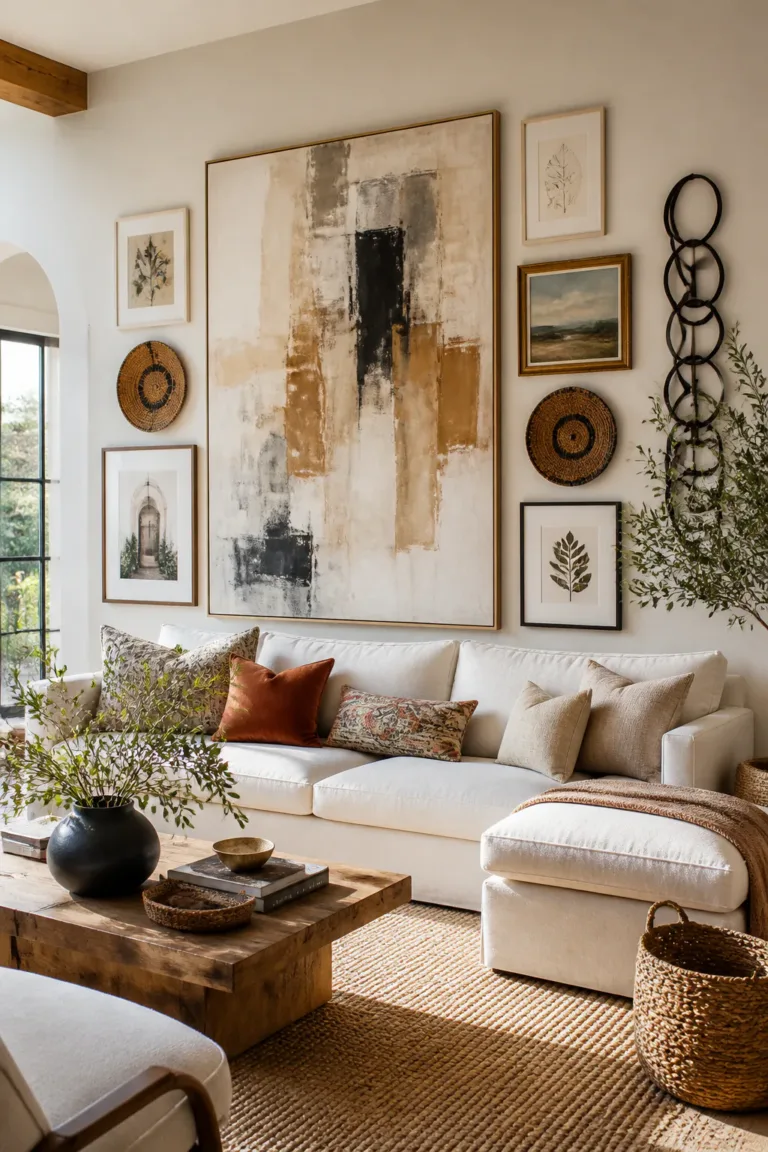
16 Stunning DIY Wall Art Ideas
Blank walls can make a room feel unfinished, but filling them doesn’t have to mean buying expensive artwork. With a few accessible materials and a little patience, you can make pieces that bring color, texture, and personality into your home.
These 16 DIY wall art ideas range from simple paper projects to sculptural designs with more dimension. Many can be adapted to suit your space, whether you’re decorating a small entryway, adding a focal point above a sofa, or building a gallery wall.
Choose a project that fits the tools and materials you already have, and think about the scale of the wall before you begin. A large textile or framed print can anchor a room, while smaller botanical pieces and handmade details work beautifully in a grouped display.
1. Make a Textured Spackle Relief Canvas

Joint compound or spackling paste can turn a plain canvas into a sculptural piece with soft ridges and sweeping shapes. Use a putty knife to create broad, relaxed marks, or drag a comb through the surface for finer, more regular lines. The result has the quiet depth of relief art without needing advanced painting skills.
This look suits modern, organic, and minimalist rooms, especially where a wall needs texture more than a strong burst of color. Hang one large canvas above a sofa or bed, or make a pair of smaller panels for a balanced arrangement. Let the room’s existing palette guide whether you leave the surface white or tint the compound.
How to create the finish
Work on a stable surface and build the texture gradually; thick ridges can take longer to dry and may crack. Test your tool and pattern on a scrap first, then keep the composition loose rather than trying to make every mark identical.
- Use a sturdy canvas and protect your work surface.
- Try a putty knife, notched tool, or wide-tooth comb.
- Mix in a little paint for a soft, consistent tint.
- Let the canvas dry fully before hanging it.
2. Frame a Vintage Rug or Runner

A patterned rug or runner can make an unexpected, richly textured focal point when displayed like a large artwork. Look for a piece with colors and motifs that complement your room, then place it inside an oversized frame so the textile becomes the main event. Its woven surface adds warmth that a flat print may not provide.
This idea works particularly well in living rooms, bedrooms, or hallways with simple furnishings that leave room for a bold pattern. A framed textile can also help connect colors from different parts of the room. If the rug is heavy or delicate, plan the support carefully so the frame holds it securely without pulling or damaging the weave.
Make the textile the focal point
Measure the textile before choosing a frame, and decide whether you want its edges visible or neatly tucked behind a mat. Use a backing that supports the material evenly, and avoid forcing a thick rug into a frame that is too shallow.
- Choose a pattern that reads clearly from across the room.
- Check the textile for loose threads or fragile areas.
- Use secure mounting that distributes the weight.
- Keep nearby décor simple enough to let the pattern stand out.
3. Display Pressed Botanicals in Glass
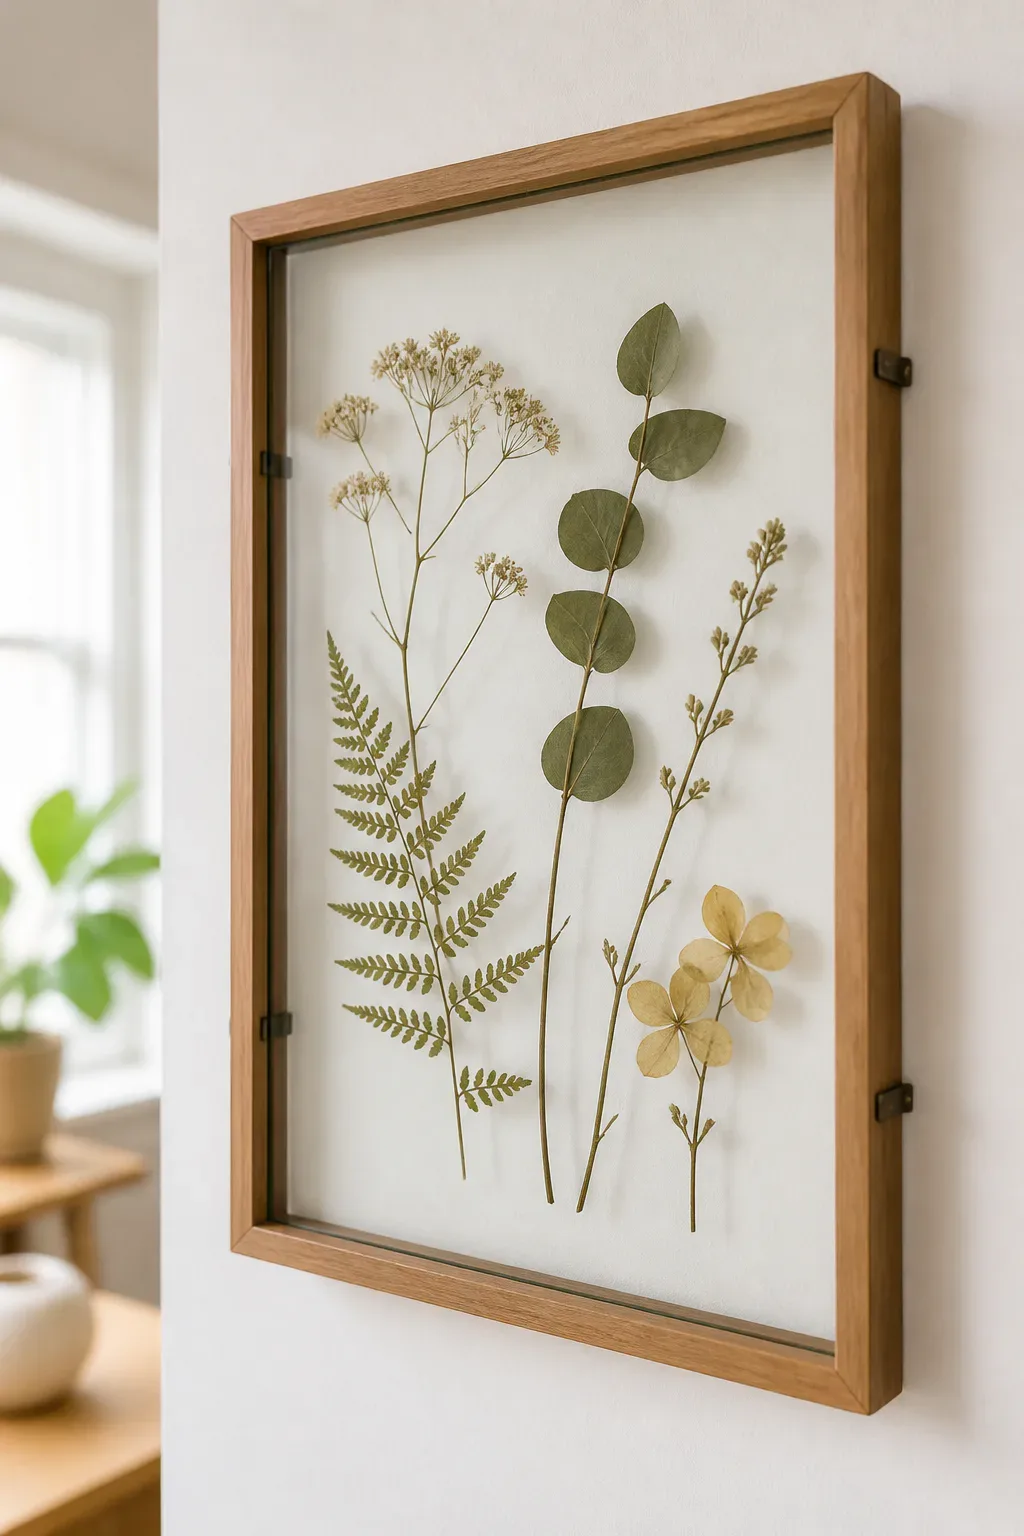
Pressed leaves and flowers bring delicate natural shapes to the wall while keeping the arrangement clean and uncluttered. Place a specimen between two glass panes in a floating frame so its silhouette and fine details remain visible. A single stem can feel quietly elegant, while several specimens arranged together create a small botanical study.
These frames fit well in bedrooms, kitchens, and sunny reading corners, or as part of a gallery wall with other nature-inspired pieces. Choose leaves or flowers with interesting outlines and press them until they are thoroughly flat and dry. Simple backgrounds help the botanical forms stand out, and consistent frames can make a group feel intentional.
Arrange and protect your specimens
Experiment with spacing on a clean surface before closing the frame. Keep the composition airy, and handle dried plants gently because thin petals and stems can break easily. Direct sunlight may fade natural colors over time, so display the work where it can be enjoyed without constant harsh exposure.
- Press leaves or flowers flat before framing.
- Try one specimen per frame for a minimal look.
- Use a group of matching frames for a collected display.
- Clean the glass carefully to avoid trapping fingerprints.
4. Hang an Oversized Architectural Print

A large black-and-white photograph or architectural sketch can give a room a strong focal point without the visual busyness of many small pictures. Look for an image with clear lines, appealing shadows, or a striking building detail, then have it enlarged as a statement print. Oversized art can make an ordinary wall feel considered and complete.
This approach suits living rooms, dining areas, and home offices, especially when the rest of the décor is fairly restrained. A monochrome image pairs easily with wood, metal, and neutral fabrics, while a simple frame keeps attention on the composition. Before printing, consider how much detail will remain legible at the intended size.
Plan for scale and clarity
Measure the wall and the furniture below it so the print feels proportionate rather than crowded or undersized. Check that the image file is suitable for enlargement, and consider an unframed or simply framed presentation if you want a relaxed, studio-inspired finish.
- Choose a photograph or sketch with a strong focal point.
- Preview the crop before committing to a large print.
- Use a clean border or understated frame.
- Hang it where the main details can be seen comfortably.
5. Add Brushstroke Texture to a Printed Painting

An inexpensive paper print can take on a more painterly appearance when you add raised brushstrokes over its surface. Use a clear textured medium, such as textured Mod Podge, to follow selected marks and color changes in the image. The added sheen and relief can make a flat print feel more tactile from nearby.
This is a useful way to refresh a print you already own or create a layered look for a bedroom, study, or gallery wall. The technique works best when the image has visible brushwork or broad areas of color to guide your strokes. A subtle touch is often more convincing than coating every inch with the same texture.
Follow the image’s movement
Test the medium on a small sample before applying it to the finished print, since paper and coatings can react differently. Use a brush to echo the direction of the image’s marks, and allow the surface to dry completely before framing it behind glass—or display it without glass if the texture needs room.
- Choose a print with visible painterly detail.
- Apply strokes that follow the image rather than crossing randomly.
- Work in manageable sections to keep the finish even.
- Check that the finished piece fits your frame safely.
6. Create a Geometric Paint Swatch Grid
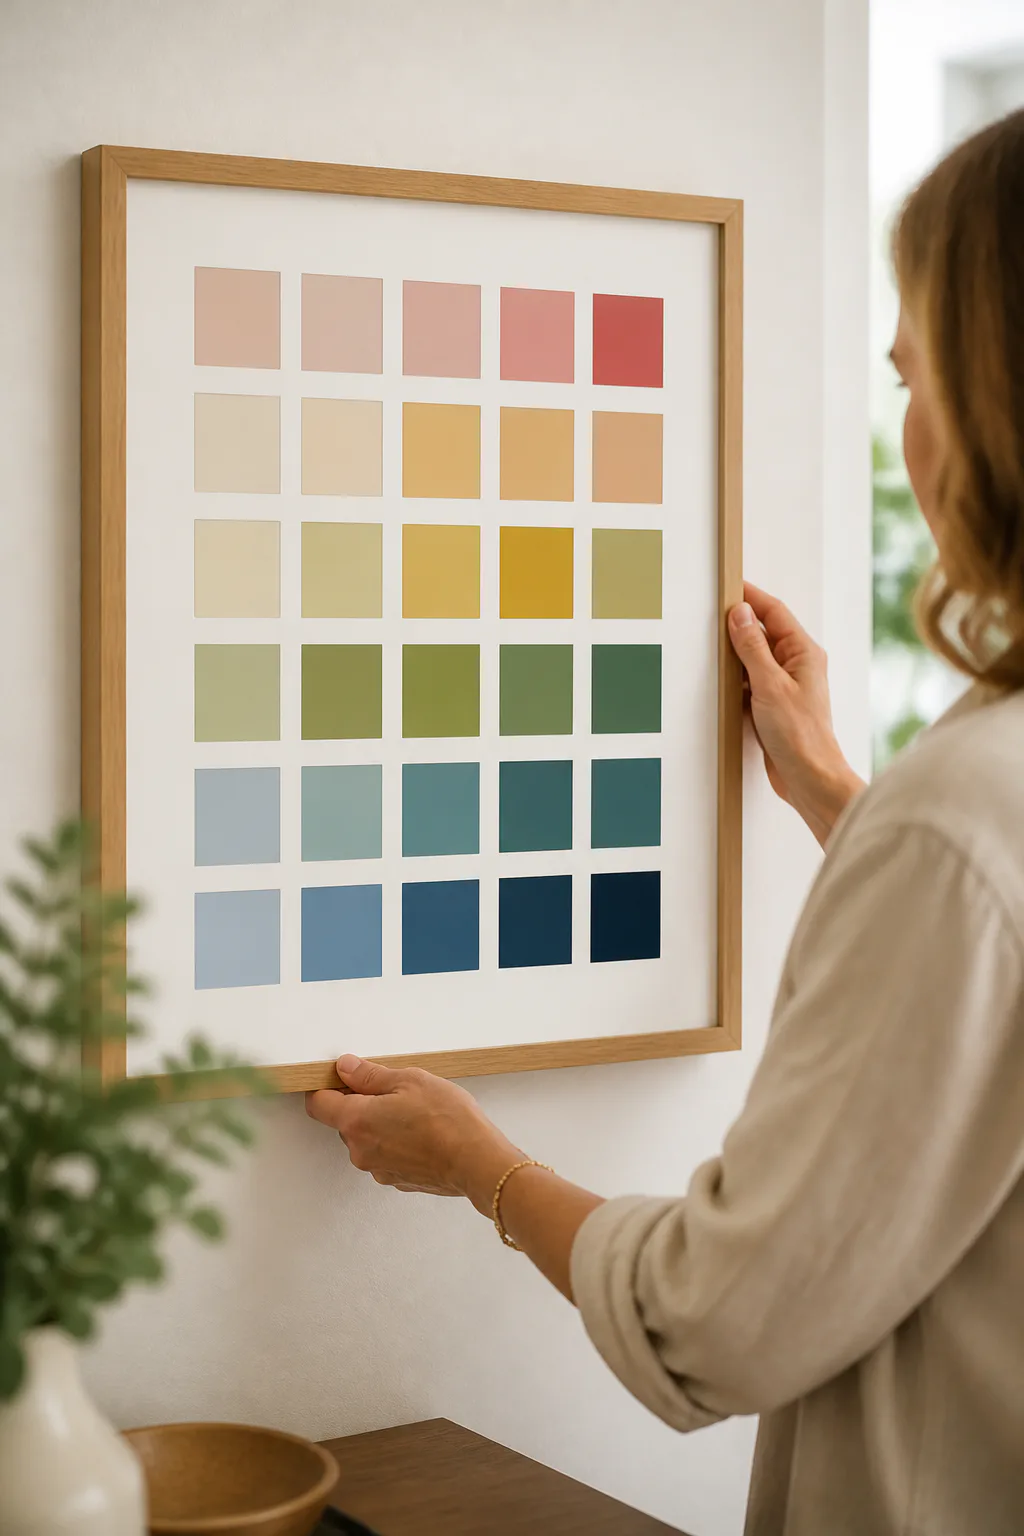
Paint chips and wallpaper scraps can become a crisp, color-focused artwork when arranged in a thoughtful grid. Repeating squares create a tidy structure, while the colors bring energy and personality. You can keep the palette close to one hue for a subtle effect or combine complementary shades for a more graphic display.
This project is a natural fit for a home office, craft room, or hallway where a compact piece can add a bright accent. It also makes good use of leftover samples, so the materials can reflect colors already present in your room. A clean cardstock backing and simple frame keep the small shapes looking deliberate rather than like loose swatches.
Build a balanced arrangement
Lay out the pieces before attaching anything, and check the spacing from a short distance as well as up close. Decide whether every square should be the same size or whether a few larger blocks will create a more relaxed rhythm. A consistent grid is especially effective when the colors vary.
- Choose a limited palette that suits the room.
- Trim swatches to matching shapes for a crisp grid.
- Use a ruler or straight edge to keep rows aligned.
- Leave an even margin around the finished arrangement.
7. Weave a Yarn Wall Hanging

A yarn wall hanging brings softness and movement to a room through a mix of colors and fibers. Tie strands of yarn, roving, or twine onto a piece of driftwood, then vary their lengths and textures to create a layered fringe or a simple woven pattern. The handmade finish makes each piece feel personal.
This style works especially well in relaxed bedrooms, reading nooks, and living rooms with natural materials. Hang it above a bed or chair where its soft texture can balance harder surfaces such as painted walls or wood furniture. A small piece can add gentle detail, while a wider hanging can take the place of a conventional framed print.
Mix fibers with intention
Start with a manageable palette and repeat a few yarn textures so the design feels connected. If you want a fuller look, layer thicker roving with thinner yarn, but leave some open areas to show the driftwood and keep the hanging from feeling too dense.
- Select a sturdy, clean piece of driftwood for the top.
- Combine a few complementary colors and yarn weights.
- Trim the fringe after hanging to refine its shape.
- Secure the hanging with a loop or strong wall hook.
8. Make Geometric Art from Pennies
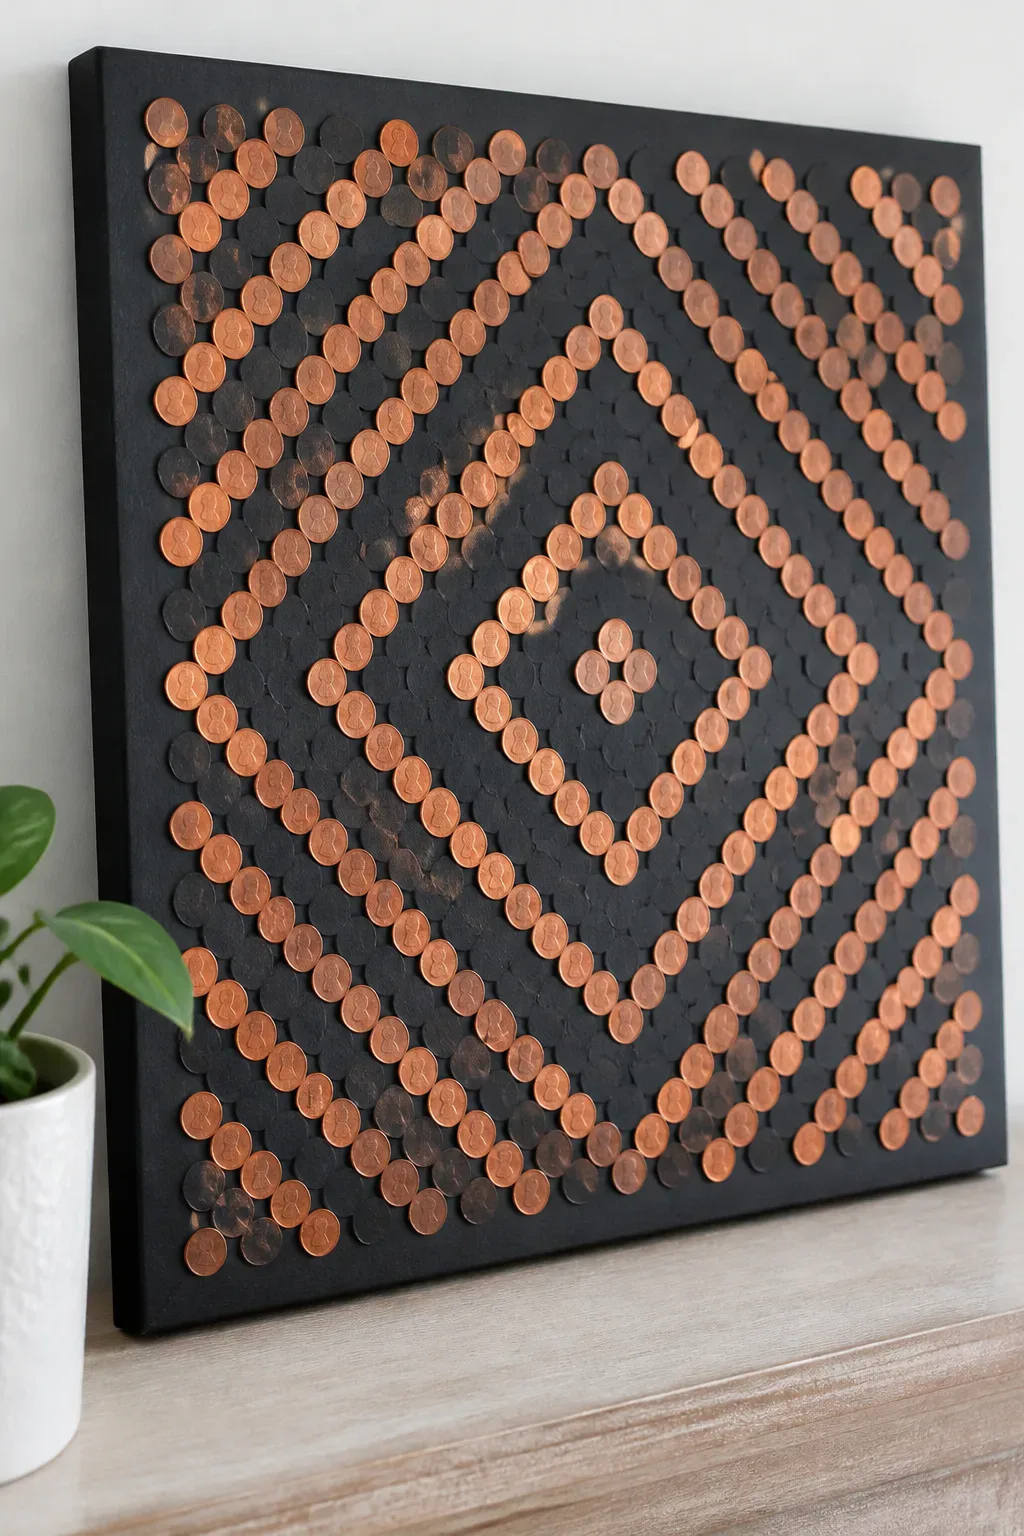
Pennies or washers can create a repeating geometric pattern with a satisfying mix of shine and texture. Arrange the pieces on a board in rows, circles, or another simple motif, then secure them in place. Depending on the finish you choose, the artwork can feel industrial, warm and metallic, or graphic and modern.
Use this idea as a compact accent in an office, entryway, or gallery wall, or make a larger panel to anchor a small seating area. The repeated shapes bring order to the design, so even a simple layout can look striking. A dark painted backing makes metallic pieces stand out, while a lighter surface creates a softer contrast.
Keep the pattern precise
Arrange the pieces before gluing to make sure the spacing and edges look balanced. Use an adhesive suited to the backing and materials, and allow it to set fully before moving the board. If you paint the finished design, apply the coating evenly so the small shapes remain visually distinct.
- Choose a pattern simple enough to repeat consistently.
- Test a few background colors before assembling the full piece.
- Use a level surface to keep rows or circles aligned.
- Secure the finished board with hardware suited to its weight.
9. Frame Coffee-Stained Book Pages

Coffee-stained book pages or sheet music can give a wall a softly aged, collected look. Brush or dab brewed coffee onto the paper to create gentle variations in tone, then let the pages dry flat before arranging them in a multi-pane frame. The repeated sections make the finished piece feel like a cohesive collection rather than a single loose page.
This artwork suits vintage-inspired rooms, cozy reading corners, and hallways with warm wood or subdued colors. You can choose pages for their typography, musical notation, or decorative illustrations, while keeping the overall tones consistent. Be thoughtful about the source material, and use pages you can repurpose without damaging a book you value.
Make the aged finish feel intentional
Test the coffee on a spare piece first and avoid soaking the paper, which can wrinkle or tear. Once dry, flatten the pages under a clean weight if needed, then try different arrangements before mounting them. A simple frame helps keep the delicate details in focus.
- Use spare pages or sheet music with appealing print.
- Apply coffee lightly for varied, natural-looking tones.
- Let each sheet dry fully before framing.
- Arrange the pages with consistent spacing in the frame.
10. Stretch Fabric into Wall Art Panels

A striking fabric remnant can become a clean, oversized wall display with very little alteration. Stretch the fabric tightly around a wooden frame and secure it at the back, letting the pattern, weave, or color provide all the decoration. Linen and other textured materials can look especially appealing when their surface is visible up close.
Fabric panels work in living rooms, bedrooms, and dining spaces where a large print might feel too formal. They can also introduce a color or pattern that appears elsewhere in the room, helping the décor feel connected. For a coordinated arrangement, make several panels from the same fabric or select different textiles that share a similar palette.
Wrap the fabric smoothly
Check the pattern direction before attaching the fabric, especially if it has stripes or a large motif. Pull evenly from side to side to reduce wrinkles, and keep the back tidy so the panel sits flat against the wall. If the fabric is thin, a plain backing can help prevent the frame from showing through.
- Choose fabric with a pattern that suits the panel size.
- Leave enough material to wrap around all frame edges.
- Secure the fabric evenly without distorting the design.
- Hang one large panel or group smaller ones together.
11. Shape Continuous-Line Wire Wall Art

Continuous-line wire art turns a single flowing outline into a lightweight sculpture for the wall. Bend craft wire into an abstract face, figure, or body silhouette, letting the line wander naturally rather than aiming for perfect symmetry. The open shape feels airy, so it can add personality without making a small room look crowded.
Place the piece above a side table, in a bedroom, or as part of a gallery wall with prints and photographs. Wire looks especially effective against a plain surface, where its outline remains easy to see. You can choose a finish that blends into the room or use a contrasting metal tone to make the shape stand out.
Form a smooth, readable outline
Sketch a simple line on paper first and use it as a loose guide while bending the wire. Make gradual curves instead of sharp kinks, and check the design from a distance as you work. Small clear hooks can help the finished outline appear to float on the wall.
- Choose wire that bends easily but holds its form.
- Start with a simple face or figure silhouette.
- Use pliers to shape ends and smooth difficult bends.
- Mount the piece at several points so it stays steady.
12. Mount Salt Dough Sculptural Shapes

Salt dough can be shaped into simple organic forms and arranged as a small wall relief. Make abstract curves, discs, or gently irregular shapes, then bake them and paint them in a single tone for a unified look. Mounted against contrasting wood, the pieces gain depth and read more like a considered sculpture than a craft project.
This idea can add a handmade focal point to a hallway, dining space, or bedroom. Neutral paint keeps the shapes calm, while a darker backing can make their outlines more pronounced. Because the forms project from the surface, consider the viewing angle and the amount of room they need before choosing a location.
Shape and mount with care
Keep the forms reasonably lightweight and similar in finish, even if their shapes vary. Allow the dough to dry or bake completely according to your chosen recipe, then paint and seal it if appropriate. Use a secure method to attach each shape to the backing, and mount the backing firmly to the wall.
- Make a few shapes in varied sizes for visual rhythm.
- Choose a paint color that contrasts with the wood.
- Arrange the shapes before fixing them in place.
- Use secure mounting suited to the finished piece’s weight.
13. Build a Painted Wood Shim Sunburst
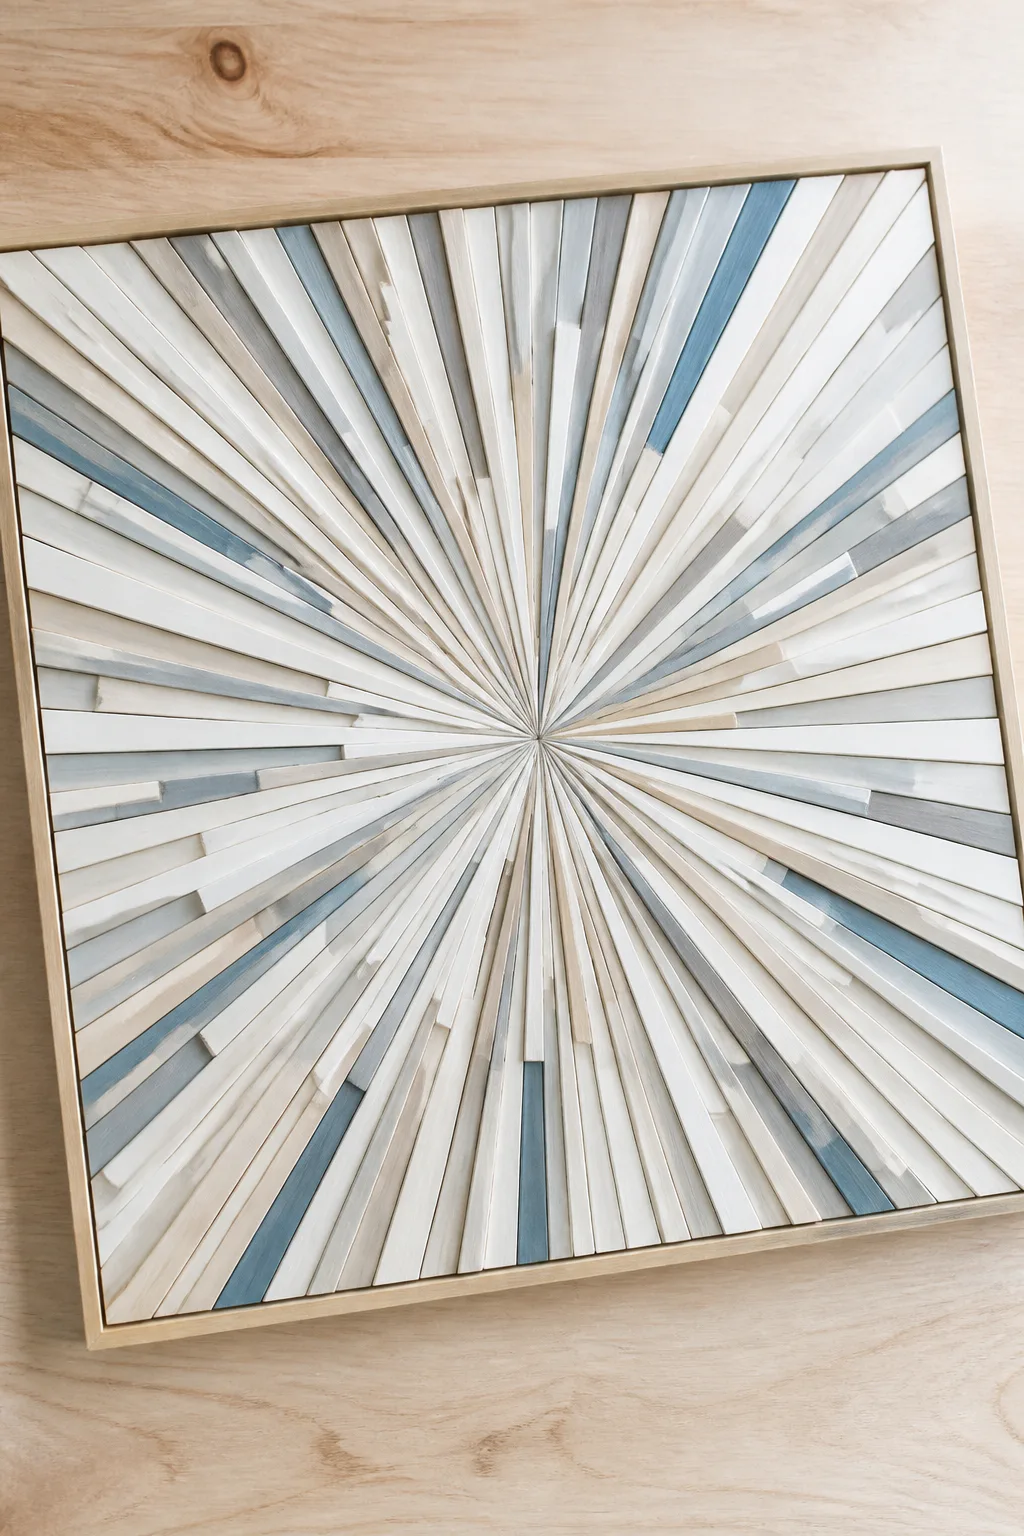
Wood shims can be arranged into a sunburst or herringbone design to create a graphic, dimensional panel. Their varied lengths make it easy to build movement from a central point or repeat a more orderly pattern across plywood. A painted or stained finish can emphasize the geometry while giving the surface a cohesive appearance.
This project works well above a console, in a dining area, or on a broad living-room wall that needs a strong handmade feature. The layered wood catches light differently across the surface, adding subtle depth throughout the day. Framing the edges with a clean border helps the finished panel look polished and keeps the composition contained.
Lay out the design before assembly
Arrange the shims on the plywood first and adjust the spacing until the pattern feels balanced. For a sunburst, begin at the center and work outward; for herringbone, repeat the angle consistently. Once the layout is set, secure the pieces and finish the edges so the panel hangs neatly.
- Choose a sunburst or herringbone pattern to guide the layout.
- Test paint or stain on a spare shim first.
- Keep the outer edges even or add a simple frame.
- Use reliable hardware to support the completed panel.
14. Arrange Dried Stems in a Shadow Box
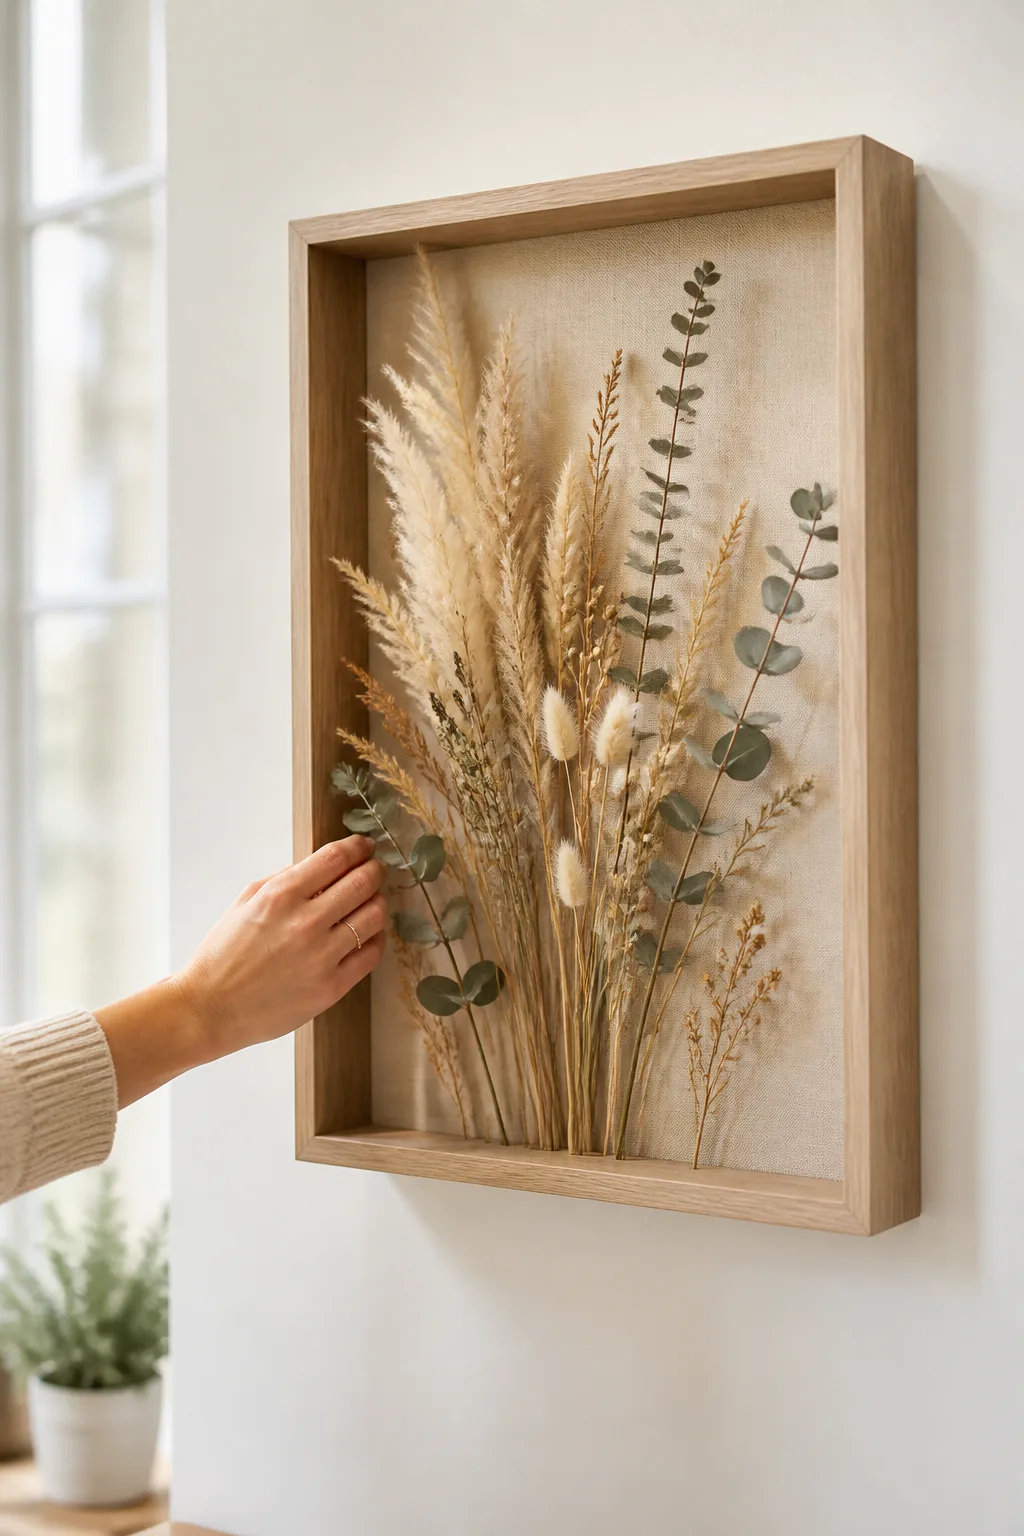
A shadow box gives dried stems space to project from the wall, turning a simple botanical arrangement into dimensional art. Place pampas grass, bunny tails, eucalyptus, or other dried pieces inside a deep frame, and compose them so their shapes remain visible through the opening. The result brings a little natural movement indoors without needing a vase or shelf.
This idea fits relaxed bedrooms, living rooms, and entryways, particularly where a quiet natural accent would complement the décor. A single variety can feel elegant and restrained, while a mix of stem shapes creates more variation. Choose a backing that makes the dried materials easy to see, and leave enough space so they are not pressed against the front.
Compose for depth and balance
Arrange the stems before securing them, paying attention to their height and direction. Keep the design from becoming too crowded, since delicate grasses need open space to show their form. Handle dried plants gently, and mount the shadow box securely once the composition is complete.
- Choose stems that fit comfortably inside the frame depth.
- Use a backing color that contrasts with the plants.
- Vary stem heights while keeping the arrangement balanced.
- Protect the piece from spots where it may be bumped.
15. Frame a Patterned Scarf as Art

A colorful or vintage scarf can make a large, expressive wall piece when displayed behind acrylic glass. Its pattern, borders, and soft fabric surface bring the feel of a textile collection into the room, while a frame gives the fabric a tidy, finished edge. This is an especially useful way to enjoy a scarf whose design deserves to be seen.
Hang it in a living room, dressing area, or bedroom where its colors can connect with pillows, throws, or other accents. A bold scarf can stand alone as a focal point, while a more delicate pattern can join a gallery wall. Consider how the design will sit within the frame, including whether the border or central motif should receive the most attention.
Keep the fabric smooth and visible
Lay out the scarf and test its position before mounting it, taking care not to stretch or distort the pattern. Use a backing or support that helps it lie flat, and select a frame deep enough to accommodate the textile comfortably. Acrylic glazing can be a practical choice for a large display.
- Choose a scarf with colors that suit the room.
- Center the most interesting motif or border.
- Keep the fabric smooth without pulling it out of shape.
- Use a frame that supports the textile without crushing it.
16. Stencil Leaf Silhouettes with Negative Space

Leaf silhouettes create a fresh, graphic artwork by letting the canvas show through as unpainted shapes. Place real leaves on the surface, spray paint over them, and lift them away to reveal crisp outlines beneath the color. The contrast between the painted field and the natural forms gives the piece a simple, memorable pattern.
This project suits kitchens, sunrooms, entryways, and other spaces that benefit from a nature-inspired accent. A single paint color keeps the result modern, while a softer shade can make the silhouettes feel more subtle. Try different leaf shapes and placements to create a composition that feels balanced rather than like a random scatter.
Keep the leaf edges clear
Use flat, fresh leaves that sit close to the canvas, since curled edges can let paint drift underneath. Work in a ventilated area and protect nearby surfaces while spraying. Arrange the leaves first, then apply light, even coats so their outlines remain distinct when you lift them away.
- Select leaves with clear, recognizable shapes.
- Test the layout before applying any paint.
- Hold the leaves flat to help preserve crisp edges.
- Let the canvas dry fully before framing or hanging.
Final Thoughts
DIY wall art can be as simple or as dimensional as you like, from a neat grid of paint swatches to a textured canvas or framed textile. The best project is one that suits your room, feels enjoyable to make, and uses materials you can handle with confidence.
Before starting, consider the scale of the wall, the colors already in the space, and how the finished piece will hang safely. Try one idea as a small accent or combine a few complementary projects into a personal gallery. A little planning can turn an empty wall into a feature that feels distinctly yours.