

15 Clever Dollar Tree DIY Home Decor Ideas
Dollar Tree DIY home decor can give a room a fresh, personal feel without requiring complicated tools or a big shopping list. These projects turn simple vases, frames, baskets, and serving pieces into accents that look right at home on a mantel, vanity, coffee table, or entryway shelf.
The ideas below cover a range of styles, from clean metallic wall art to soft woven textures and natural-looking greenery. Most can be adapted with paint, glue, or materials you already have, so you can choose a finish that works with your colors and existing decor.
This list is for renters, beginner crafters, and anyone who enjoys a satisfying weekend project. Check that pieces are stable before displaying them, use adhesives suited to the materials, and keep candles and delicate decor away from anything that could catch fire or tip over.
Quick Answer
The easiest Dollar Tree DIY decor projects are a faux stone textured vase, candles on painted mini risers, a beaded garland, a jute-wrapped basket and a neutral faux floral centerpiece. For more impact, build a geometric metallic wall accent, a boho sunburst mirror or a floating botanical frame gallery; for organizing, make apothecary jars, a tiered coffee bar tray, vanity dispensers or a marble vanity tray.
1. Style a Faux Stone Textured Vase
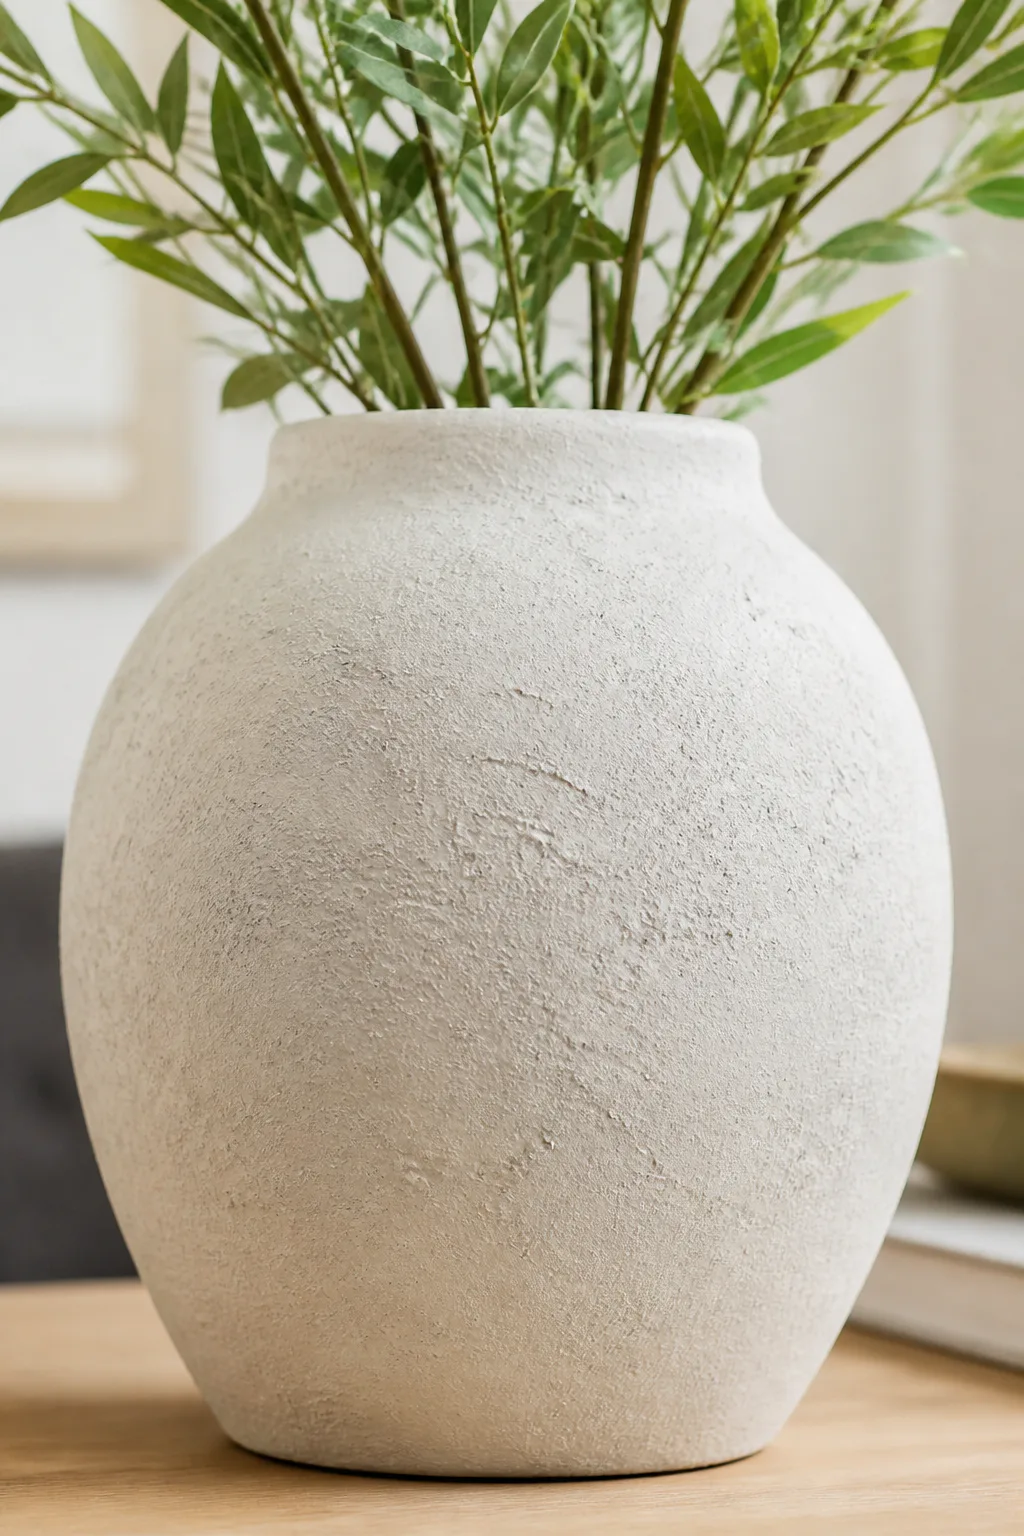
Best for: Adding texture to a shelf or table
Effort: Under an hour
A smooth plastic or glass vase can look more sculptural with a matte, stone-like finish. Mixing acrylic paint with a little baking soda creates a thicker coating that adds subtle texture, making a simple vessel feel closer to handmade earthenware.
This look suits a mantel, bookshelf, or side table, especially when paired with natural wood and neutral fabrics. Choose a vase with an uncomplicated silhouette so the finish, rather than a busy shape, becomes the main feature.
How to get the textured finish
Clean and dry the vase before painting so the coating has a better chance of adhering. Stir baking soda into the paint a little at a time, then dab or brush on several thin layers instead of trying to cover the surface all at once.
- Use warm white, taupe, or muted clay for an earthy palette.
- Let each layer dry before adding more texture.
- Test the paint mixture on an inconspicuous spot first.
Style the finished vase on its own or with a few dry stems for a simple, collected look.
2. Line a Mantel with Classic DIY Lanterns
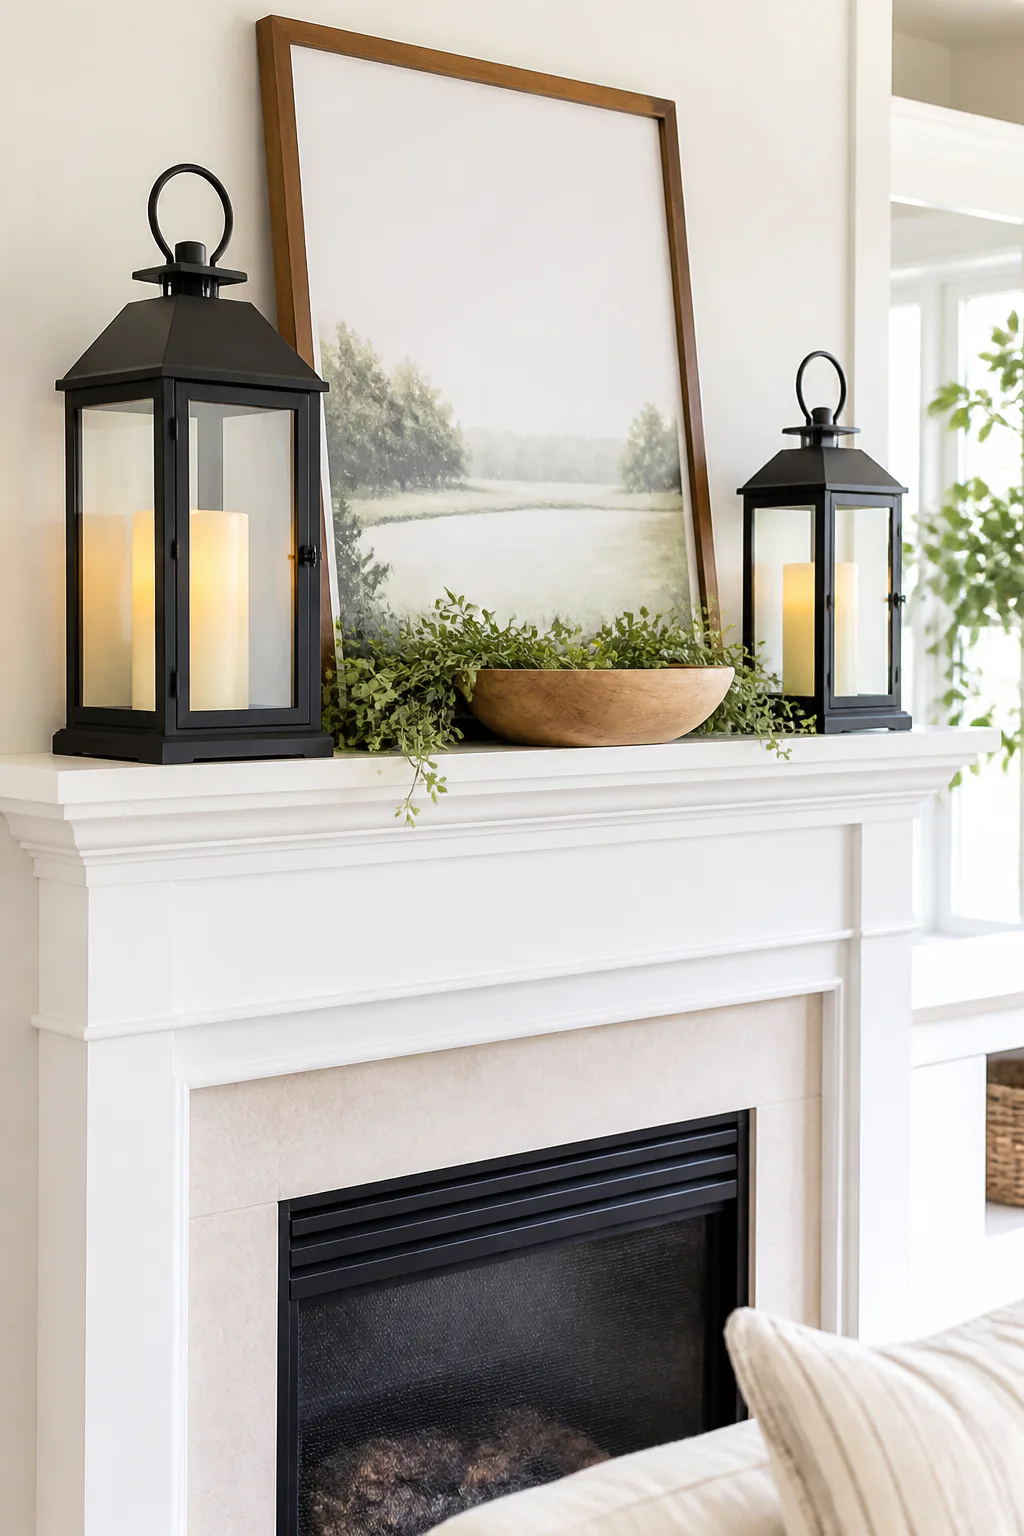
Best for: Cozy mantels and seasonal styling
Effort: An afternoon project
Decorative lanterns bring a cozy, familiar shape to a mantel, porch, or entryway. A pair can make a display feel balanced, while flameless candles add a gentle glow without an open flame inside a small decorative lantern.
Keep the arrangement relaxed rather than perfectly symmetrical. Lanterns work well alongside a framed print, greenery, or a low bowl, and their height helps add dimension to a mantel without filling every inch of it.
Make the display feel intentional
Choose lanterns with finishes that relate to the room, such as black for contrast or a light neutral for a softer arrangement. Before placing them, check that the doors or openings are easy to access so you can switch the flameless candles on and off.
- Use two lanterns in different sizes for a layered effect.
- Choose flameless candles that fit securely inside.
- Leave open space around the lanterns to avoid a crowded mantel.
- Repeat one finish elsewhere in the room for a cohesive look.
The same arrangement can move to a covered porch or console table when you want a quick seasonal refresh.
3. Hang a Geometric Metallic Statement Wall
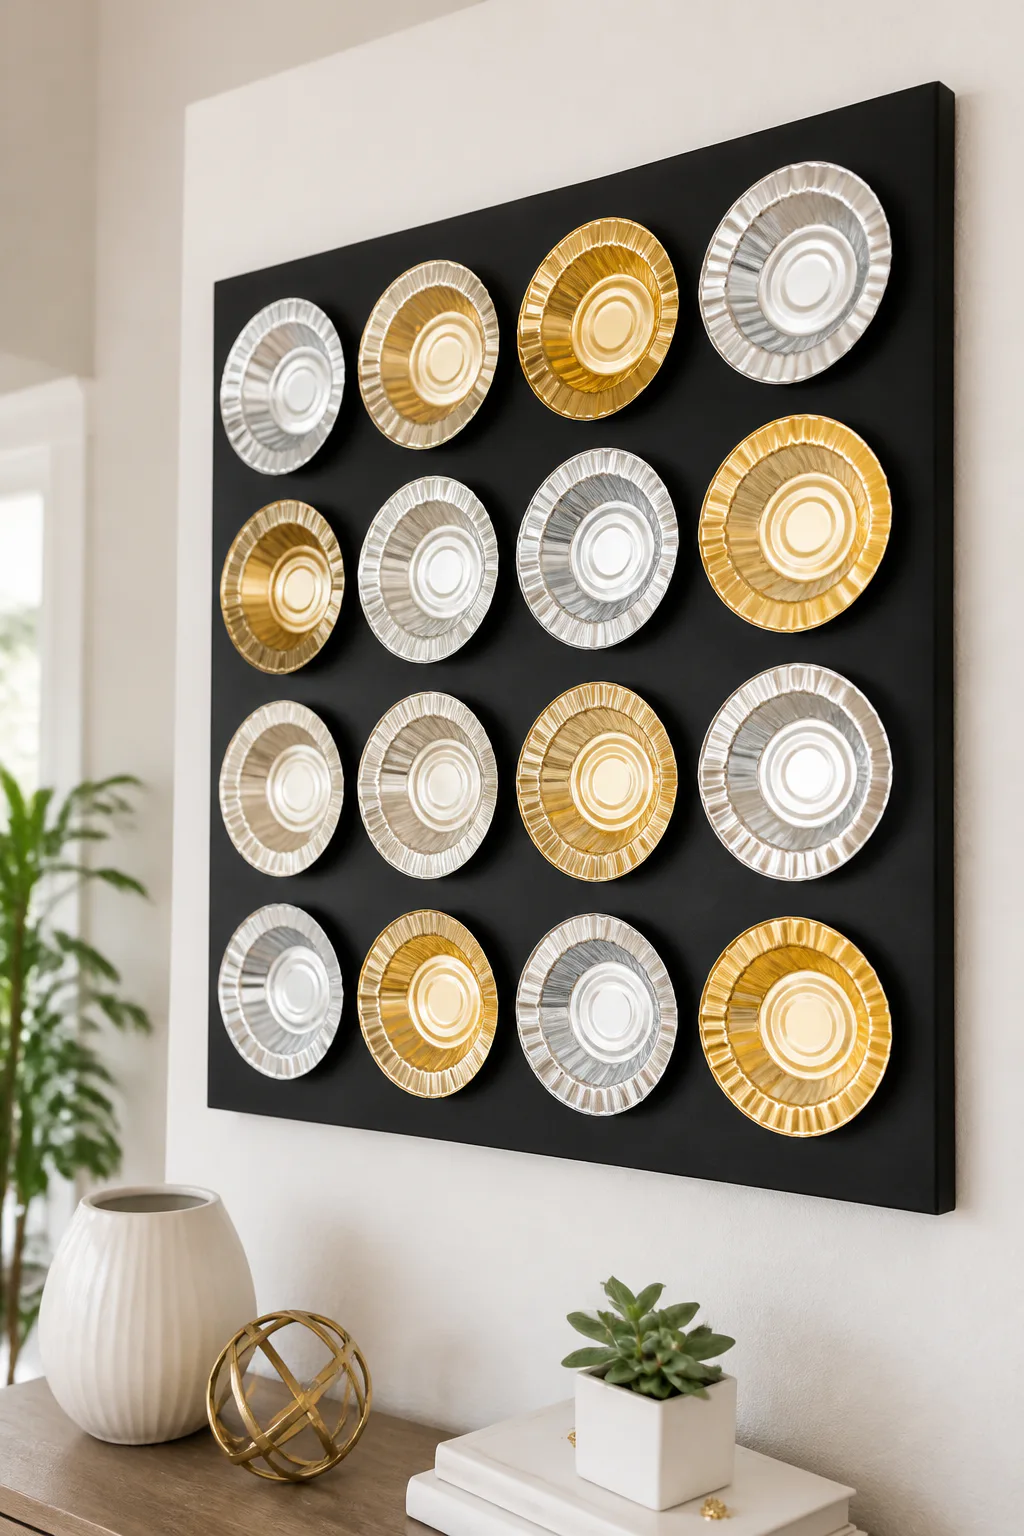
Best for: A big wall statement on a small budget
Effort: A weekend project
Metallic bowls or foil pans can become the building blocks for modern geometric wall art. Arranged in a tidy grid on a painted board, their reflective surfaces catch the light and create dimension without the need for a complicated design.
This project can fill a blank wall above a desk, dining nook, or console. A dark board makes silver or gold shapes stand out, while a pale background keeps the overall effect subtle and airy.
Plan the layout before attaching pieces
Set the shapes on the board first and adjust the spacing until the pattern feels balanced. Use an adhesive appropriate for the materials, and make sure the board and hanging hardware can safely support the finished piece before mounting it.
- Repeat one shape for a crisp, orderly grid.
- Mix metallic finishes only if the room already uses more than one.
- Measure the wall area so the artwork has enough breathing room.
- Press each piece firmly and allow the adhesive to cure as directed.
A simple geometric arrangement makes a strong focal point, so keep nearby accessories uncomplicated.
4. Create a Glass Apothecary Counter Display

Best for: Tidy bathroom or kitchen counters
Effort: Under an hour
Glass vases, candle holders, and decorative knobs can be combined into elevated jars that bring a polished touch to a bathroom or kitchen counter. A small holder beneath a glass vessel gives it height, while a knob on top creates the familiar shape of an apothecary jar.
Use the finished pieces to organize small items that are attractive enough to display, such as cotton balls or wrapped treats. Grouping two or three jars together can make a counter feel styled while keeping everyday essentials close at hand.
Assemble and use with care
Choose pieces with stable, flat contact points and use a strong clear adhesive intended for glass. Let the bond fully set before filling the jar, and treat the finished display as decorative storage rather than a food-safe container unless its materials and adhesive are specifically suitable for food.
- Match the glass shapes for a coordinated set.
- Clean surfaces thoroughly before gluing.
- Use lightweight contents to keep the display stable.
Clear glass keeps the arrangement visually light, even when the counter is in daily use.
5. Add a Woven Mat Accent Pillow
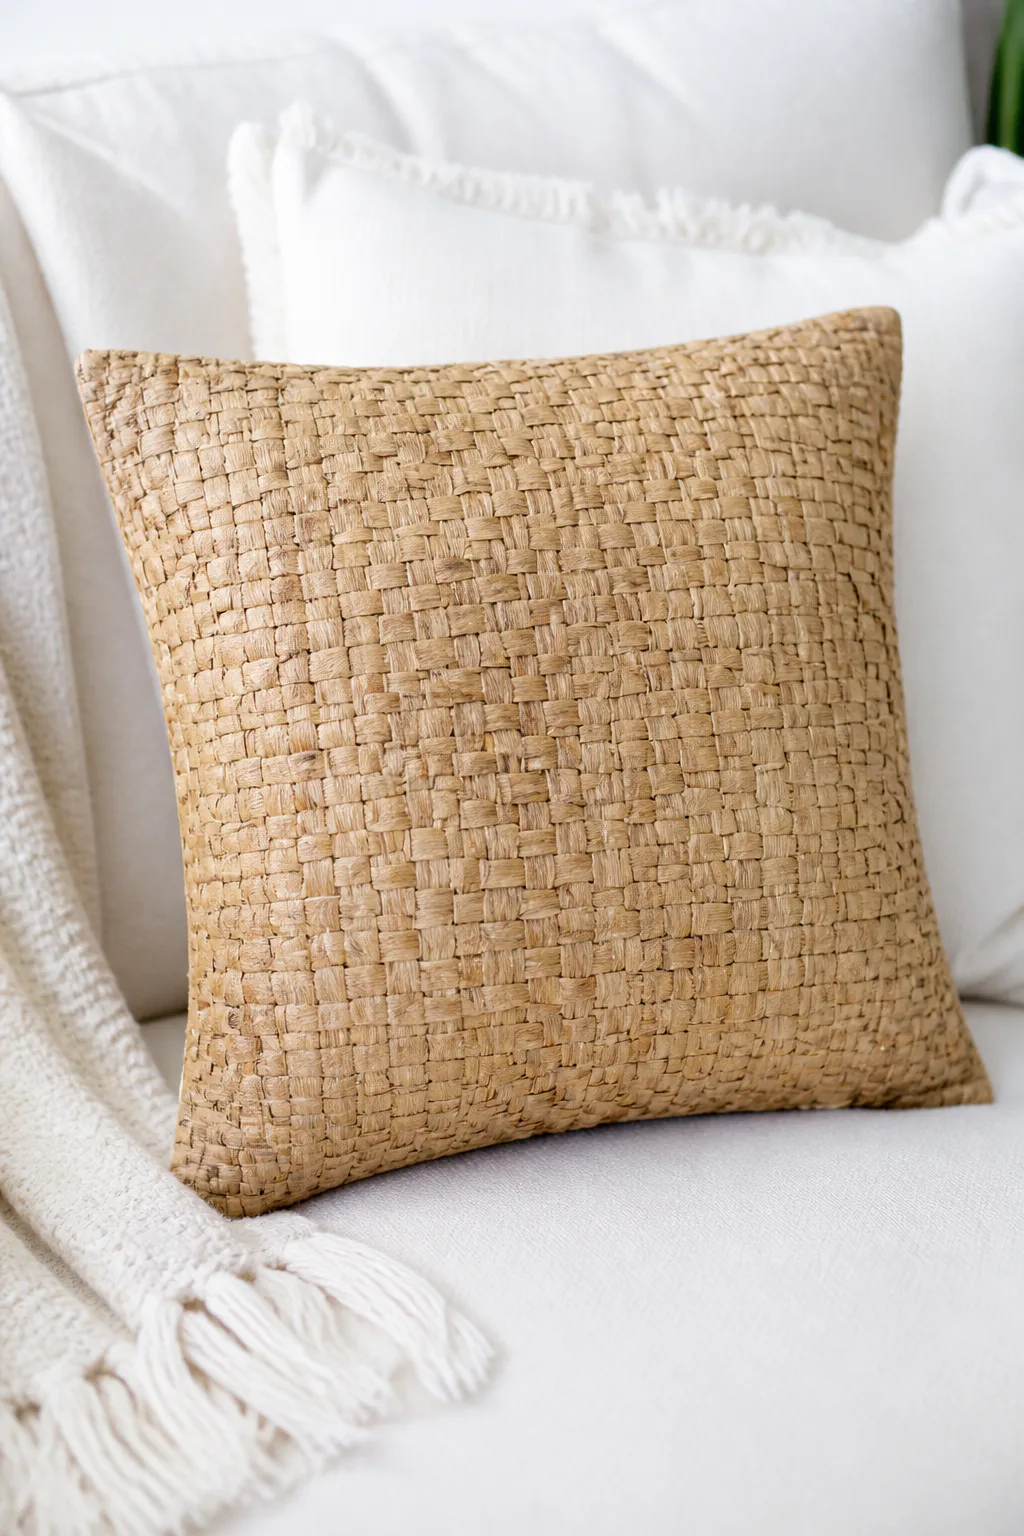
Best for: Boho and natural living rooms
Effort: An afternoon project
Two small woven mats or placemats can become a distinctive throw pillow with a tactile, relaxed finish. Their existing texture adds interest to a sofa or bed, especially when the surrounding cushions are plain or made from smoother fabrics.
Check that the mats feel comfortable against the surface where they will be used, and choose a color that connects with the room’s palette. A natural woven tone works well with linen, cotton, and wood accents, while darker mats can add contrast to a light sofa.
Join the pieces neatly
Place the mats together with their outer sides facing inward, then sew or carefully hot-glue three edges. Add stuffing until the pillow looks full but not stiff, and close the remaining edge with a neat seam or a line of glue.
- Trim loose fibers before assembly.
- Keep the filling evenly distributed toward the corners.
- Test hot glue on a hidden area to check how the mat responds.
- Use the pillow as a decorative accent rather than a washable cushion.
The finished piece adds handmade texture without requiring a separate fabric cover.
6. Build a Floating Botanical Frame Gallery
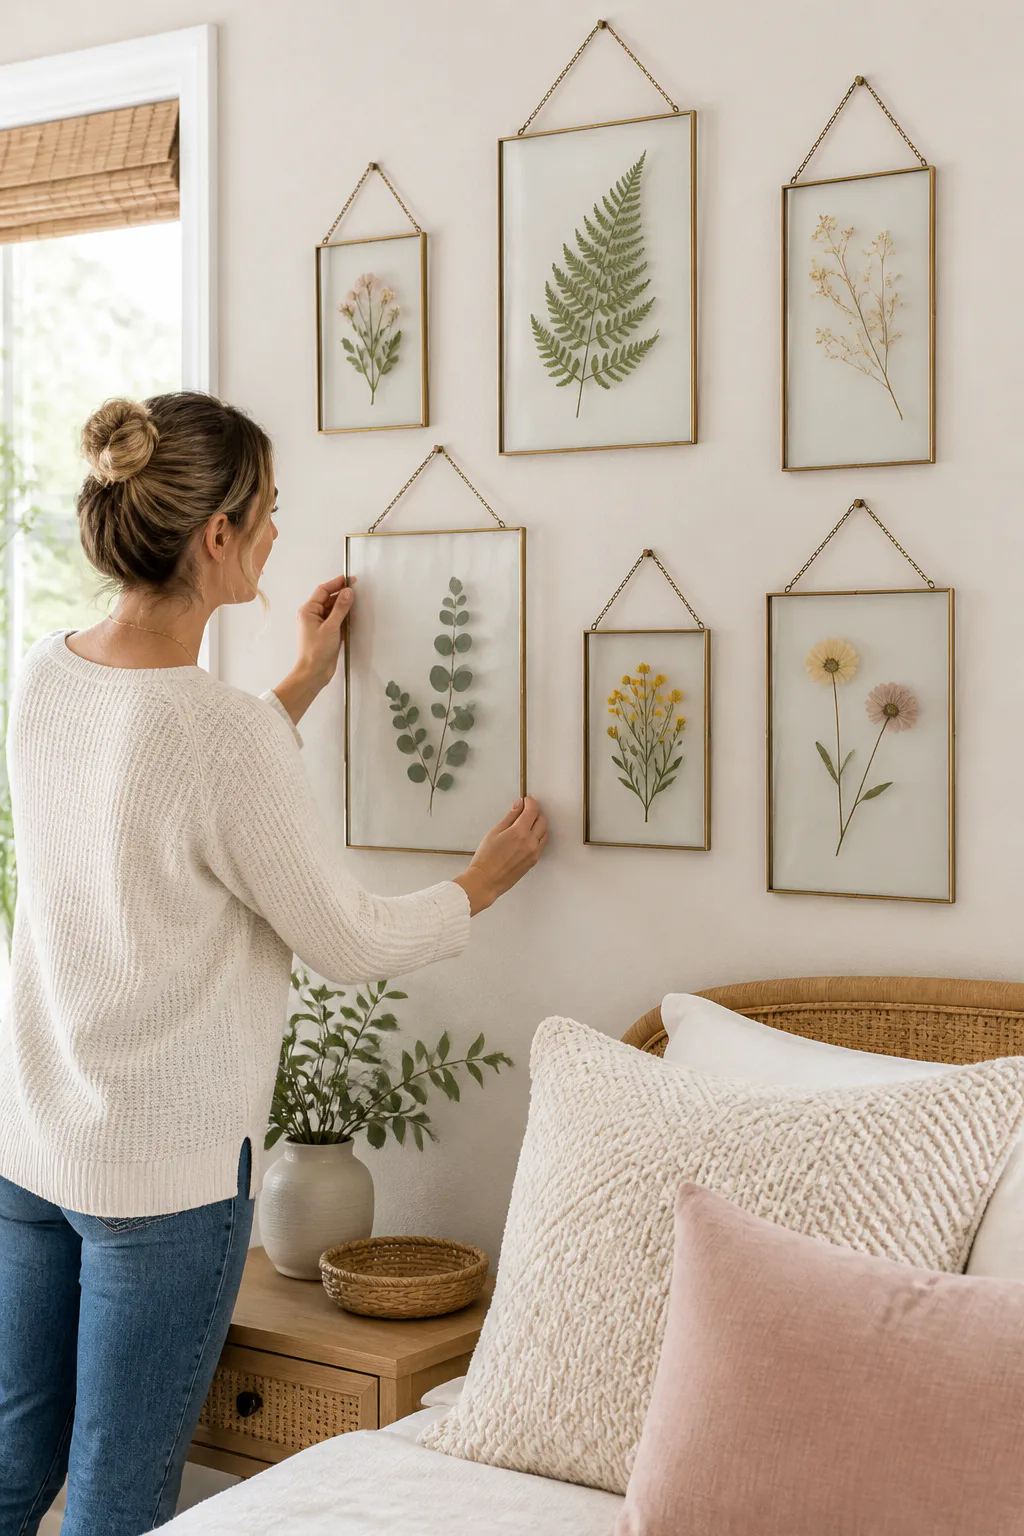
Best for: Bringing greenery to a blank wall
Effort: An afternoon project
Glass picture frames can make pressed leaves, flowers, or abstract art appear to float against the wall. With no heavy backing visible, the display feels light and lets the wall color become part of the composition.
Arrange several frames together above a bedside table, along a hallway, or near a reading corner. Repeating a frame size creates a tidy gallery, while mixing a few sizes gives the group a more casual, collected character.
Arrange before hanging
Place the frames on the floor or a table first to find a layout you like. Make sure the botanicals are completely dry, and check how the glass sits together before mounting; use hanging hardware that is secure for the frame and wall surface.
- Use delicate leaves for a calm, natural display.
- Try simple abstract shapes for a more graphic look.
- Keep spacing consistent for a structured gallery.
- Dust glass gently to avoid shifting the artwork.
A small group of transparent frames can add personality without visually crowding a room.
7. Set Up a Chic Tiered Coffee Bar Tray
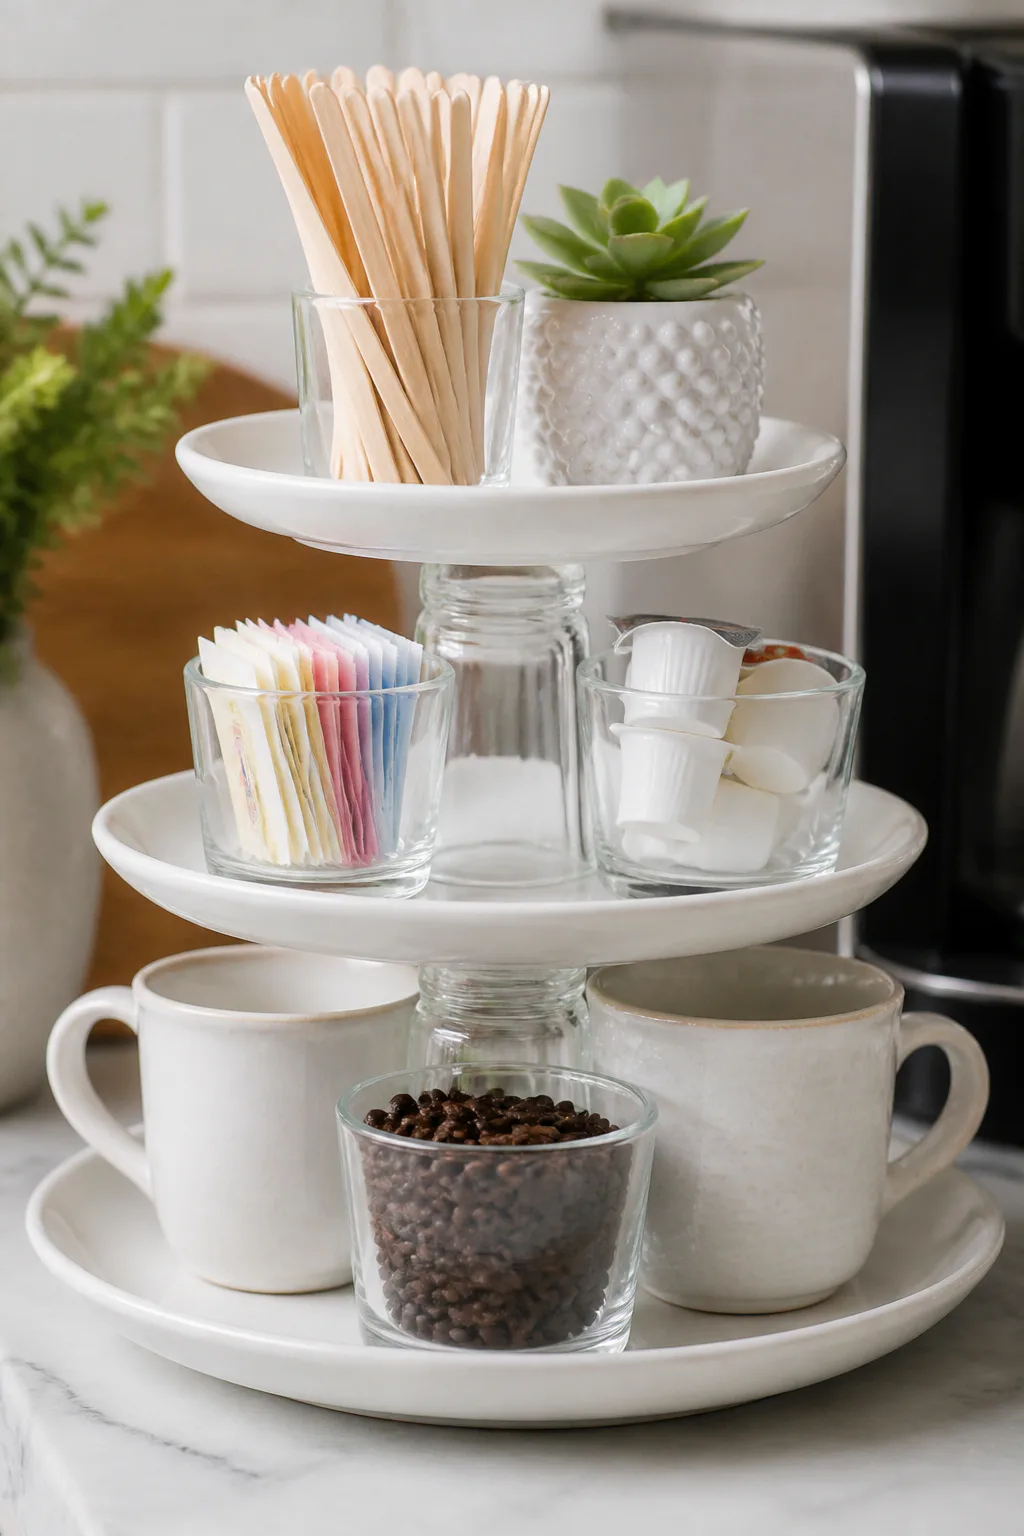
Best for: Coffee lovers and kitchen corners
Effort: Under an hour
A tiered tray made from plates and glass holders creates vertical storage for a coffee bar or kitchen counter. It keeps small accessories together while using less surface space than a row of separate containers.
Use the levels for items you reach for often, such as sweetener packets, stirrers, or small decorative accents. The display can also work on a sideboard for snacks or on a bathroom counter for neatly grouped essentials.
Build a stable stack
Choose plates that sit evenly on the holders and test the arrangement before gluing anything. A glass cup or candlestick holder can separate the tiers; once assembled, paint the piece in a uniform color if you want a more cohesive finish.
- Place the largest plate at the bottom for a steady base.
- Use a centered holder between each level.
- Keep heavier items on the lower tier.
- Allow adhesive to cure completely before adding supplies.
Keeping the contents limited to a few useful pieces helps the tray look organized rather than crowded.
8. Wrap a Basket in Coastal Jute Rope

Best for: Coastal style and hidden storage
Effort: An afternoon project
Jute rope gives a plain plastic bin or wire basket a warm, textured exterior. The natural fibers soften utilitarian shapes and bring a coastal or farmhouse note to a shelf, entryway, or open storage area.
A rope-wrapped basket can hold lightweight accessories, craft supplies, or small household items. Before starting, consider whether you want to cover the entire basket or leave part of the original material visible as a contrasting band.
Wrap in even rows
Begin near the base and work upward, applying small sections of hot glue as you go. Keep the rope snug and the rows close together so the basket looks even, but take care not to stretch or distort a flexible container as you wrap it.
- Choose a basket with a sturdy shape that holds its form.
- Cut rope in manageable lengths to reduce tangling.
- Press glued sections in place while the adhesive sets.
- Leave handles uncovered if you want them easy to grip.
The finished basket adds useful storage while making everyday clutter feel more considered.
9. Create Matching Bathroom Vanity Dispensers
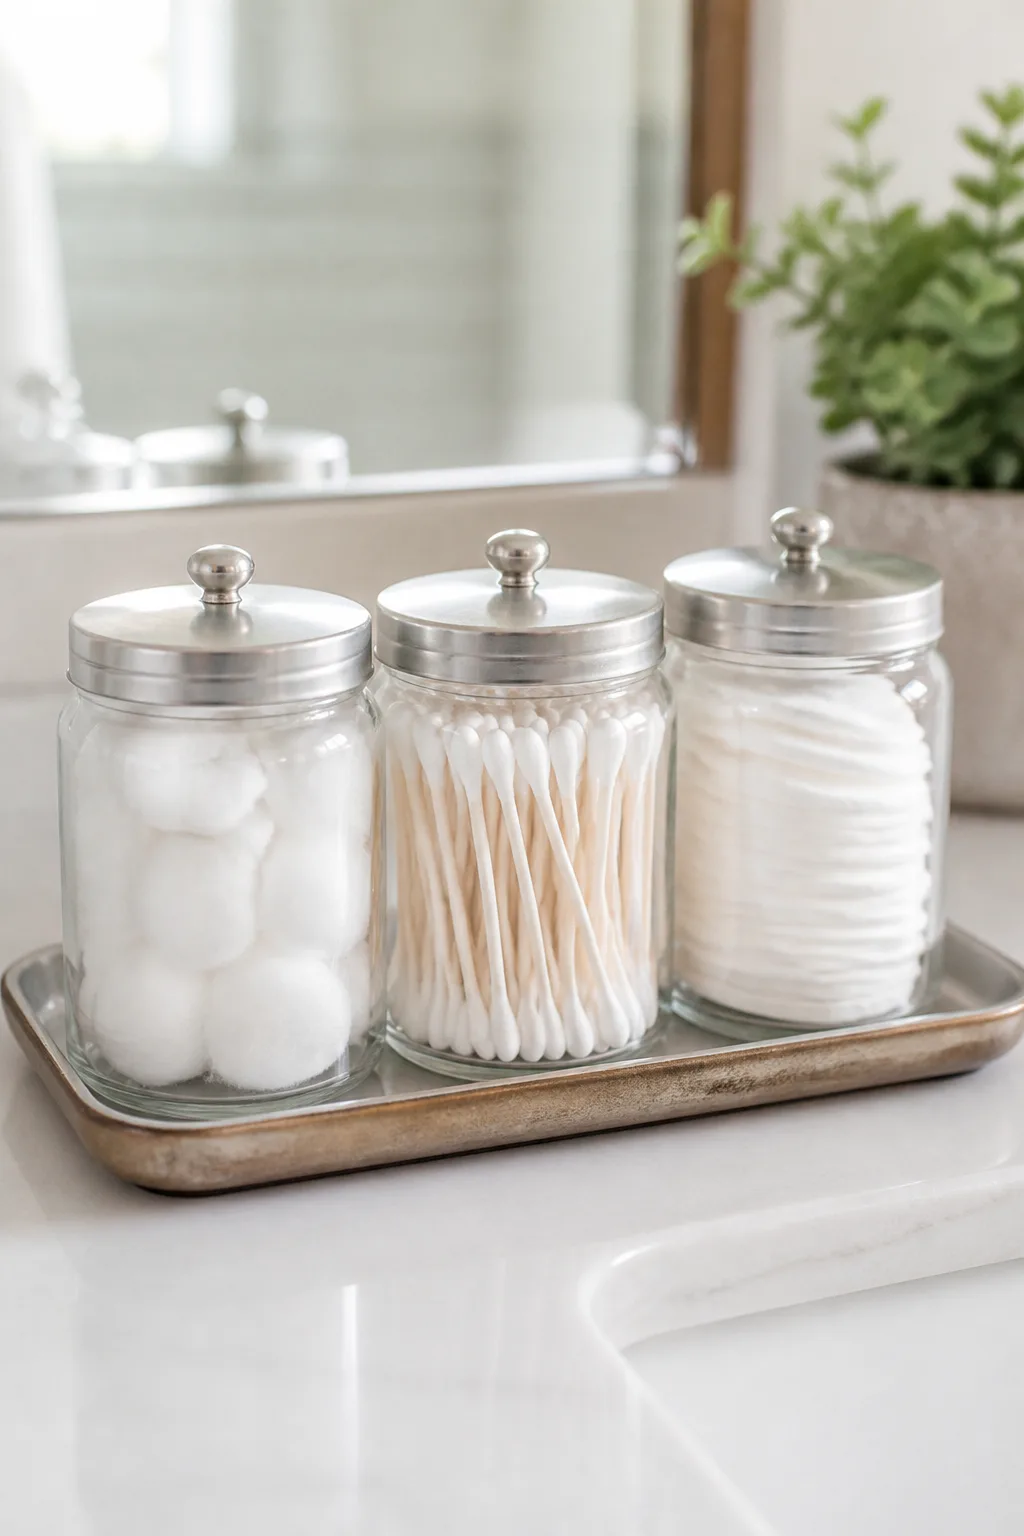
Best for: A spa-like matching vanity
Effort: Under an hour
Small spice jars can make tidy holders for cotton balls and swabs when their labels are removed and the containers are grouped together. Their compact size suits a bathroom vanity, where a few coordinated jars can keep essentials accessible without taking over the counter.
Use simple labels to distinguish the contents, especially if the jars have similar shapes. A clean, minimal arrangement works well with other bathroom finishes, from bright white towels to warm wood or metallic hardware.
Keep the setup practical
Wash and dry the jars thoroughly before filling them, and check that the lids are easy to remove. If you add labels, use a finish that can handle occasional splashes, and place the jars away from the sink edge where they could be knocked over.
- Remove any original labels and adhesive residue.
- Choose contents that fit comfortably through the jar opening.
- Use matching labels for a coordinated appearance.
- Keep the display limited to items you use regularly.
This small update can make daily routines feel more organized without adding bulky storage.
10. Make a Gold-Handled Marble Vanity Tray

Best for: Organizing perfume and jewelry
Effort: Under an hour
A serving tray can become a polished accent with a marble-look base and metallic handles. The contrast between the veined surface and warm gold finish gives a simple tray a dressier appearance for a vanity, coffee table, or dresser.
Use it to gather perfume, skincare, or a few tabletop accessories so small items read as one intentional arrangement. On a coffee table, the tray can corral coasters and a decorative object while leaving the rest of the surface open.
Apply the finishes smoothly
Cut marble-pattern contact paper to fit the tray base, smoothing from one side to the other to reduce bubbles. If painting the handles, protect the rest of the tray and let the finish dry fully before handling or placing objects on it.
- Measure the base before cutting the paper.
- Use a soft cloth or card to smooth the surface.
- Keep the painted handles free of fingerprints while drying.
- Wipe the tray gently rather than soaking it.
A restrained arrangement on top lets the marble effect remain visible and do its decorative work.
11. Arrange a Neutral Faux Floral Centerpiece

Best for: Dining tables and entry consoles
Effort: Under an hour
A glass bowl, floral foam, stones, and faux greenery can come together as a low, organic centerpiece. Neutral leaves and soft textures bring a natural note to a dining table without needing fresh flowers or a tall arrangement that blocks conversation.
This project works on a dining table, coffee table, or kitchen island. A low bowl is especially useful in busy rooms because it adds color and texture while keeping sightlines open across the surface.
Build a balanced arrangement
Fit floral foam inside the bowl and cover exposed areas with stones before adding stems. Place greenery at different angles, turning the bowl as you work so the arrangement looks appealing from several sides rather than only from the front.
- Choose foliage in a limited palette for a calm look.
- Vary stem heights without making the display top-heavy.
- Use stones to conceal foam and add visual weight.
- Check the arrangement from each side of the table.
The finished centerpiece can stay in place year-round and be refreshed with seasonal accents.
12. Display Candles on Painted Mini Risers
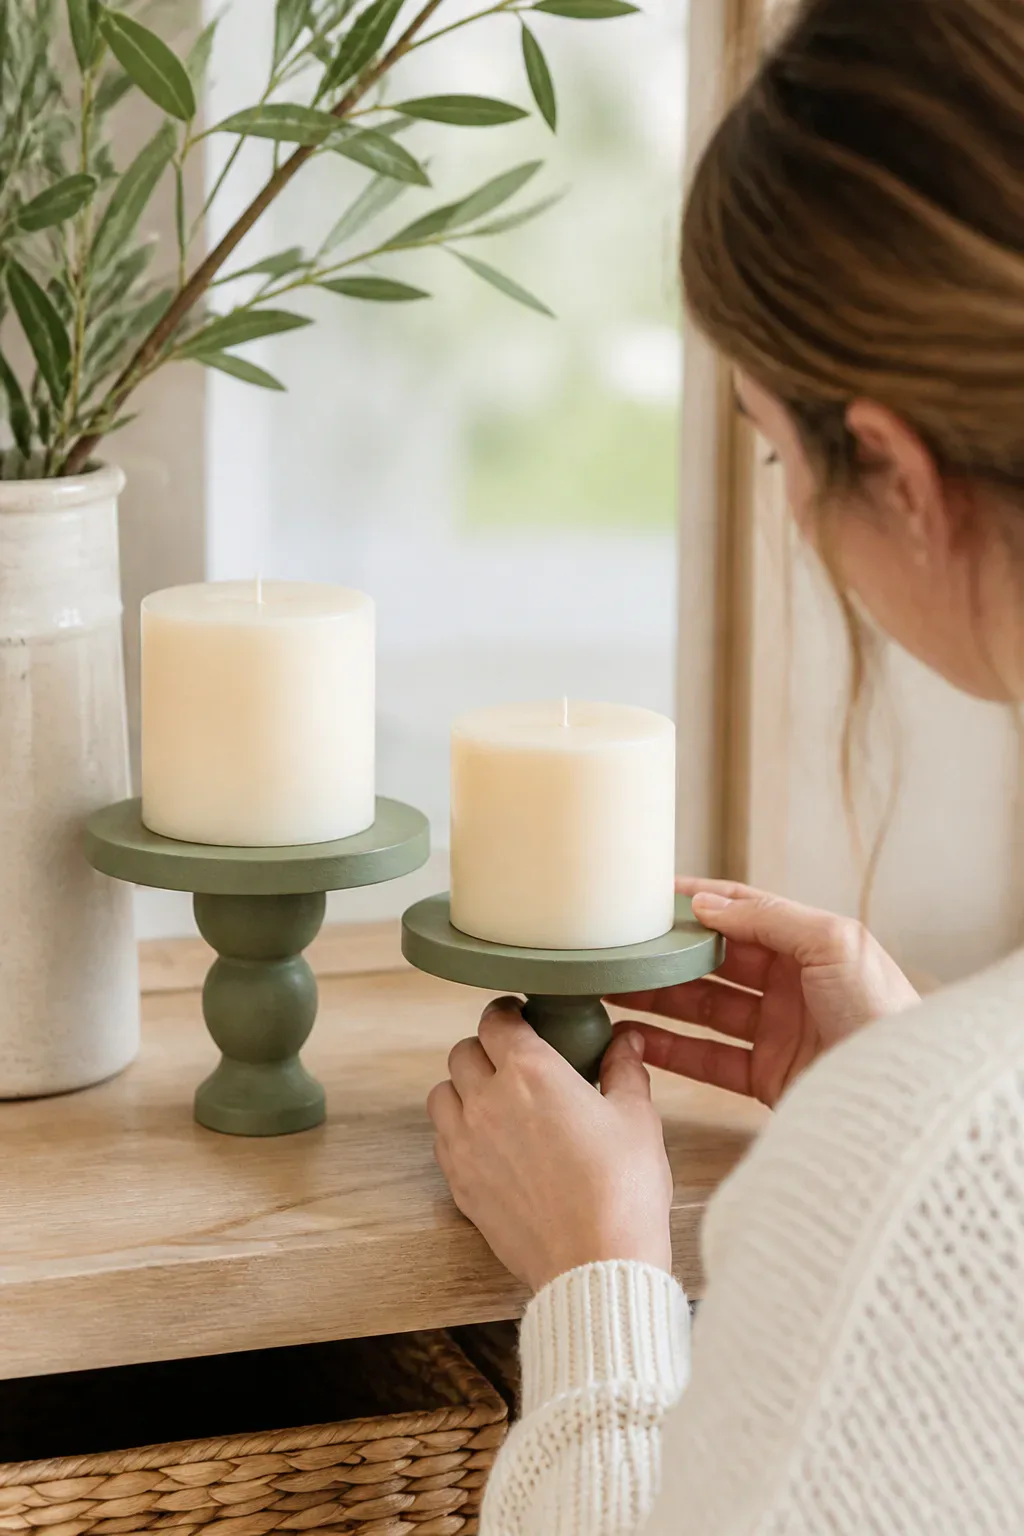
Best for: Adding height to candle displays
Effort: Under an hour
Small wooden plaques paired with doll heads or napkin rings can form simple pedestal risers. Painting the pieces in one color helps them read as miniature stands, adding height to candles, soaps, or small decorative objects on a shelf or tabletop.
Varying the height of a display makes a grouping feel more layered. Use one or two risers among flatter objects rather than elevating everything, so the arrangement keeps a natural rhythm and remains easy to use.
Assemble a steady base
Center the wooden support beneath each plaque and attach it with an adhesive suited to the materials. Let the bond set before painting, then check that every riser sits flat before placing anything on top.
- Pair a larger top with a stable, centered support.
- Paint all parts before assembly if that gives cleaner edges.
- Keep heavier objects on the widest riser.
- Use candle risers on a level surface and supervise lit candles.
These little platforms are an easy way to give everyday items a more intentional place in a vignette.
13. Drape a Beaded Garland Over Decor
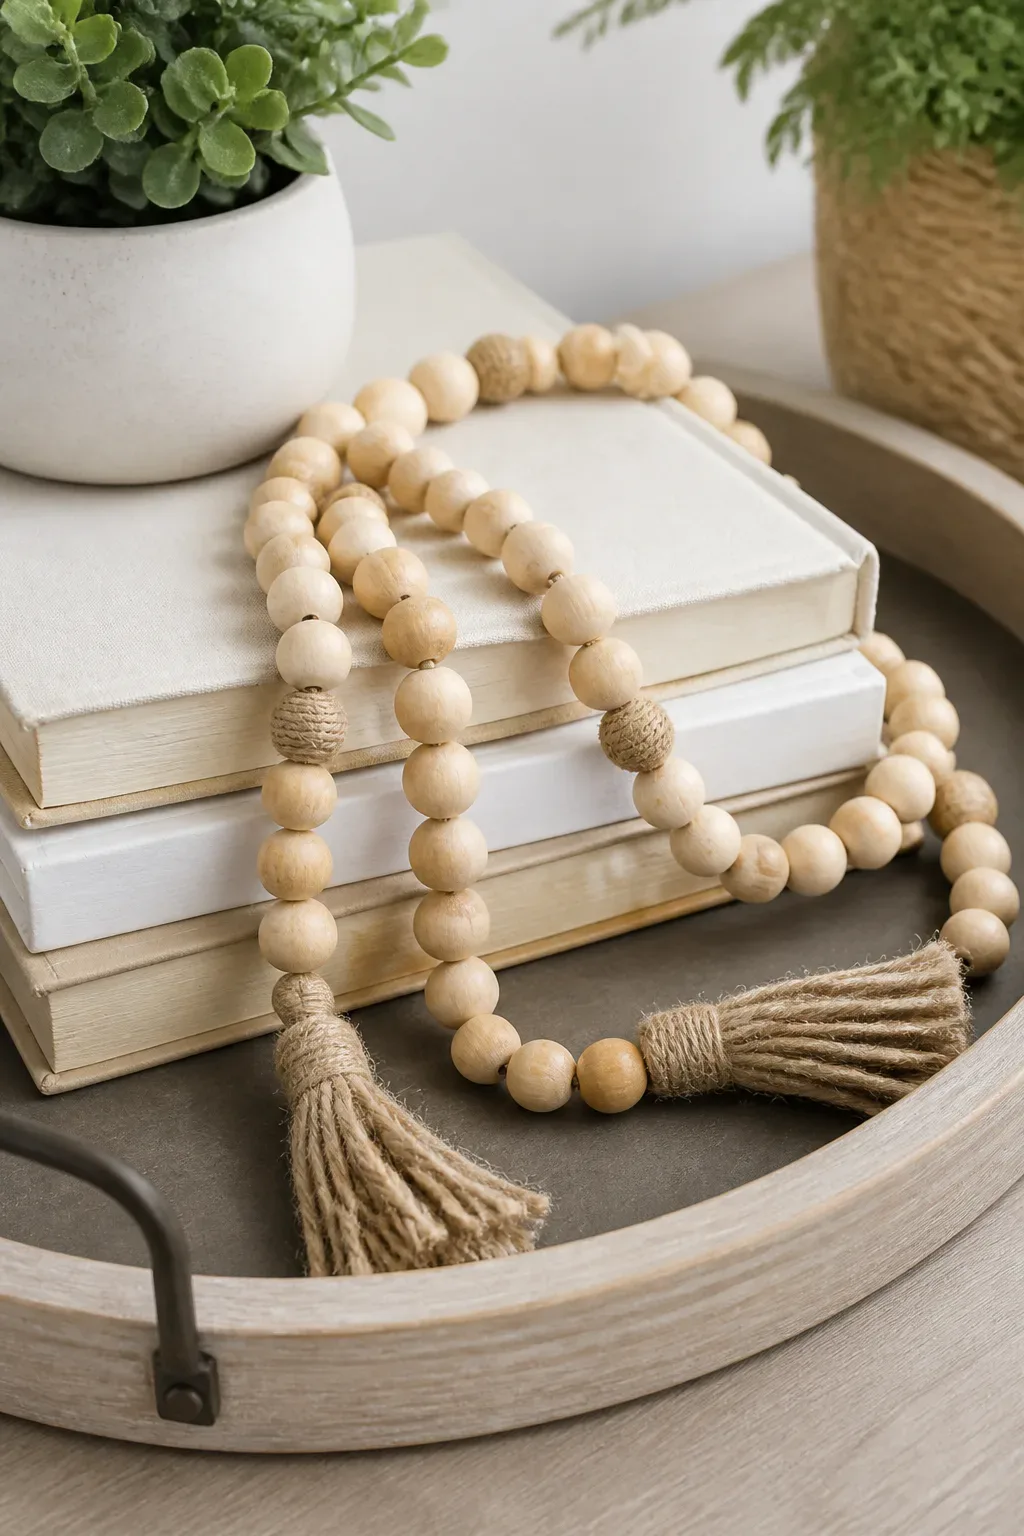
Best for: Quick shelf and coffee-table styling
Effort: Under an hour
A jute-and-wood bead garland adds a soft, handmade detail to a stack of books or a decorative tray. Its natural materials bring texture to a shelf without adding a large object, making it an easy finishing touch for a living room, bedroom, or entryway.
Let the garland fall loosely instead of pulling it into a rigid line. The beads can echo other wood tones in the room, while small jute tassels add a relaxed finish that suits both farmhouse and boho-inspired spaces.
Style it with a light touch
Lay the garland over the edge of a tray or across a short book stack, then adjust the drape until it feels balanced. Keep it away from flames, curious pets, and spots where it could snag or be pulled down.
- Repeat the room’s natural wood tones for cohesion.
- Use a simple tassel at each end for a finished look.
- Pair it with books or a tray that have clean, simple shapes.
- Avoid layering it over too many small accessories.
Because it is easy to move, the garland can refresh a display whenever the season or room arrangement changes.
14. Make a Boho Sunburst Mirror Wall Accent
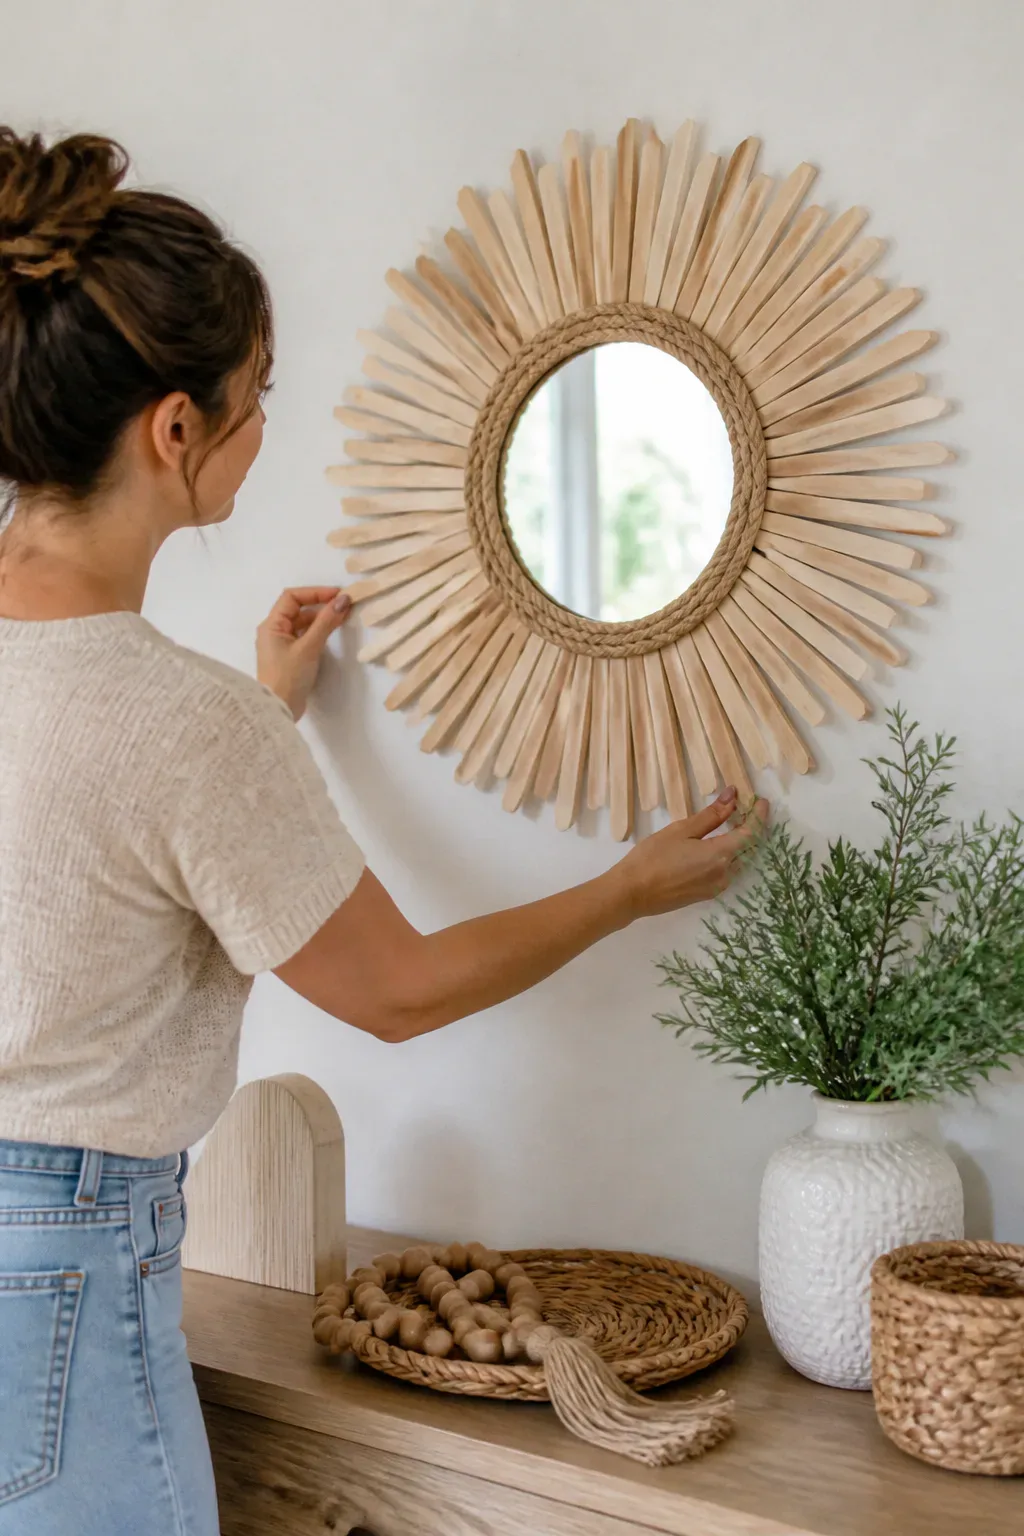
Best for: A warm boho focal point
Effort: A weekend project
A small round mirror can become a striking wall accent when framed with craft sticks or a woven placemat. The radiating shape draws the eye outward, giving a compact mirror more presence above a console, in a hallway, or near a bedroom dresser.
Craft sticks create a crisp, graphic sunburst, while a woven backing gives the piece a softer, more natural look. Choose the version that best complements nearby materials, and keep the surrounding wall relatively simple so the shape has room to stand out.
Arrange the rays evenly
Lay out the mirror and backing before attaching anything, checking the spacing from several angles. Secure the pieces with an adhesive appropriate to their surfaces, and add a reliable hanging method to the backing rather than relying on the mirror alone.
- Mark a center point to keep the rays balanced.
- Paint craft sticks for a unified finish if desired.
- Use a woven placemat for a softer, textured border.
- Confirm the finished piece is secure before hanging.
The mirror adds function as well as a handcrafted focal point to an otherwise empty wall.
15. Build a Tiered Plant and Trinket Stand

Best for: Plants and small collections
Effort: An afternoon project
A compact tiered stand creates several small display surfaces for succulents, keys, or decorative objects. Round pans or plates arranged at different heights can make use of vertical space on an entryway table, kitchen counter, or plant shelf.
Keep the display pieces lightweight and consider how the stand will be used before choosing its location. A plant arrangement may need room for watering, while a key station should sit somewhere easy to reach as you come and go.
Keep the tiers balanced
Arrange the levels around a central dowel or a stack of candlestick holders, checking stability as you build. Attach each tier securely and paint the assembled stand in one color if you want the different components to feel like a coordinated piece.
- Place the widest tier at the bottom for a steadier base.
- Leave enough space for items to sit without touching.
- Use small, lightweight objects on upper levels.
- Test the stand on a level surface before styling it.
A thoughtful mix of practical and decorative items keeps this little stand useful as well as attractive.
Frequently Asked Questions
What are the easiest Dollar Tree DIY decor projects?
Candles on painted risers, a beaded garland, a jute-wrapped basket and a faux floral centerpiece need only glue, paint or twine.
How do I make Dollar Tree decor look expensive?
Stick to a neutral palette, use textured or metallic paint finishes and group pieces in odd numbers on trays or risers.
What supplies do I need for Dollar Tree DIY projects?
Most projects use a hot glue gun, spray or craft paint, jute rope, adhesive labels and basic picture-hanging hardware.
Are Dollar Tree DIY projects good for renters?
Yes. Most are freestanding pieces like trays, vases and garlands, and wall accents can hang on removable hooks.
Final Thoughts
These Dollar Tree DIY home decor ideas show how a few simple materials can become useful, personal accents for the rooms you use every day. Whether you prefer a textured vase, an organized vanity, or a statement wall piece, start with a project that suits the space and style you already have.
Take your time with layout, adhesive, and finishing touches, and adapt colors or materials to make each idea feel like yours. Even one small handmade update can bring fresh texture and character to a shelf, counter, or blank wall.



