11 Clever Dollar Tree Christmas DIY Decor Ideas
Dollar Tree Christmas DIY decor can make a home feel festive without requiring a full room makeover. A few affordable craft basics—like small ornaments, faux greenery, jars, tins, and ribbon—can become thoughtful accents when you combine them with a clear color palette and a little patience.
These projects include both tabletop pieces and decorations you can hang, so there are options for mantels, dining tables, staircases, and cozy corners. Some use simple assembly, while others invite you to reuse a seasonal sign or everyday container you already have.
Use the ideas as starting points and adjust the finishes to suit your home, whether you lean toward traditional red and green, soft neutrals, or a mix of metallics. Before crafting, gather your materials and check that each piece is stable and suitable for its intended spot, especially around candles, pets, and busy walkways.
Quick Answer
The best Dollar Tree Christmas DIY decor ideas are glowing pinecone snow globes, a raised Christmas centerpiece, framed dimensional sheet music, plaid tin display risers and a seasonal sign refreshed with evergreens. You can also make a bottle brush tree wreath, a colorful ornament garland, a plush snowman tree display, mini winter wonderland cloches, a rustic mop-head gnome and cinnamon stick bundles.
1. Create Glowing Pinecone Snow Globes
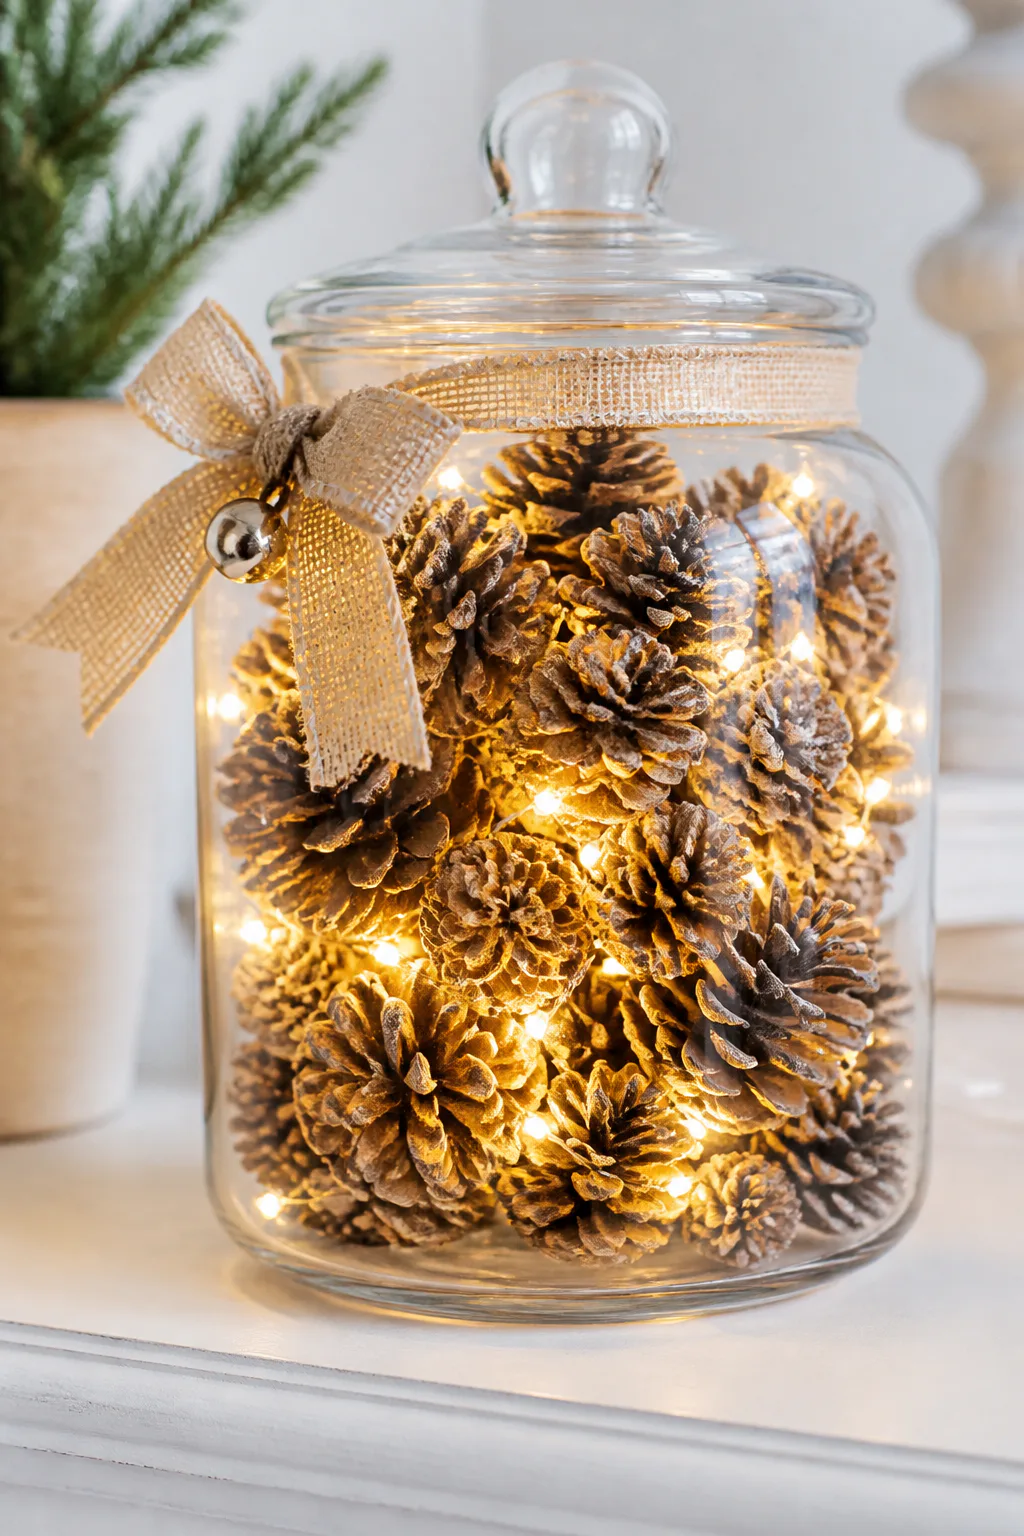
A clear jar or plastic globe filled with mini pinecones and soft lights makes a charming seasonal accent for a mantel, entry table, or bookshelf. The transparent container keeps the arrangement visually light, while the natural texture of the pinecones gives it a cozy woodland feel.
Battery-operated fairy lights are a practical choice because they avoid a cord trailing across the display. Choose warm white lights for a gentle glow, or use a cool tone if your holiday palette includes icy blues and silver. A little open space inside the container helps the lights remain visible rather than getting lost among the filler.
How to style the display
Start with a clean, dry container and arrange the pinecones loosely before adding the lights. Tuck the battery pack where it can be reached easily, then finish the lid with ribbon or a small bell if you want a more gift-like look.
- Use pinecones in a few sizes for a less uniform arrangement.
- Keep the light strand visible near the front of the container.
- Repeat the ribbon color elsewhere on the mantel for cohesion.
- Set the display away from open flames and damp areas.
2. Build a Raised Christmas Centerpiece Tray
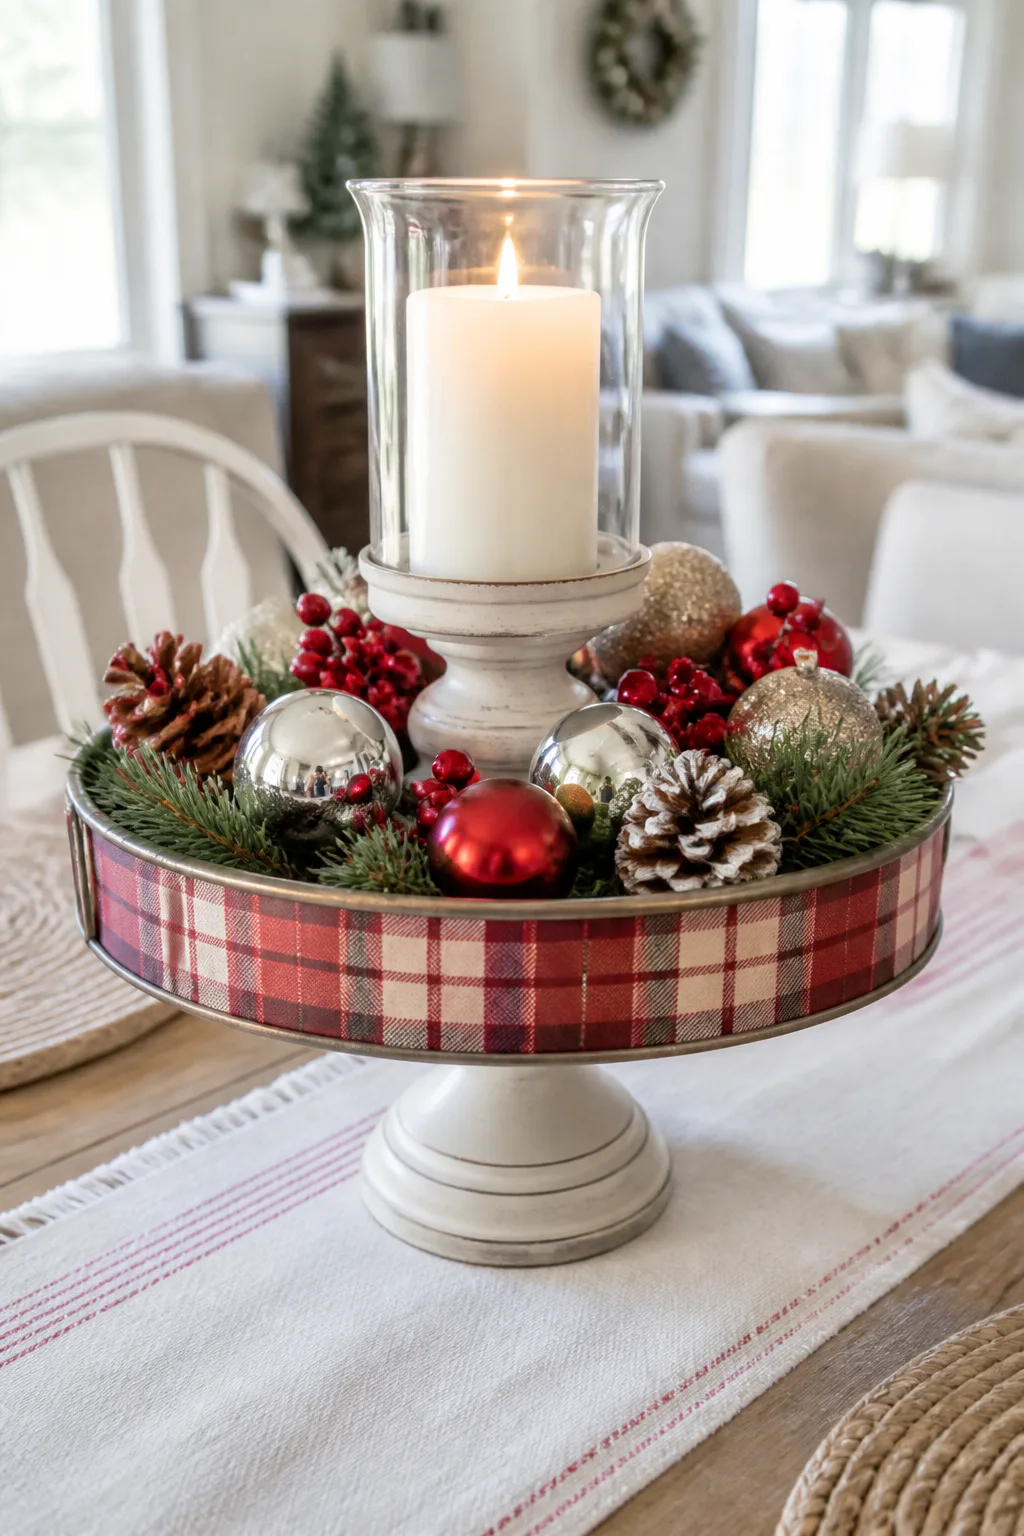
An elevated tray gives candles, ornaments, or small seasonal decorations a more intentional place on a dining or coffee table. Pairing a decorative tin with a candle holder creates height, which can make a simple arrangement feel like a centerpiece without filling the whole table.
Choose a tin with a pattern that suits your room, or use a plain one and add a trim of holiday ribbon. A neutral finish can help the tray work with different decor, while a classic festive pattern makes it feel especially seasonal. Keep the finished piece broad enough to hold your display without making it difficult to see across the table.
Assemble and style it
Test the candle holder and tin together before attaching them, checking that the base sits flat and the top is balanced. Use an adhesive appropriate for the materials, follow its directions, and allow it to fully set before placing anything on the tray.
- Arrange candles or ornaments in a loose group rather than a crowded row.
- Add faux greenery around the base for a softer edge.
- Keep real candles away from ribbon and faux foliage.
- Use the tray to gather small decor so the tabletop stays tidy.
3. Frame Dimensional Holiday Sheet Music Art
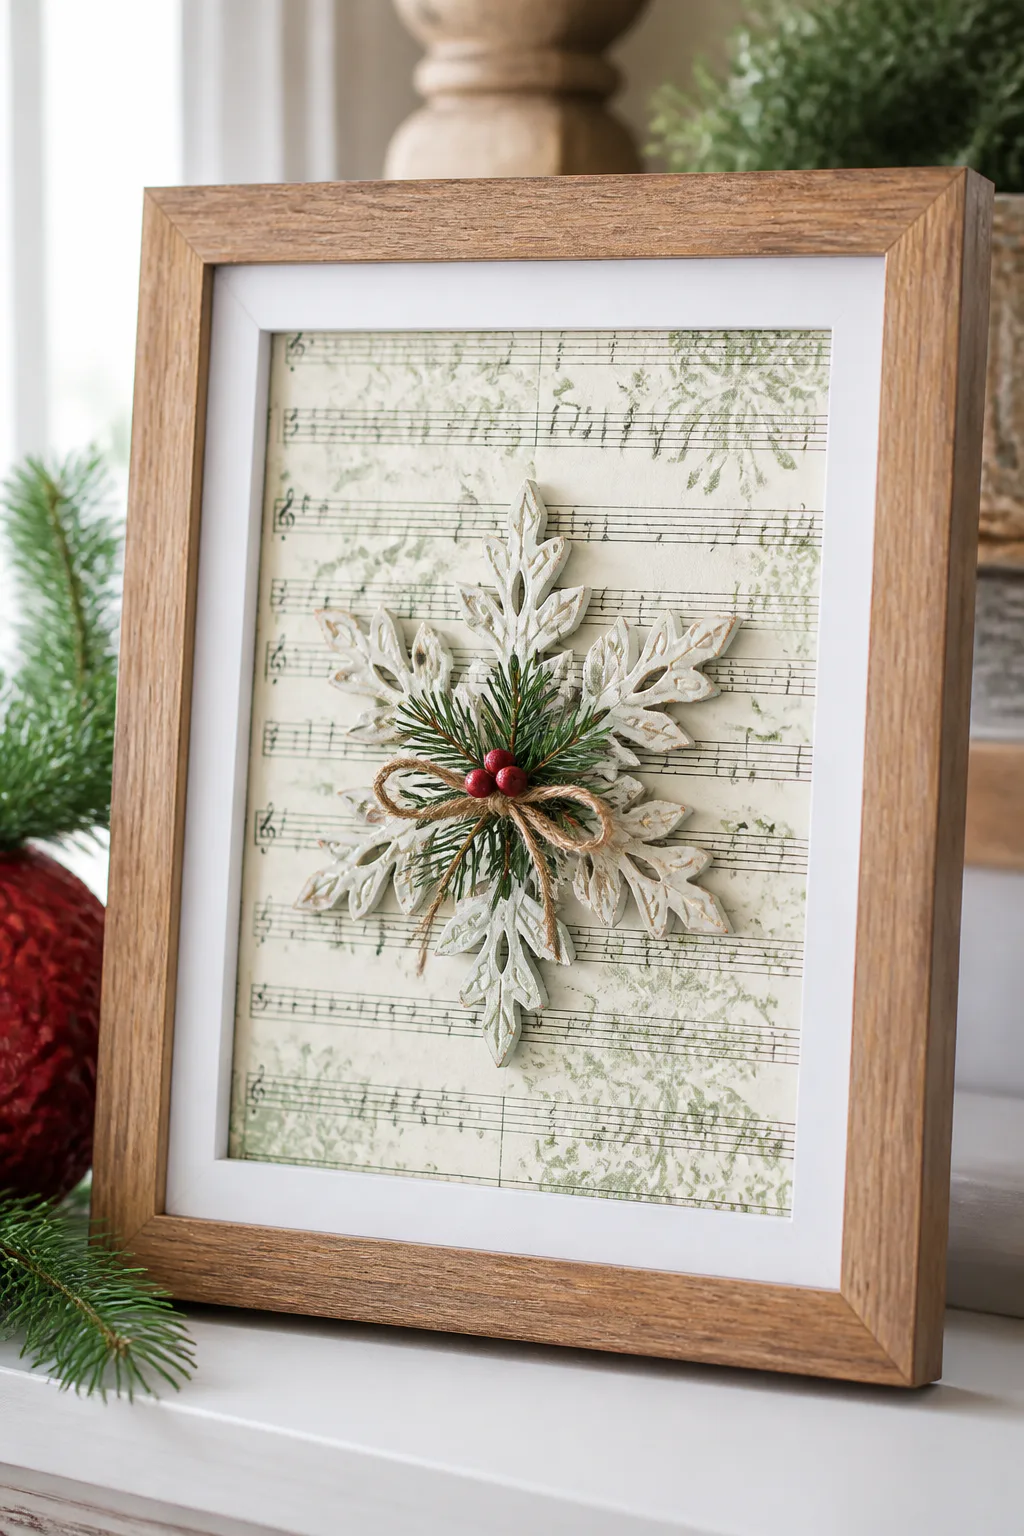
Framed holiday paper offers an easy way to bring seasonal color to a shelf, mantel, or gallery wall. Scrapbook paper, a festive napkin, or sheet music can serve as the background, giving the project a tailored look without needing a complicated painting technique.
A raised ornament or foam cutout adds dimension and creates a small focal point. This works especially well when the paper has a quiet pattern, since the embellishment can stand out without competing with too many details. A simple frame also lets you coordinate the piece with the finishes already in the room.
Layer the artwork
Trim the background to fit the frame, then position the dimensional accent before securing it. Foam dots can lift a lightweight decoration from the surface, but check that the frame still closes comfortably and that the embellishment does not press hard against the glass.
- Choose a background with enough open space for the raised detail.
- Use one main ornament shape rather than several competing motifs.
- Repeat a color from the paper in nearby ribbon or greenery.
- Display the frame on a stable shelf or hang it securely.
4. Make Plaid Tin Display Risers
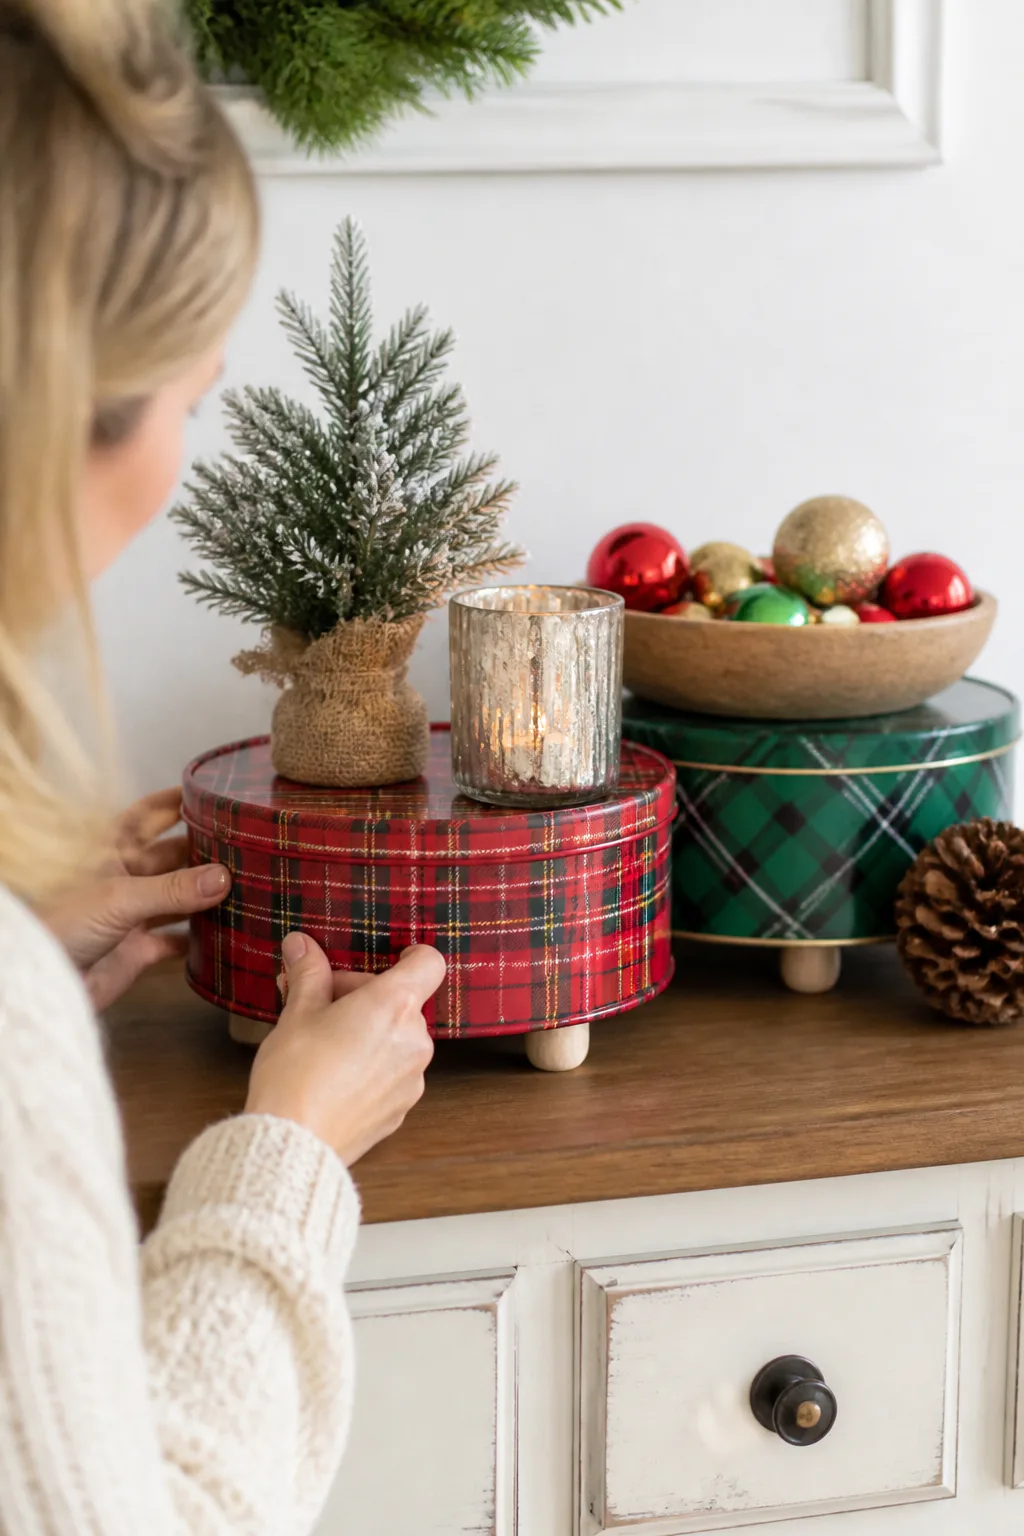
Flipped cookie tins can become handy risers for seasonal decor, helping smaller pieces stand out on a sideboard, kitchen counter, or dining table. Plaid designs bring a familiar holiday pattern, while the hidden underside creates a platform for displaying a little tree, a candle, or a cluster of ornaments.
Adding small feet gives the tin more height and makes it look like a purpose-made stand. You can use matching tins for a coordinated layered display or choose different sizes and patterns for a collected feel. Keep the overall arrangement stable, especially if the riser will sit where people pass or reach for items.
Build a steady base
Turn the tin over and decide where each foot should go before attaching anything. Small wooden cups or knobs can work as supports; make sure they are evenly spaced and level so the platform does not wobble once decorated.
- Choose a lightweight display item that suits the tin’s size.
- Use a level surface and check the stand before adding decor.
- Mix one patterned tin with simpler pieces to avoid visual clutter.
- Keep food off the finished riser unless its materials are food-safe.
5. Refresh a Seasonal Sign with Evergreen
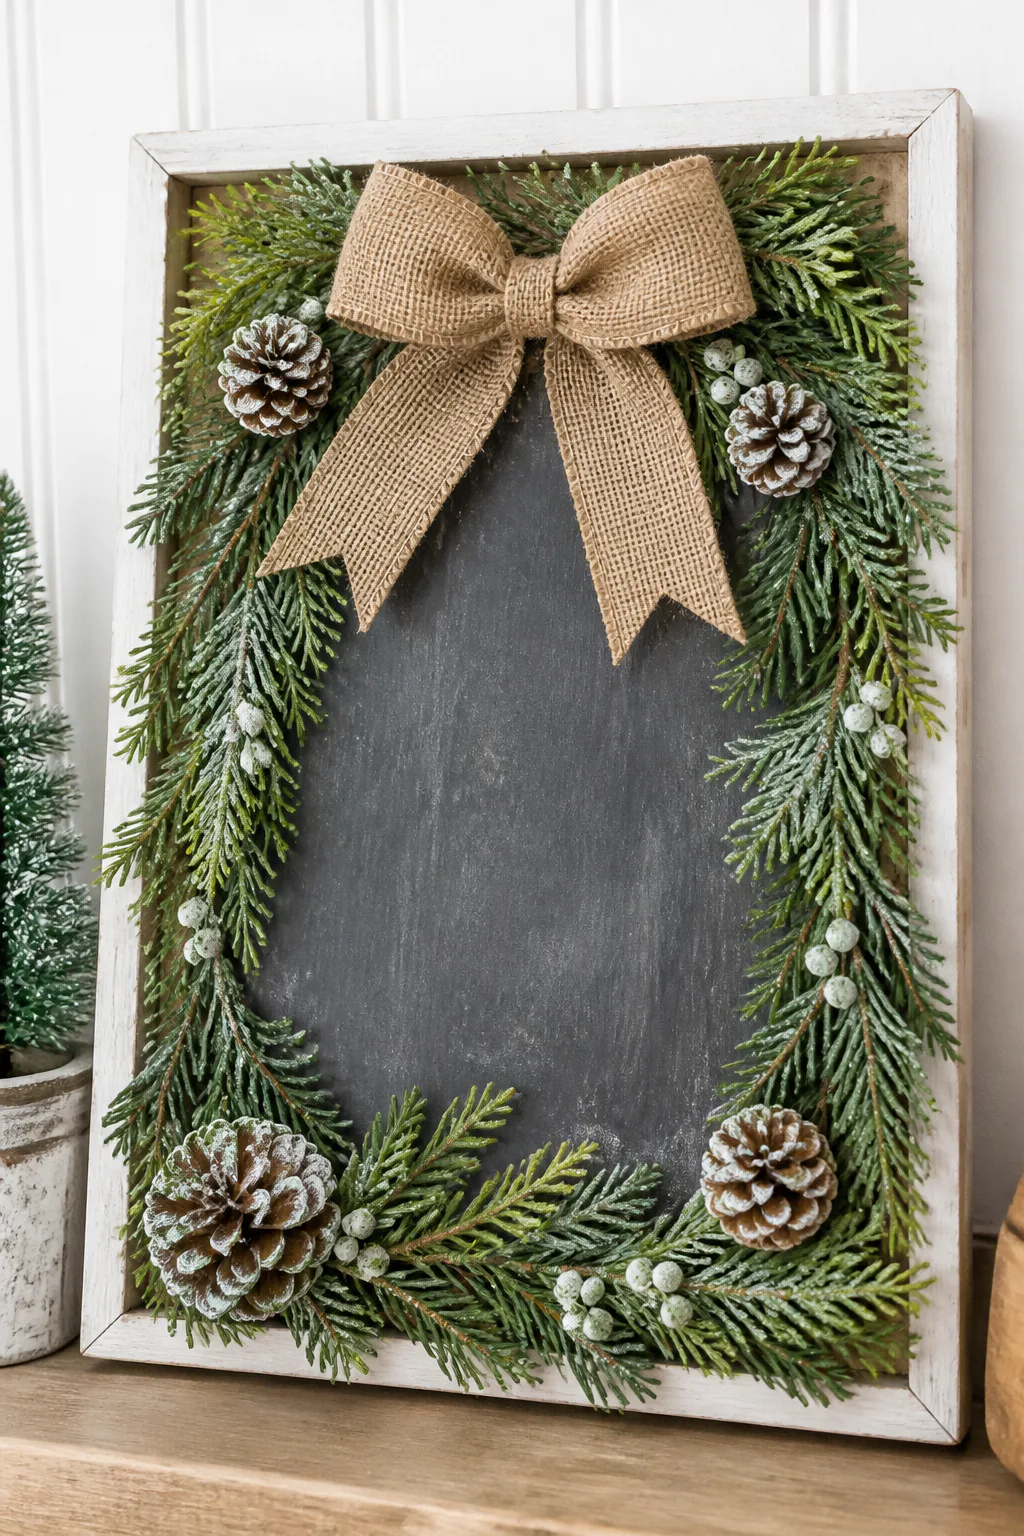
An old seasonal sign can get a fresh look when you cover the original design and add a new holiday message. This is a useful approach for a sign that still has a solid frame or backing but no longer matches your current color scheme or decorating style.
Ribbon, faux evergreen, and a simple cutout can create layers that soften the surface and bring in texture. Place the refreshed sign on an entry table, lean it on a mantel, or hang it where the new message can be read easily. Keeping the palette consistent with nearby decor helps the update feel intentional.
Plan the new design
Before gluing anything down, lay out the ribbon and greenery to see how much of the old graphic needs to be covered. Arrange the message where it remains easy to read, and use an adhesive suited to the sign’s surface and embellishments.
- Cover old lettering fully if it shows through the new design.
- Trim greenery into small pieces for a more controlled arrangement.
- Use a short message that fits the sign without crowding it.
- Let the finished sign dry flat before hanging or leaning it.
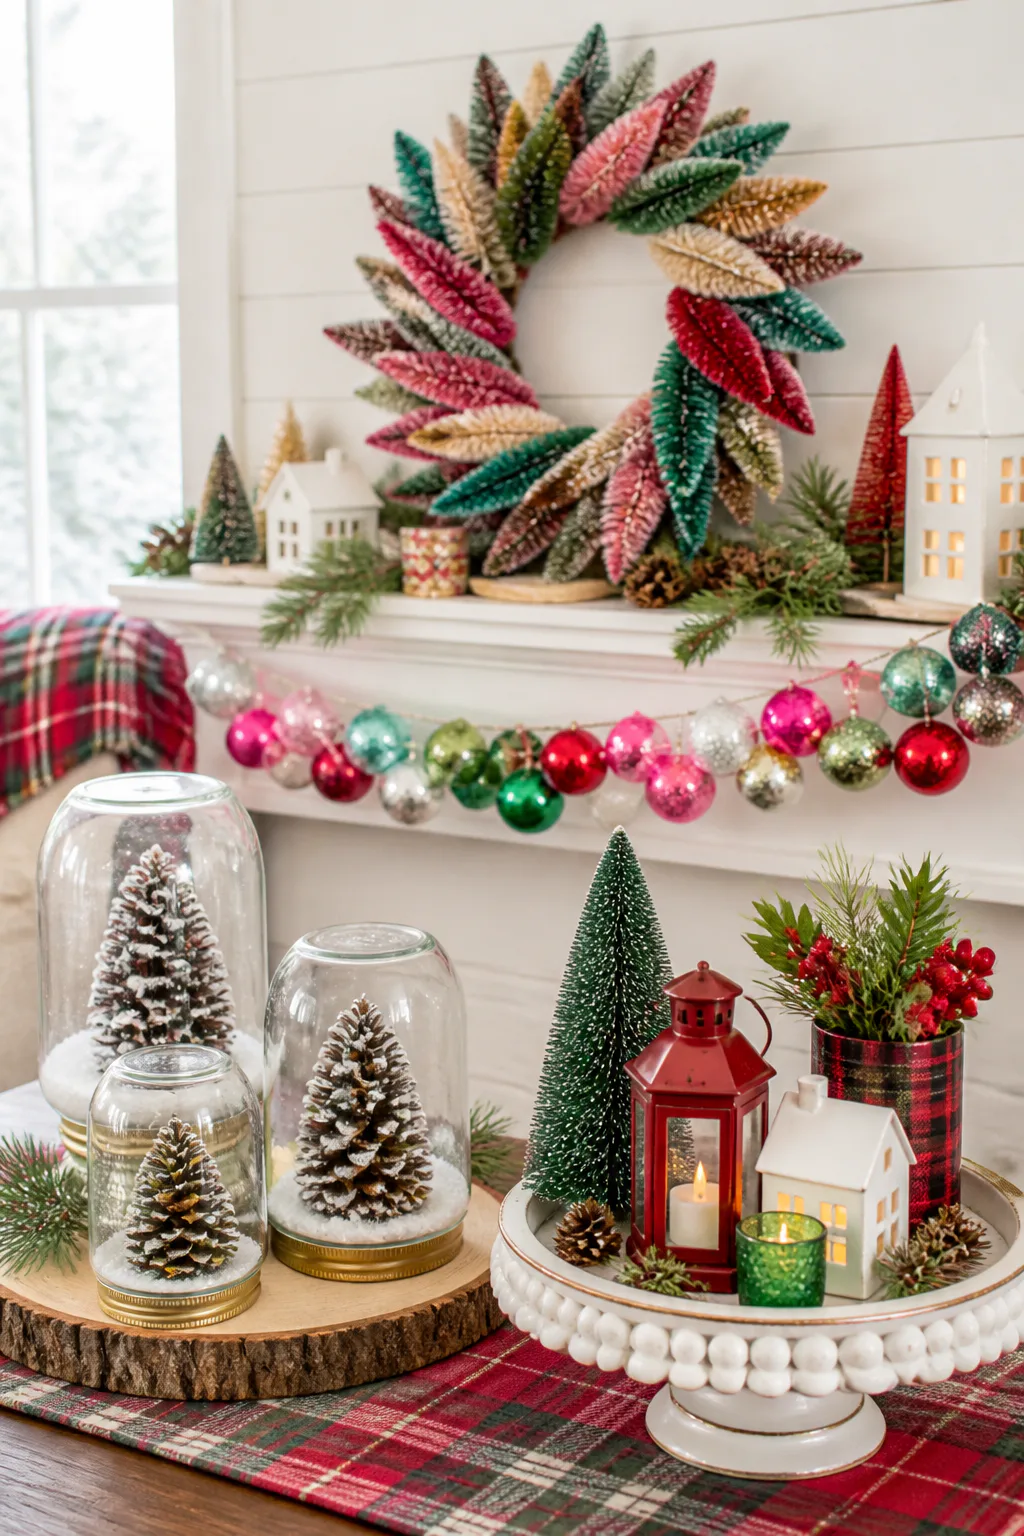
6. Create a Bottle Brush Tree Wreath
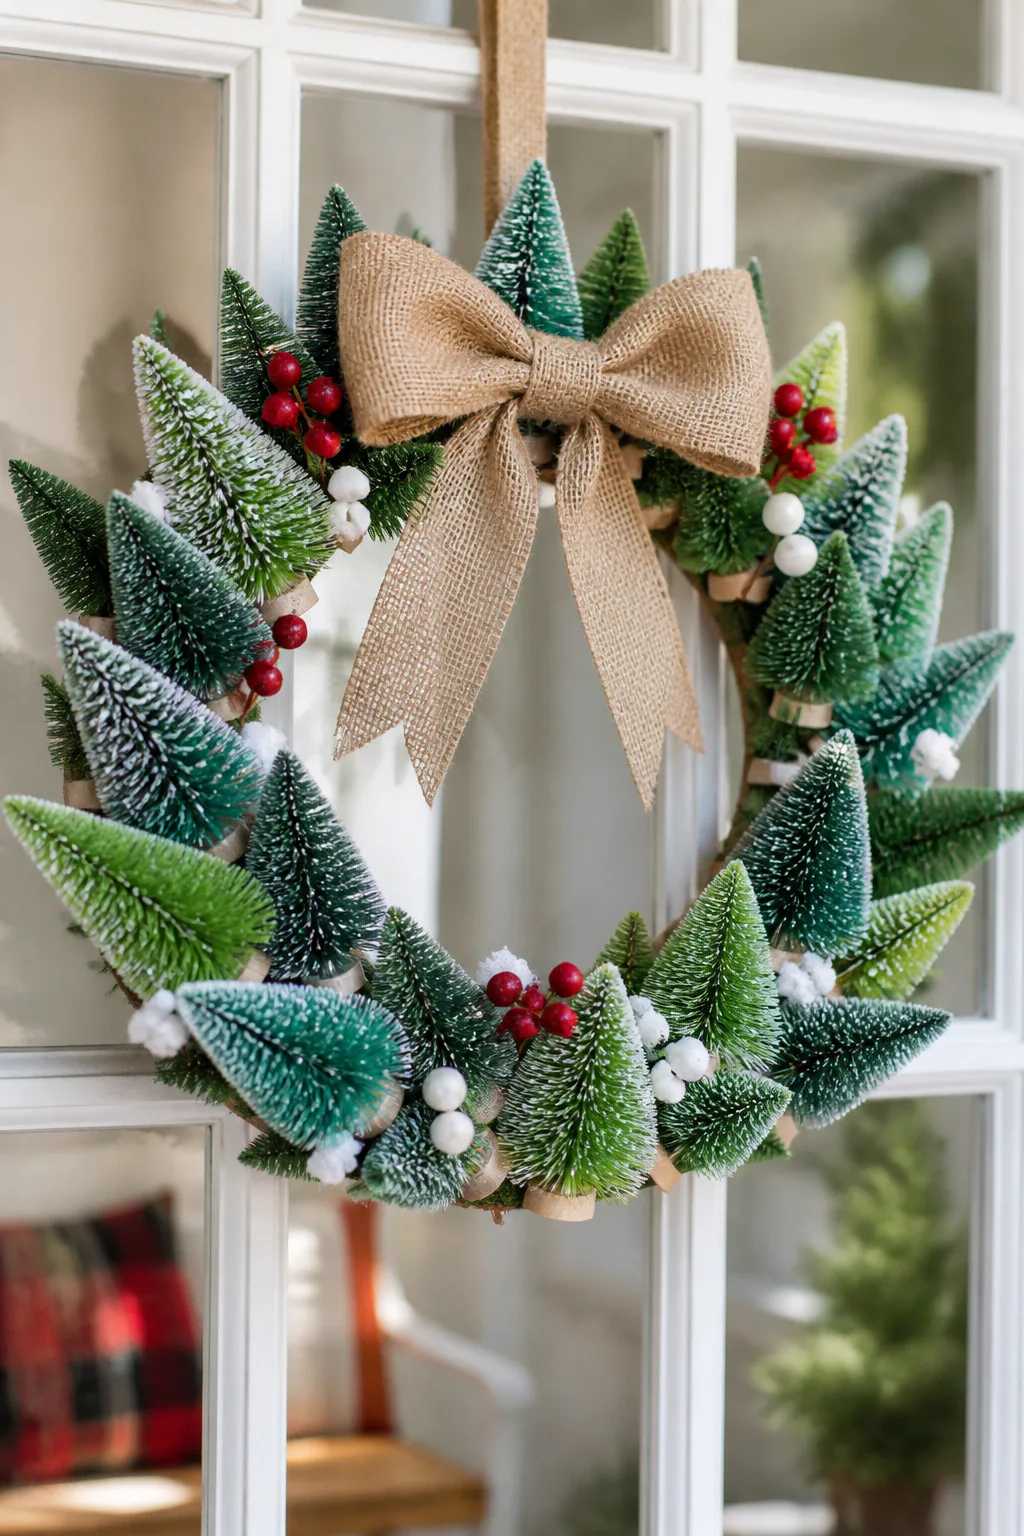
A wreath made from miniature bottle brush trees offers a playful alternative to a traditional greenery ring. Its repeated tree shapes create a strong outline, making it a cheerful accent for a front door, interior wall, or mantel when you want something distinctly seasonal.
Arrange trees around a small wreath form or sturdy circular base, alternating heights or colors to give the design rhythm. Faux snow, berries, and a bow add familiar holiday details, but leaving a little space between accents keeps the wreath from feeling overly busy. Consider where it will hang so you can choose a scale that suits the spot.
Arrange the trees
Lay the trees around the base first and adjust their spacing before attaching them. Secure each one firmly, then add smaller accents in selected areas rather than covering every gap. If the wreath is for a door, check that the decorations do not snag when it opens and closes.
- Use a consistent color family for a calm, coordinated wreath.
- Vary tree heights slightly to create movement around the circle.
- Add faux snow sparingly so the tree shapes remain easy to see.
- Choose a bow size that balances the wreath without hiding it.
7. Hang a Colorful Ornament Garland
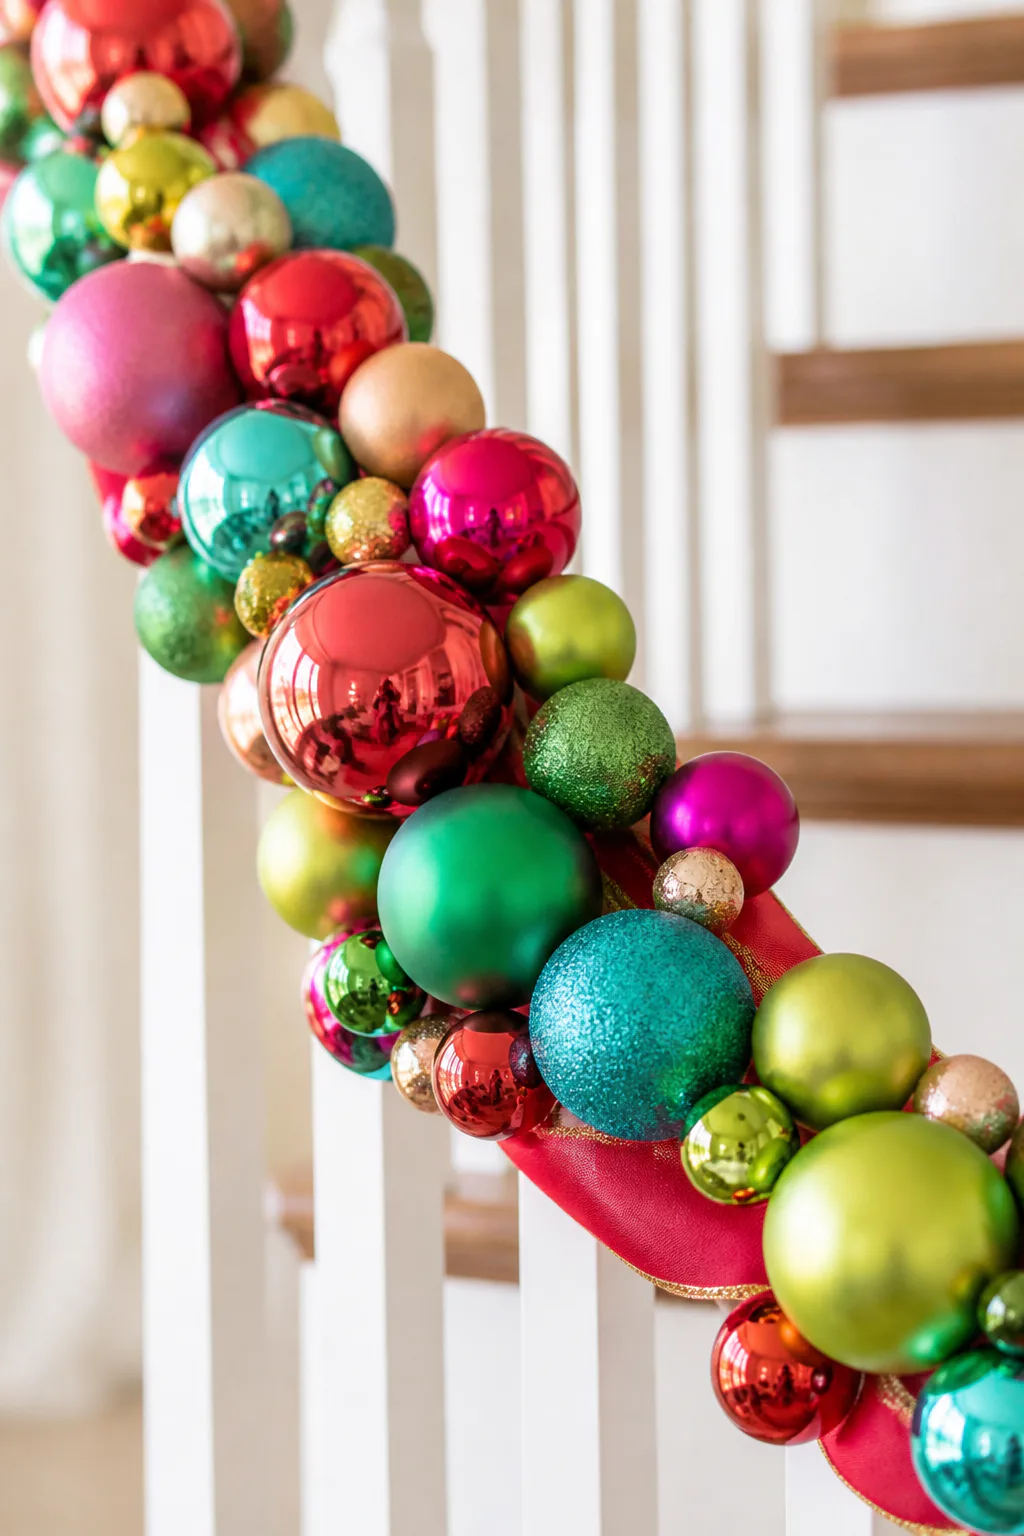
An ornament garland brings a burst of color to a staircase, mantel, or doorway. Shatterproof ornaments are a practical option for a busy home, and combining several sizes can give the strand a fuller, more dimensional appearance than using identical bulbs throughout.
Pick two or three main colors and mix finishes—such as glossy, matte, or glittery—to keep the garland interesting without making it feel random. A thick ribbon or sturdy twine can support the arrangement, while a little extra length at each end makes it easier to attach securely where you want it.
Build a balanced strand
Lay out the ornaments before stringing them so you can see how the colors repeat. Secure them firmly and test the finished garland at a low height before hanging it above a staircase or mantel. Keep the design clear of heat sources and areas where it could catch on clothing.
- Alternate ornament sizes to create a varied rhythm.
- Repeat colors at regular intervals instead of grouping each color.
- Use a ribbon that complements the ornaments rather than competing with them.
- Fasten the ends to stable hooks or supports.
8. Make a Plush Snowman Tree Display
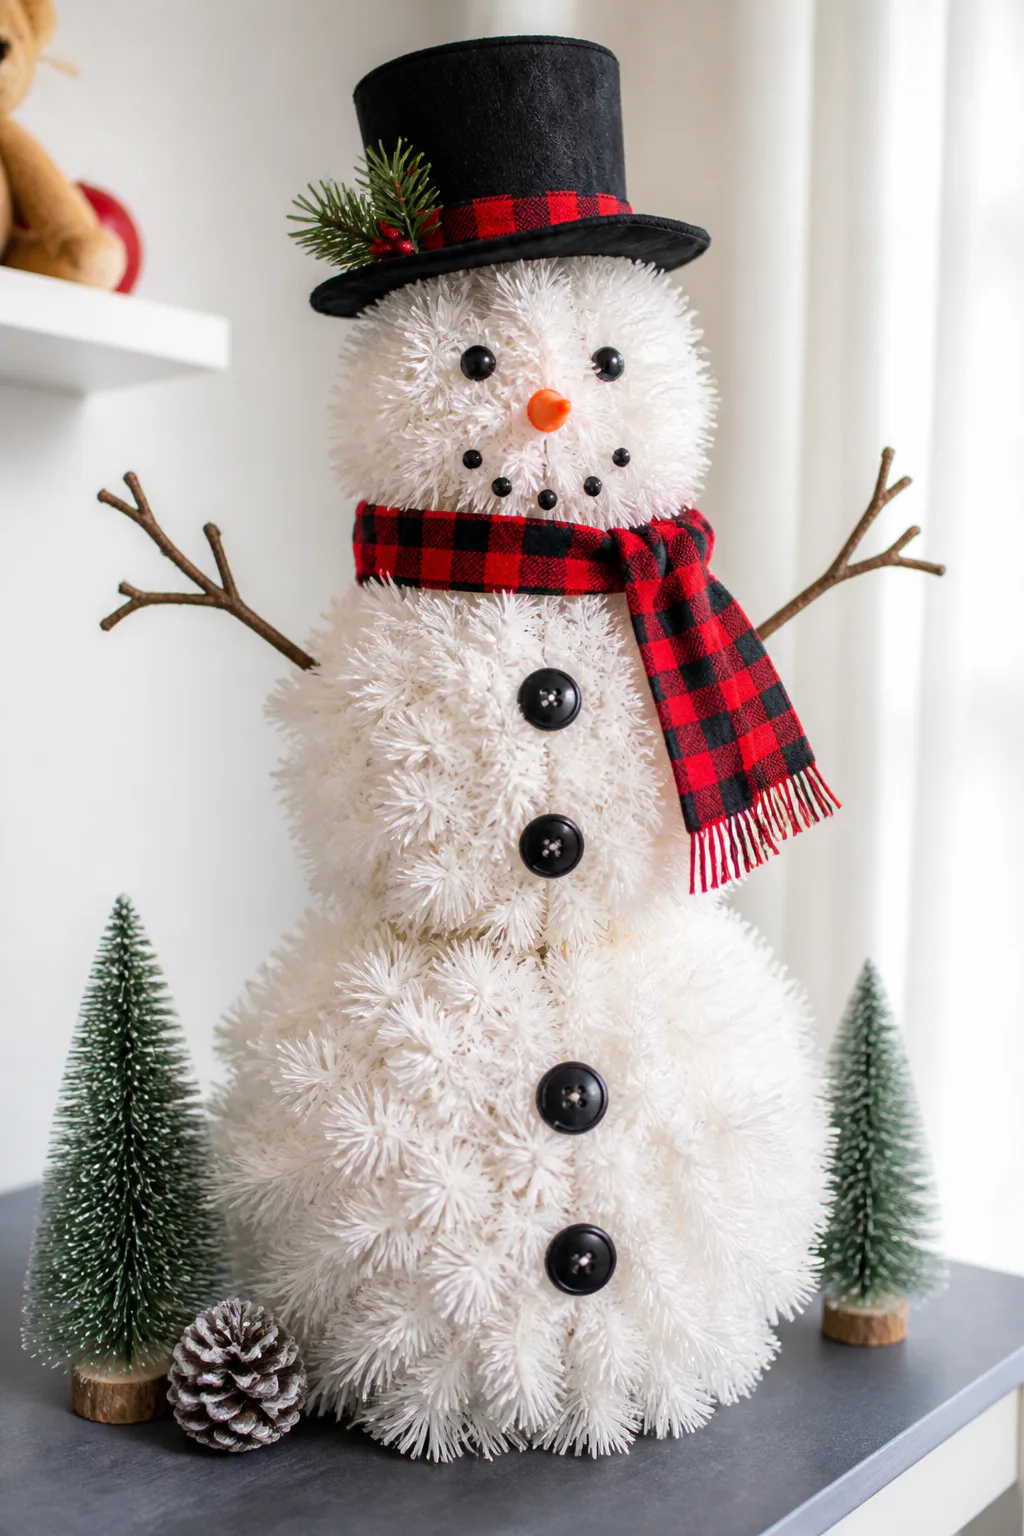
White mini trees can be styled into a snowman-inspired display for a console table, a child’s room, or a sheltered corner of the living room. The soft tree shapes provide the snowy base, while small details such as a scarf, buttons, branch arms, and a hat make the character easy to recognize.
Depending on the trees you find, you can place them side by side or stack them to suggest a rounded snowman silhouette. Keep the additions lightweight so they do not bend the branches, and choose a scarf or hat that works with the rest of your holiday colors. This project can be whimsical while still fitting a coordinated room.
Add the character details
Arrange the trees first and make sure the display stands securely. Attach the arms and buttons gently, then add the scarf and hat last so you can adjust their position without disturbing the base.
- Use a small number of buttons to keep the front uncluttered.
- Choose branch arms that are light and smooth-edged.
- Position the scarf so it does not hide all the tree texture.
- Place the display where it will not be bumped or tipped.
9. Style Mini Winter Wonderland Cloches
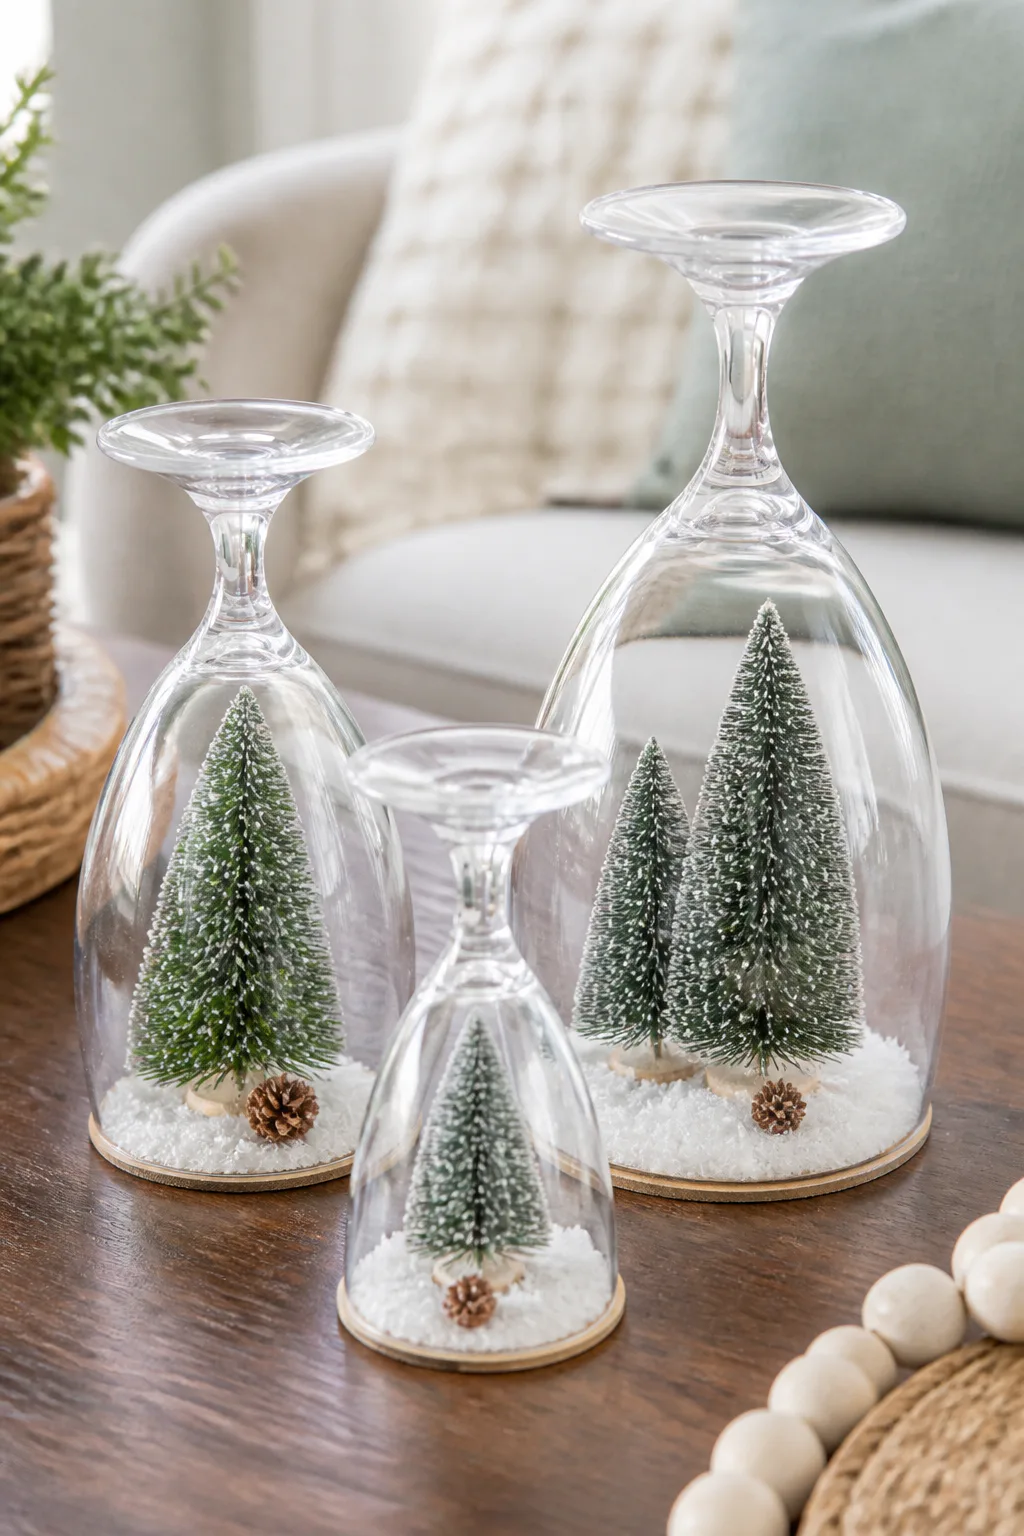
Clear plastic wine glasses can become miniature cloches when inverted over tiny trees and artificial snow. Grouped on a coffee table, shelf, or dining-room sideboard, these little scenes bring a wintery detail to the room without taking up much space.
A small coaster or cardboard round can serve as the base, giving the scene a neat boundary and helping the snow stay contained. Bottle brush trees are a natural focal point, though a single tree often looks more striking than a crowded arrangement. Repeating the same idea in a few sizes can make a small display feel cohesive.
Compose each tiny scene
Arrange the trees and snow on the base before setting the glass over them. Make sure the glass sits securely and does not press against the decorations. If the display will be moved often, keep the filler light and avoid placing it near the edge of a table.
- Choose a base that fits beneath the rim of the inverted glass.
- Use a restrained amount of artificial snow for a clear view.
- Vary tree heights between cloches for a collected look.
- Keep the plastic glass away from heat and open flames.
10. Add a Rustic Mop-Head Christmas Gnome
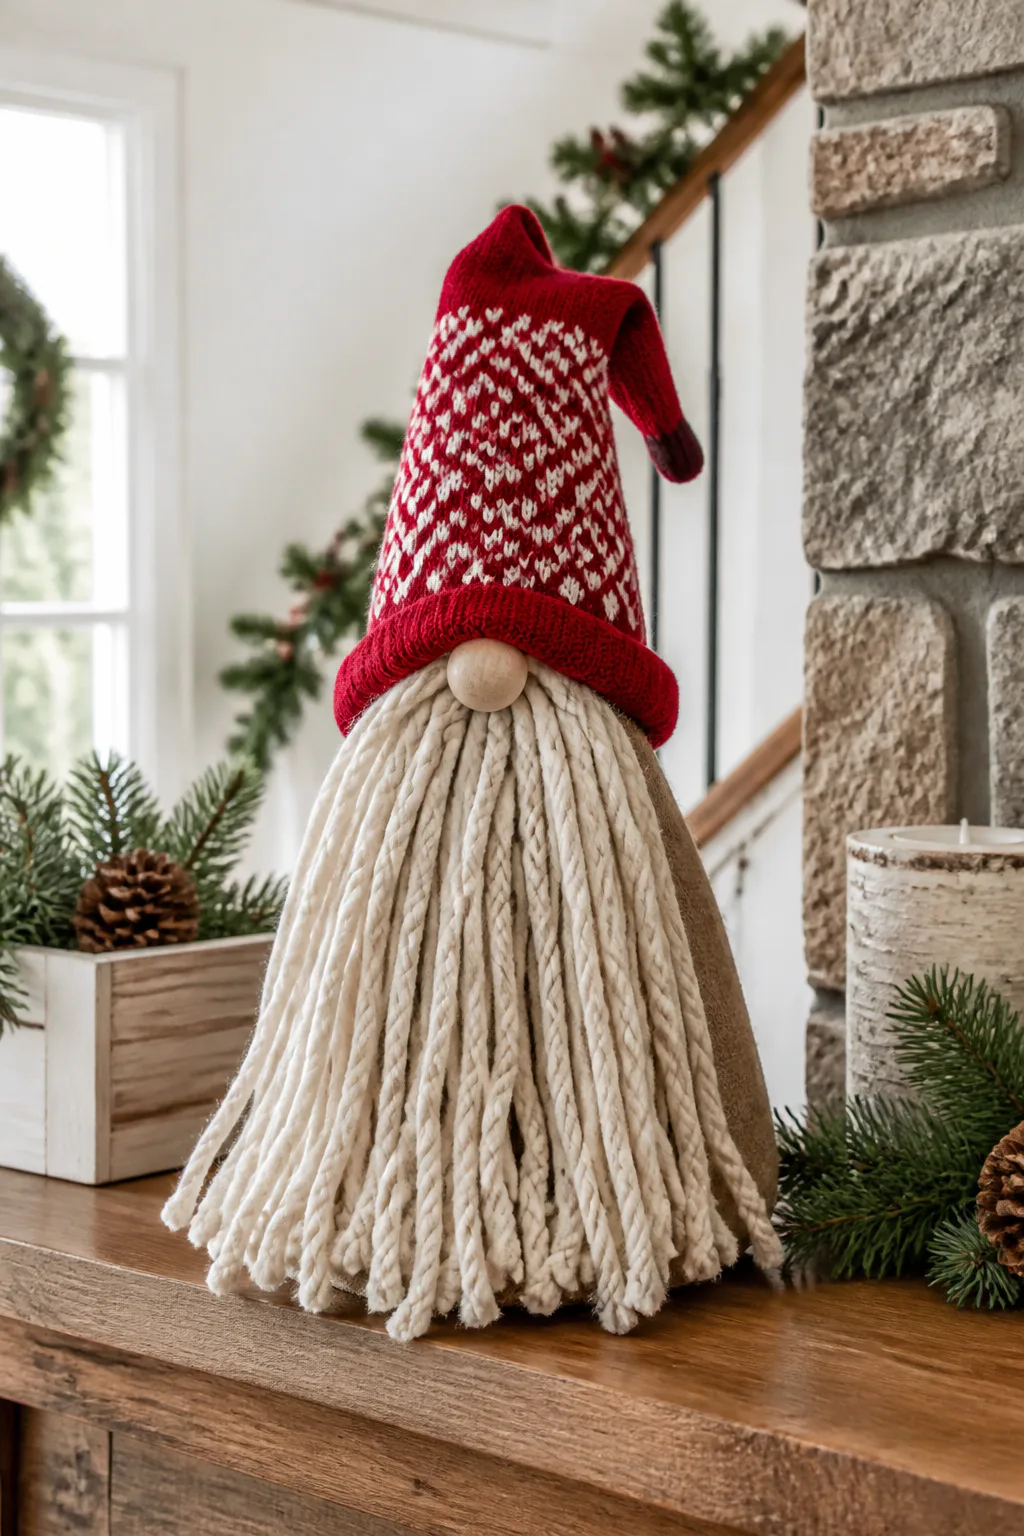
A mop-head gnome adds soft texture and a touch of whimsy to a mantel, shelf, or entryway. The strands become a long beard, while a small body and miniature knit sock hat create the familiar gnome silhouette. Using yarn instead of mop strands is another option if you want a different texture or color.
Keep the design simple so the beard remains the main feature. A weighted base helps the figure stand upright, and a hat that sits securely makes the finished gnome easier to display. Neutral fibers suit rustic or woodland decor, while a bright hat can bring a cheerful accent to a traditional holiday setup.
Shape the beard and hat
Gather the strands into a beard shape and attach them to a small body or foam form. Add the hat above the beard, adjusting the proportions until the face area is mostly concealed for the classic gnome look. Allow adhesive to set fully before moving the piece.
- Trim uneven strands for a tidy outline or leave them loose for a softer look.
- Use a stable base so the gnome does not tip easily.
- Choose a hat color that repeats elsewhere in the room.
- Keep loose fibers away from candles and other heat sources.
11. Arrange Cinnamon Stick Bundles with Faux Pine
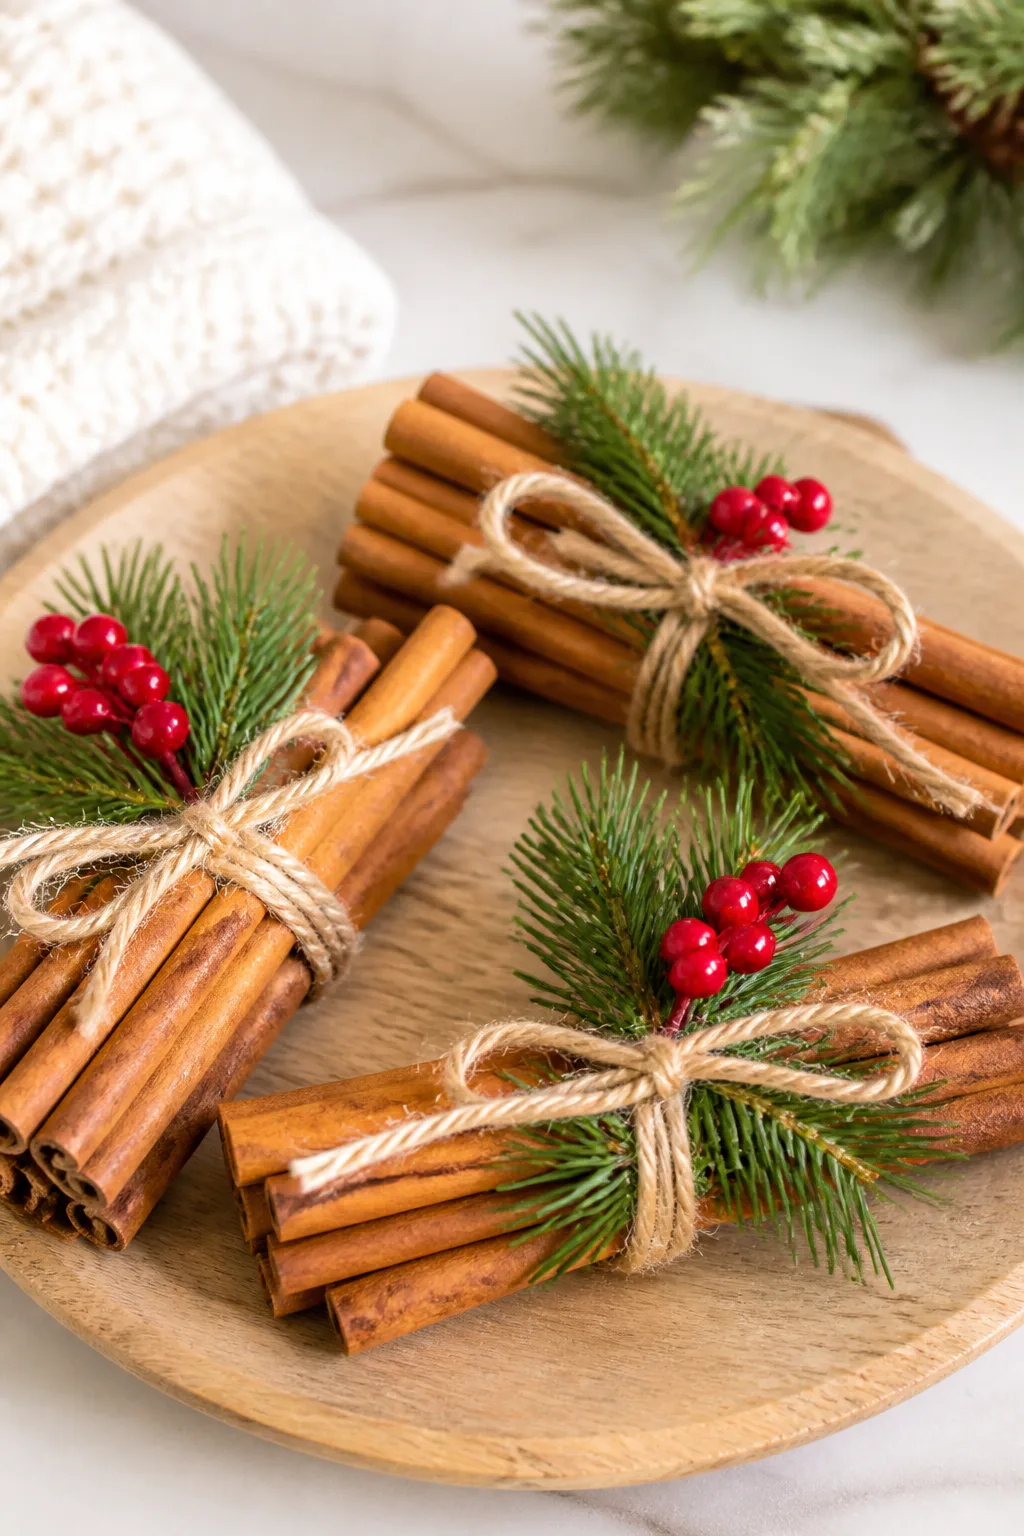
Cinnamon stick bundles bring a natural, rustic note to a coffee table, place setting, or kitchen counter. Their warm brown color pairs easily with faux pine, red berries, and twine, making this one of the simplest accents to adapt to different holiday palettes.
Place a bundle beside a candle arrangement, tuck one into a napkin setting, or add several to a small bowl for a casual tabletop display. The sticks provide the structure, while a sprig of greenery or a few berries add a seasonal finish. If using scented materials, keep the arrangement away from anyone who may be sensitive to fragrance.
Tie and display the bundles
Gather a few cinnamon sticks and wrap them snugly with twine, leaving the knot or bow visible. Tuck a small piece of faux pine or berries beneath the tie, then trim any loose ends so the accent looks neat from every angle.
- Make bundles of different sizes for a more relaxed arrangement.
- Use natural twine for a rustic look or ribbon for a dressier finish.
- Keep the greenery small so it does not hide the cinnamon sticks.
- Use the bundles as accents rather than crowding a tabletop.
Frequently Asked Questions
What Dollar Tree items are best for Christmas crafts?
Faux greenery, small ornaments, glass jars and cloches, tins, ribbon, bottle brush trees and frames are the most flexible. They can be combined into many different projects.
How do you make Dollar Tree decor look expensive?
Choose one color palette, repeat it across projects, and add natural elements such as pinecones, cinnamon sticks or real greenery. Grouping pieces at different heights also makes them look more intentional.
Can kids help with Dollar Tree Christmas crafts?
Many projects suit kids, such as bundling cinnamon sticks or filling jars. Adults should handle hot glue, glass and anything with small parts or lights.
Final Thoughts
These Dollar Tree Christmas DIY decor ideas show how a few simple materials can become accents for nearly every part of the home, from a glowing mantel display to a colorful staircase garland. You can follow each project closely or adjust its colors, scale, and finishing details to suit the decorations you already own.
Start with one idea that fits your space and the supplies you have on hand. A small handmade piece can bring plenty of seasonal character, and making a few details repeat—such as a ribbon color or touch of greenery—helps the finished room feel warm and pulled together.
Want more holiday projects? See our Christmas mantel decor ideas and Dollar Tree DIY home decor ideas.