15 Clever Small Bathroom Ideas to Maximize Space
A small bathroom can feel cramped when fixtures compete for floor space, storage spills onto every surface, or finishes break the room into too many visual pieces. The right updates can make the layout feel more open while helping everyday essentials stay within reach.
These small bathroom ideas cover a mix of renovation projects and simpler styling changes, from floating vanities and pocket doors to reflective tile and clever storage. Some work best during a remodel, while others can refresh an existing room without changing its footprint.
Whether you’re planning a full bathroom or looking for ways to improve a powder room, start with the biggest frustration in your space. Then choose a few ideas that solve it and suit your home’s style, lighting, and storage needs.
1. Install a Floating Vanity to Reveal More Floor
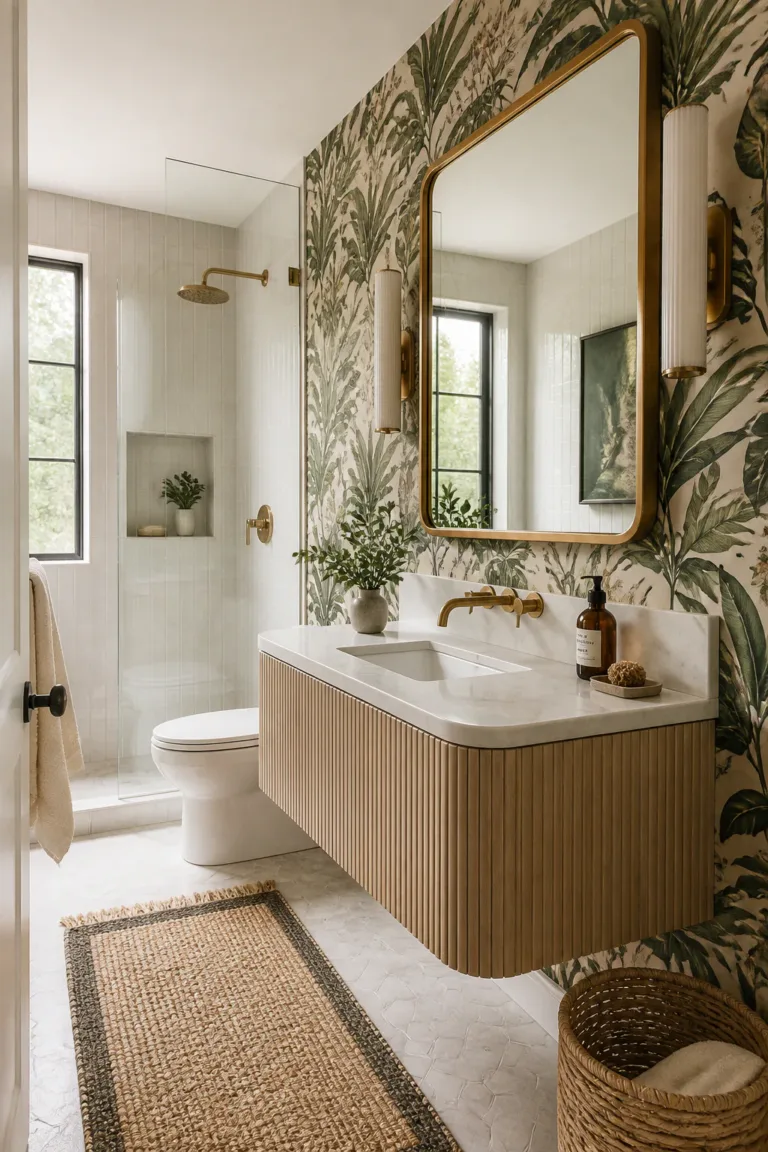
A wall-hung vanity leaves the floor visible beneath the sink, which can make a compact bathroom feel less crowded. That open area also gives your feet more room when you’re standing at the basin, a useful detail in a narrow layout.
Choose a vanity with enough storage for your daily essentials so the open look doesn’t lead to clutter on the counter. A simple drawer or two can keep supplies out of sight while maintaining the clean lines that make this fixture feel light.
How to make it work
Before installation, confirm that the wall and plumbing can accommodate a securely mounted unit. Position the vanity at a comfortable height, and consider a finish that relates to the floor or other cabinetry.
- Measure the available width, depth, and door clearance.
- Use drawer organizers to make compact storage more useful.
- Keep the visible floor beneath the vanity clear.
- Choose a wall-mounted faucet if counter space is especially limited.
The result is a practical focal point that makes the room feel more open without giving up useful storage.
2. Run Large-Format Tile Across the Bathroom
Large-format tile can create a calmer, more continuous surface by reducing the number of grout lines in view. On the floor, that visual simplicity can help a small bathroom feel less busy; on the walls, it can make the room seem more unified.
Use tile thoughtfully rather than assuming bigger is always better. The tile layout should suit the proportions of the room, and cuts around corners, fixtures, and drains need to be planned so the finished surface looks intentional.
Plan the layout
Ask a tile professional to map the pattern before installation, especially in a tight space where awkward slivers can be noticeable. A grout color close to the tile shade can further soften the grid.
- Choose a tile scale that fits the room’s dimensions.
- Preview how the pattern meets the doorway and shower edge.
- Select a suitable slip-resistant finish for bathroom floors.
- Coordinate grout color with the tile for a quieter look.
Used across connected surfaces, larger tiles can provide a clean backdrop for more expressive fixtures or accessories.
3. Carve a Recessed Niche into the Shower Wall
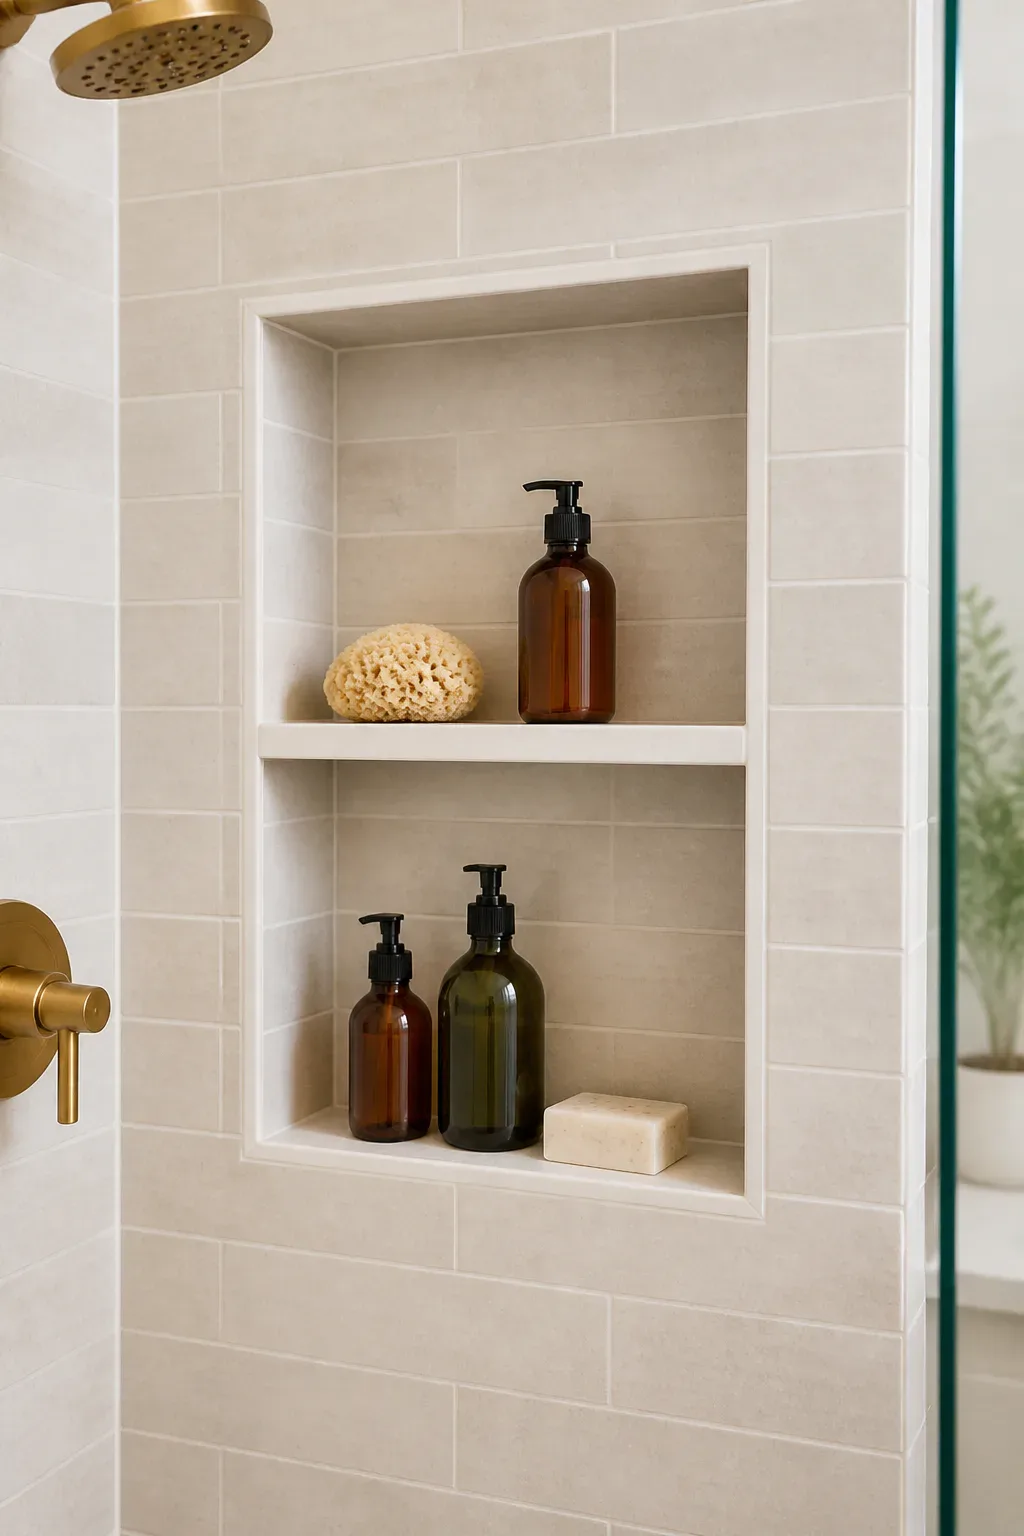
A recessed shower niche provides a home for shampoo and soap without adding a rack that projects into the bathing area. Because the storage sits within the wall, it can make a compact shower feel tidier and easier to move around in.
The niche can also become a subtle design feature. Matching its tile to the rest of the shower creates a seamless look, while a contrasting tile can define the storage area without adding another bulky object.
Choose the right location
Plan the niche before the shower walls are finished, and check that its placement avoids plumbing and structural obstacles. Set it at a convenient height and make sure the shelf surface is designed to shed water.
- Measure bottles and containers before choosing niche dimensions.
- Place it within easy reach from the shower area.
- Use compatible waterproofing behind and around the niche.
- Keep the shelf free of items you rarely use.
Thoughtful built-in storage keeps everyday products accessible while preserving a streamlined shower enclosure.
4. Install a Frameless Glass Shower Panel
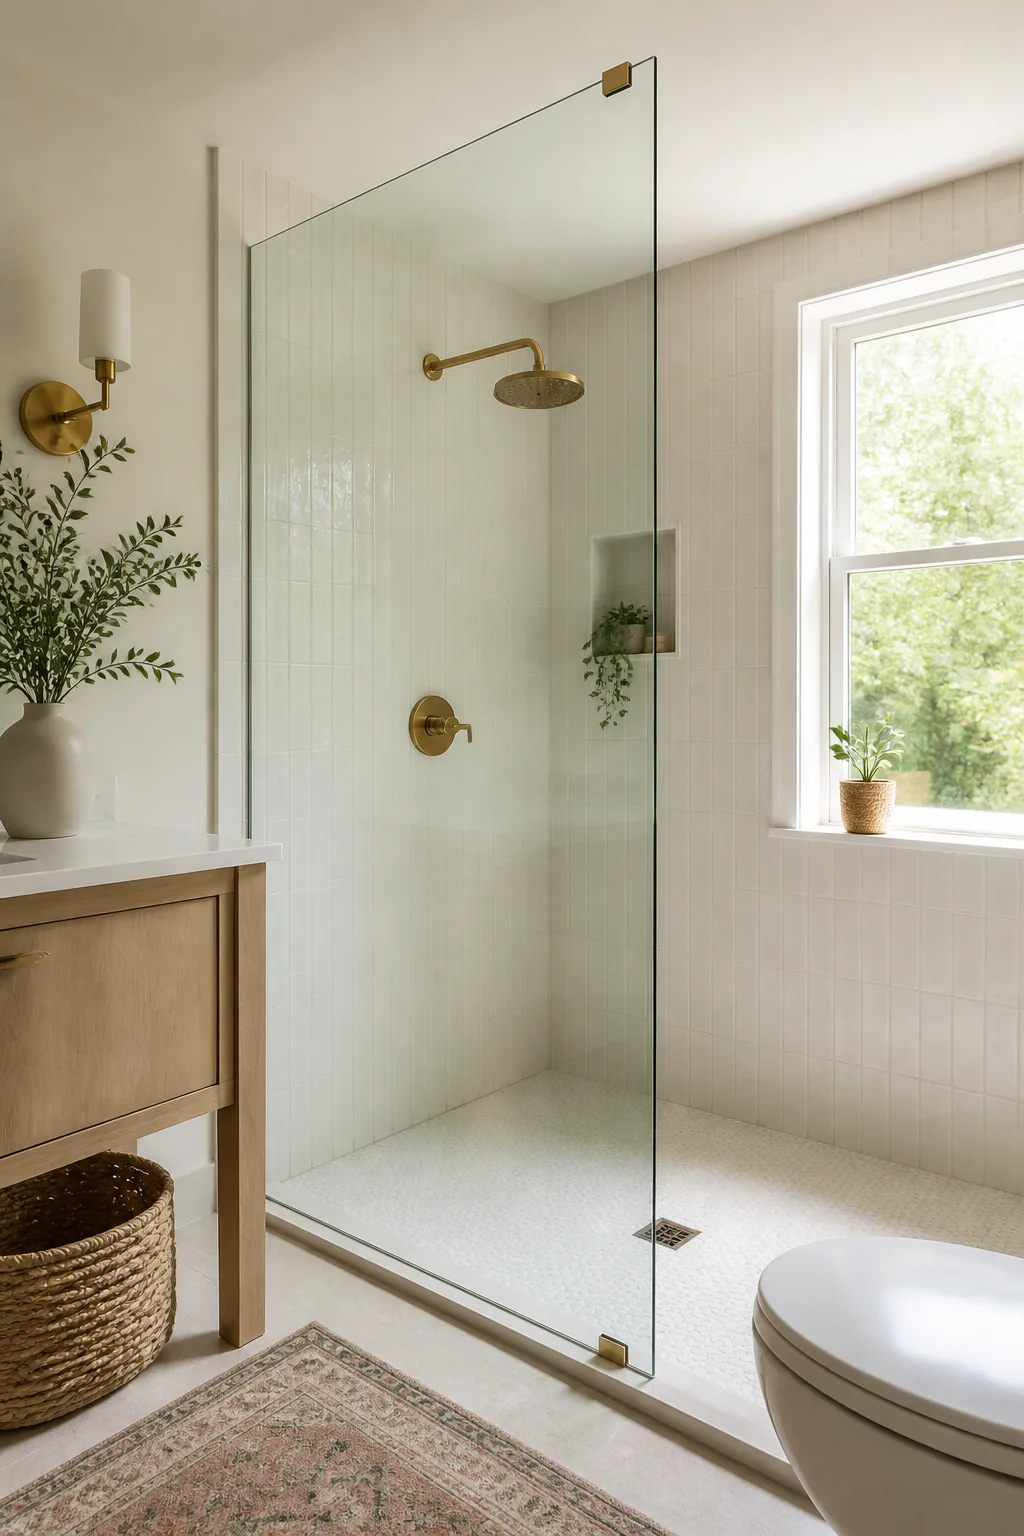
A frameless glass panel keeps sightlines moving through the bathroom instead of visually dividing the shower from the rest of the room. If the bathroom has a window, clear glass can also help natural light reach farther into the space.
Unlike a curtain or a heavily framed enclosure, a simple panel lets the tile and fixtures remain visible. That can make the shower feel more connected to the room, though the layout must still manage splashes and provide a comfortable entry.
Balance openness and function
Measure the shower carefully and consider where water will spray before settling on panel size and placement. A glass professional can help determine the right configuration for the opening and the surrounding surfaces.
- Keep the glass clear if maintaining sightlines is the priority.
- Position the panel to limit water escaping onto the floor.
- Choose hardware that complements nearby plumbing finishes.
- Plan a simple routine for wiping away water spots.
When the shower layout allows it, a glass panel offers a lighter visual boundary without sacrificing a defined bathing zone.
5. Replace the Swinging Door with a Pocket Door
A conventional door needs clear floor space to swing open, which can interfere with a vanity, hamper, or person moving through a narrow bathroom. A pocket door slides into the wall instead, leaving more of the room available for daily use.
This change can be especially helpful when the bathroom door opens into a tight hall or meets another door. It does involve work inside the wall, so it’s generally easiest to plan during a renovation rather than treat it as a simple hardware swap.
Check the wall first
Before choosing a pocket door, confirm that the wall can accommodate the sliding mechanism and does not contain obstacles that prevent installation. A contractor can assess the framing and explain what changes may be needed.
- Measure the doorway and the wall space beside it.
- Check for wiring, plumbing, or other obstructions.
- Select a handle that works smoothly in a pocket-door setup.
- Consider privacy and sound needs for the bathroom.
By removing the swing arc, this design can make the entrance and the floor plan feel noticeably less constrained.
6. Color-Drench the Walls, Ceiling, and Trim

Using one color across the walls, ceiling, and trim can soften the boundaries between surfaces. In a small bathroom, fewer sharp changes in color may help the room read as one coordinated space rather than a set of separate planes.
The shade can be soft and quiet, deep and moody, or bright and energetic, depending on the mood you want. A single-color approach doesn’t have to mean a flat result: tile, wood, metal, and textiles can add variation through their textures.
Build a cohesive palette
Test paint samples under the room’s actual lighting, since a shade can look different near a window, mirror, or warm light fixture. Use bathroom-appropriate finishes and confirm that the selected products suit the surfaces being painted.
- Carry the main color across trim and ceiling for a unified effect.
- Use towels and accessories to add a gentle contrast.
- Consider lighter shades in rooms with limited natural light.
- Repeat metal finishes to keep the palette feeling intentional.
A continuous color story can make even a bold choice feel considered in a compact room.
7. Add Vertical Board-and-Batten Behind the Vanity
Vertical board-and-batten draws the eye upward and can emphasize the height of a bathroom. Installed behind the vanity, it creates a defined feature wall without taking up floor space or adding a deep piece of furniture.
The narrow vertical lines provide texture and structure, while paint can help the paneling blend into the room or stand out as a focal point. This treatment works particularly well when the rest of the bathroom uses simpler finishes, so the wall can add character without competing with every surface.
Make the detail suit the room
Plan the panel height in relation to the mirror, vanity, and any nearby trim. In a bathroom, choose materials and finishes suited to moisture, and seal edges carefully to help protect the installation.
- Use slim battens to keep the pattern visually light.
- Align the design with the vanity and mirror where possible.
- Paint the paneling to match the wall for a subtle effect.
- Keep nearby decor simple so the texture can stand out.
This vertical detail adds dimension while helping the wall feel taller and more thoughtfully finished.
8. Finish the Shower with Glossy Reflective Tile
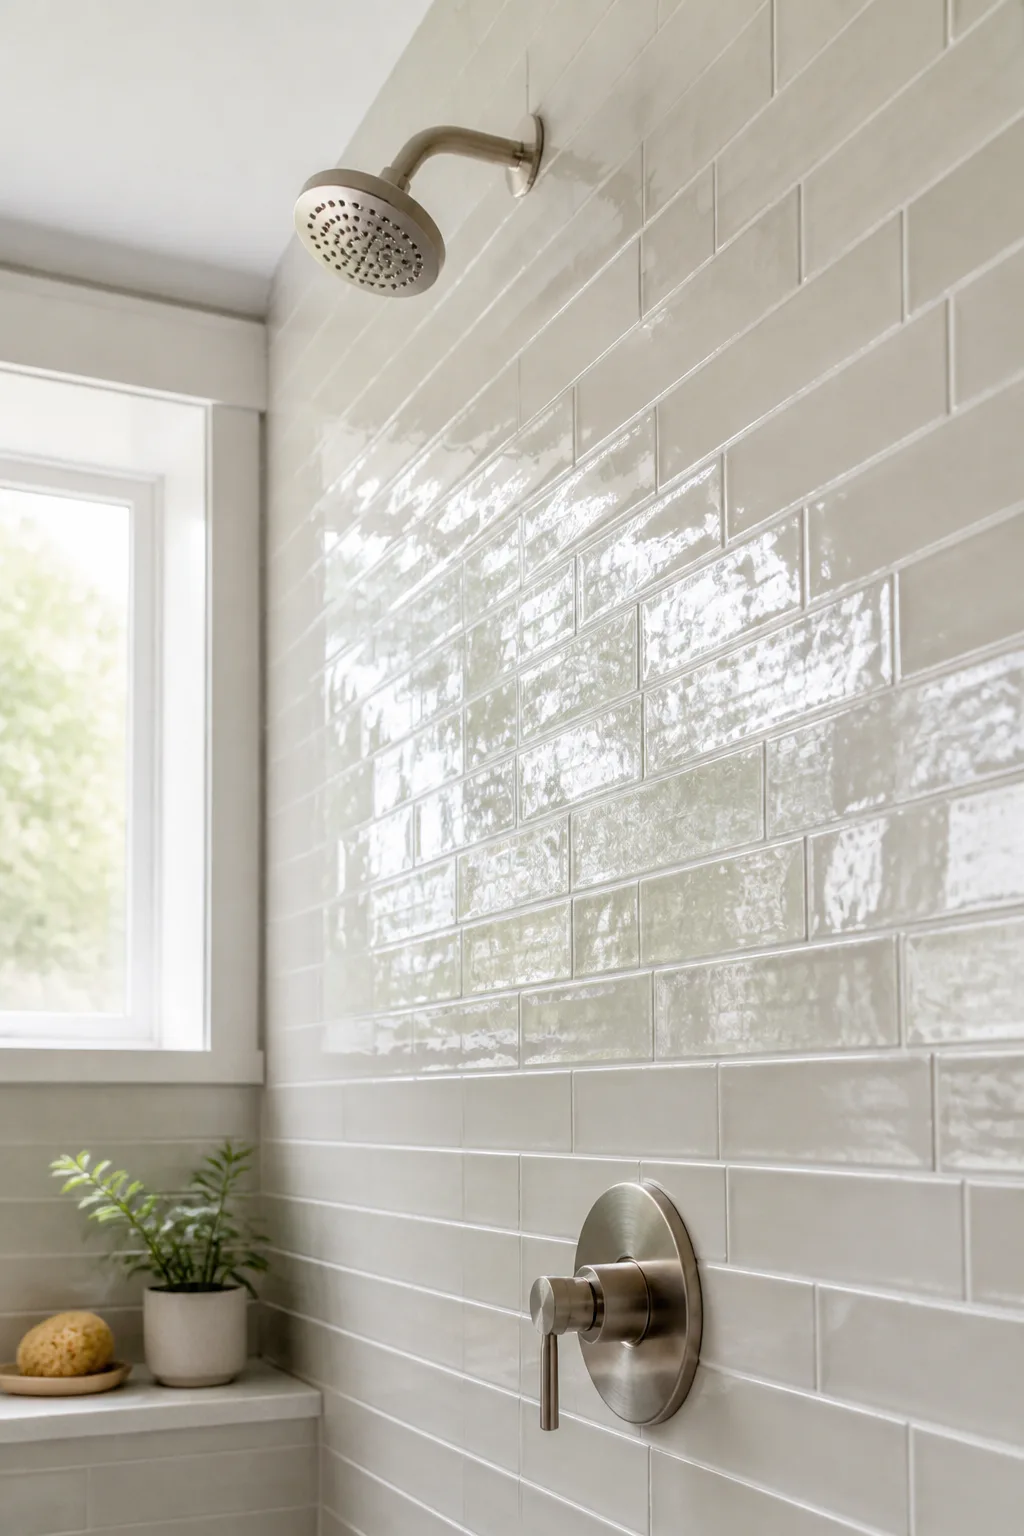
Glossy tile reflects light across the shower wall, which can help a compact bathroom feel brighter. The surface also brings a lively finish to an area that might otherwise read as a solid block of material behind a curtain or glass panel.
Reflective tile pairs naturally with polished fixtures, but it doesn’t need to cover every surface. A tiled shower wall can provide enough shine, while matte flooring or painted walls keep the overall room from feeling overly slick or visually busy.
Use shine with intention
Look at tile samples in the bathroom’s lighting before committing, because glaze and color can change the way the surface reads. Also consider cleaning and maintenance, particularly in areas that see frequent water.
- Use glossy tile on a wall to reflect available light.
- Pair reflective finishes with a quieter floor material.
- Choose grout that supports the pattern rather than overpowering it.
- Repeat polished metal in small, coordinated details.
A considered mix of reflective and subdued surfaces can make the shower feel brighter without overwhelming the room.
9. Fit a Compact Sink into an Awkward Corner
An unused corner can be an opportunity for a small sink, especially in a powder room where a full-width vanity would make the layout feel crowded. A curved or triangular basin can fit close to the walls and leave more room to move through the center of the space.
Corner fixtures aren’t only about fitting a smaller basin; they can also help clarify the room’s circulation. Before selecting one, make sure there is enough comfortable standing space and that the faucet and basin are practical for handwashing.
Measure for comfortable use
Check the corner’s dimensions, plumbing access, and clearance from the door and nearby fixtures. A compact sink should solve a space problem without making the daily task feel awkward.
- Compare curved and angled basins against the room’s shape.
- Confirm the door can open without hitting the sink.
- Choose a faucet that suits the basin’s size and placement.
- Keep soap and hand towels within easy reach.
A well-placed corner sink can turn an awkward spot into useful function while freeing up the main walkway.
10. Hang an Oversized Mirror Above the Sink
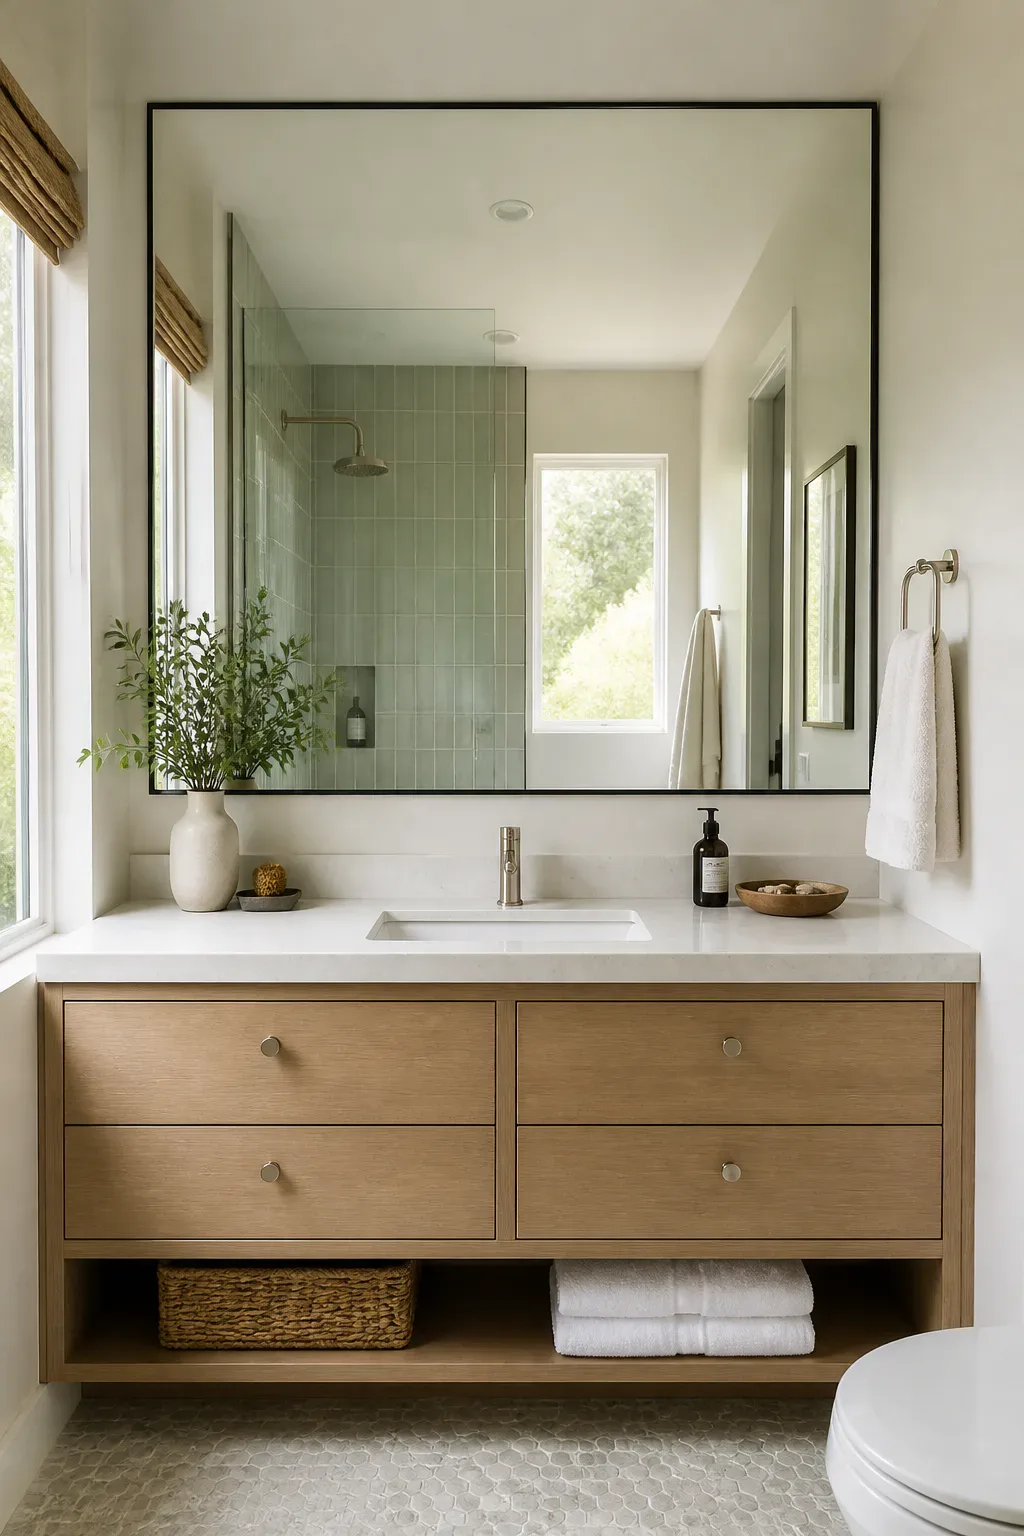
A larger mirror reflects more of the bathroom than a small one, creating a greater sense of depth above the sink. It can also bounce available light around the room, which is useful when the vanity wall feels dark or visually closed in.
The mirror’s shape and frame help set the mood. A simple frameless design can keep the wall feeling open, while a slim frame introduces a little contrast without taking up the visual space of a bulky cabinet.
Size and placement matter
Measure the vanity and wall before choosing a mirror, and make sure its placement works with the faucet, lighting, and ceiling height. If you’re considering lighting behind or around the mirror, plan the electrical work and the overall arrangement together.
- Choose a width that relates comfortably to the vanity.
- Check that the mirror reflects a pleasing part of the room.
- Use a simple frame to avoid adding visual weight.
- Position lighting to reduce shadows around the sink.
A generous mirror can make the vanity area feel more open while remaining useful for everyday routines.
11. Stack Floating Shelves Above the Toilet
The wall above the toilet often goes unused, making it a practical place for a small amount of open storage. Two or three slim floating shelves can hold folded hand towels, spare bathroom essentials, or a few decorative pieces without taking up floor area.
Open shelves keep items visible and easy to reach, but they can look messy if every inch is filled. A limited, coordinated arrangement works best in a small room, where too many containers and colors can quickly make the wall feel cluttered.
Keep shelves useful and balanced
Check the position of the toilet tank and any plumbing before drilling. Install shelves securely, with enough clearance for access and cleaning, and choose a depth that doesn’t crowd the space above the fixture.
- Use two or three shelves rather than a crowded stack.
- Store towels and frequently used supplies within easy reach.
- Group small items in a few tidy containers.
- Leave some open space to keep the arrangement light.
These shelves add accessible storage while keeping the bathroom’s floor and vanity top clear.
12. Make a Powder Room Pop with Statement Wallpaper
A powder room’s small footprint can make it a welcoming place to try a bold wallpaper. A tight floral or geometric pattern turns the walls into a focal point and can give the room a distinct personality without requiring a large collection of accessories.
Wallpaper can be especially effective in a room used for shorter visits, where a lively pattern feels intentional rather than overwhelming. Balance it with simpler fixtures and a restrained color palette so the print remains the main event.
Choose a pattern that feels at home
Consider the room’s lighting, wall condition, and moisture exposure before choosing wallpaper. Use a product and installation approach suited to the space, and decide whether you want the pattern on every wall or just one feature wall.
- Try a small-scale print for a detailed, layered look.
- Repeat one wallpaper color in towels or accessories.
- Keep the mirror and fixtures visually simple.
- Check pattern placement around corners and the vanity.
A confident print can turn a compact powder room into a memorable, finished space.
13. Pair a Shallow Basin with a Wall-Mounted Faucet
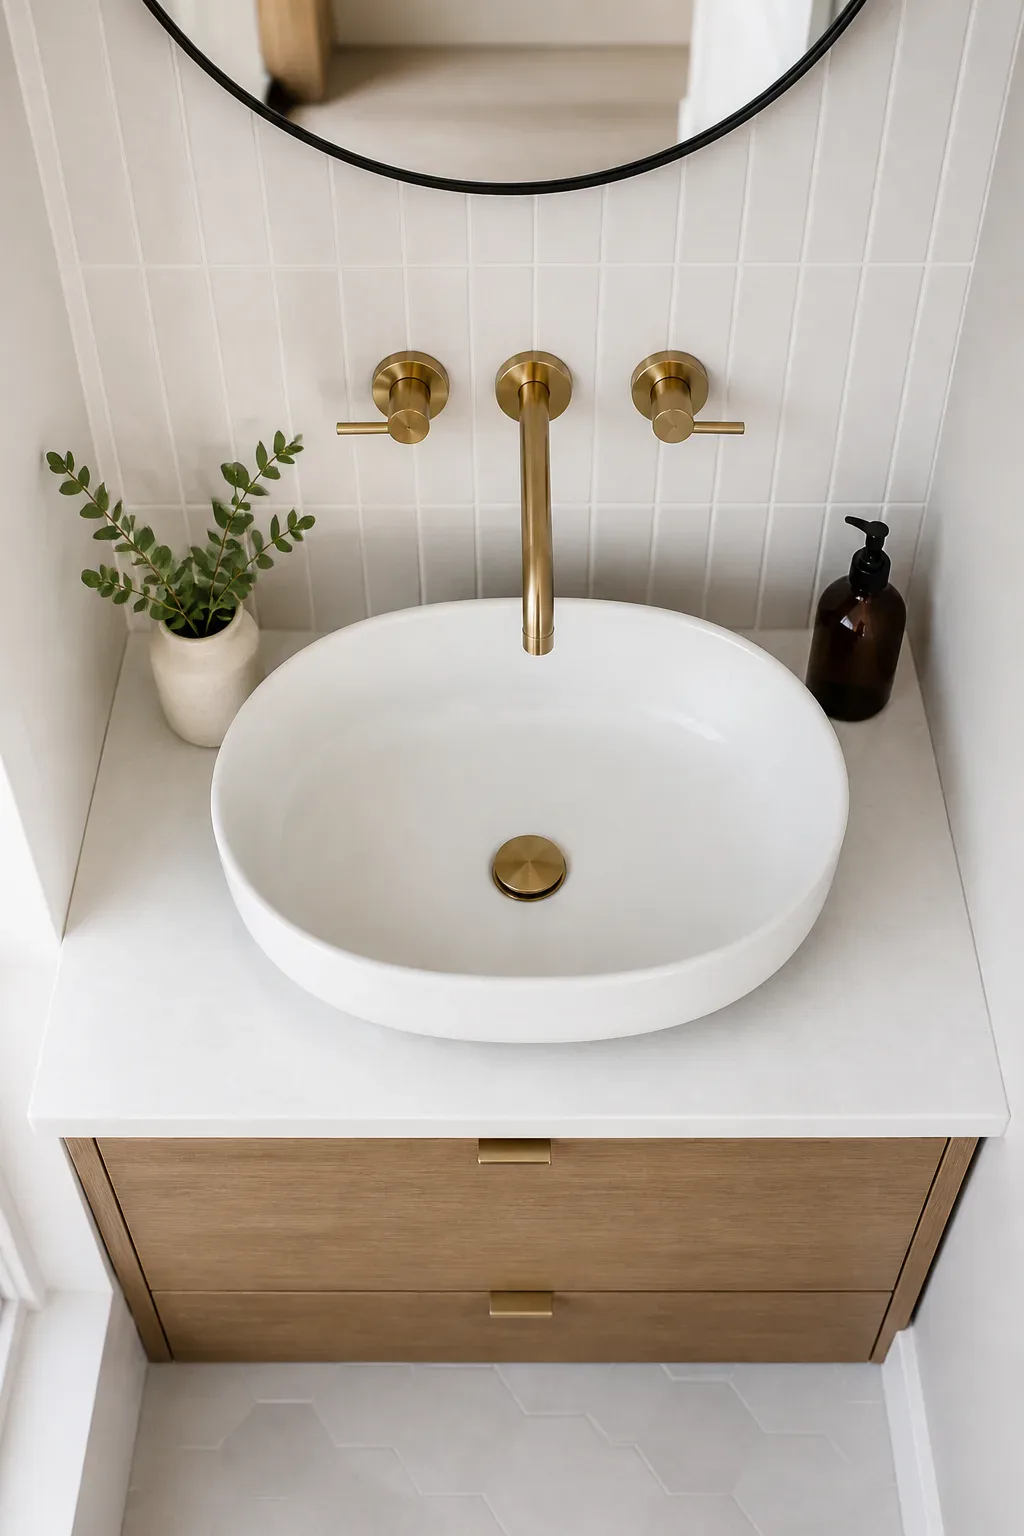
A shallow basin can project less into the room than a deeper sink, which may help preserve standing and walking space. Pairing it with a wall-mounted faucet clears the rim and counter area, creating a neat setup that suits a narrow vanity or compact powder room.
This arrangement needs careful coordination because the faucet’s position must work with the basin’s depth and shape. A well-planned combination can be both streamlined and comfortable to use; a poorly matched one may cause splashing or leave too little room for hands.
Coordinate basin and faucet
Choose the sink and faucet together, and confirm the spout reach and height before installation. Wall-mounted plumbing usually needs to be planned in advance, so it’s worth considering during a renovation or wall update.
- Check that the spout reaches the basin comfortably.
- Allow enough room for handwashing beneath the faucet.
- Match the basin shape to the available counter space.
- Confirm wall plumbing and installation requirements early.
The pairing can keep a small sink zone visually clean while making the most of limited depth.
14. Mount a Slim Towel Bar on the Vanity Side
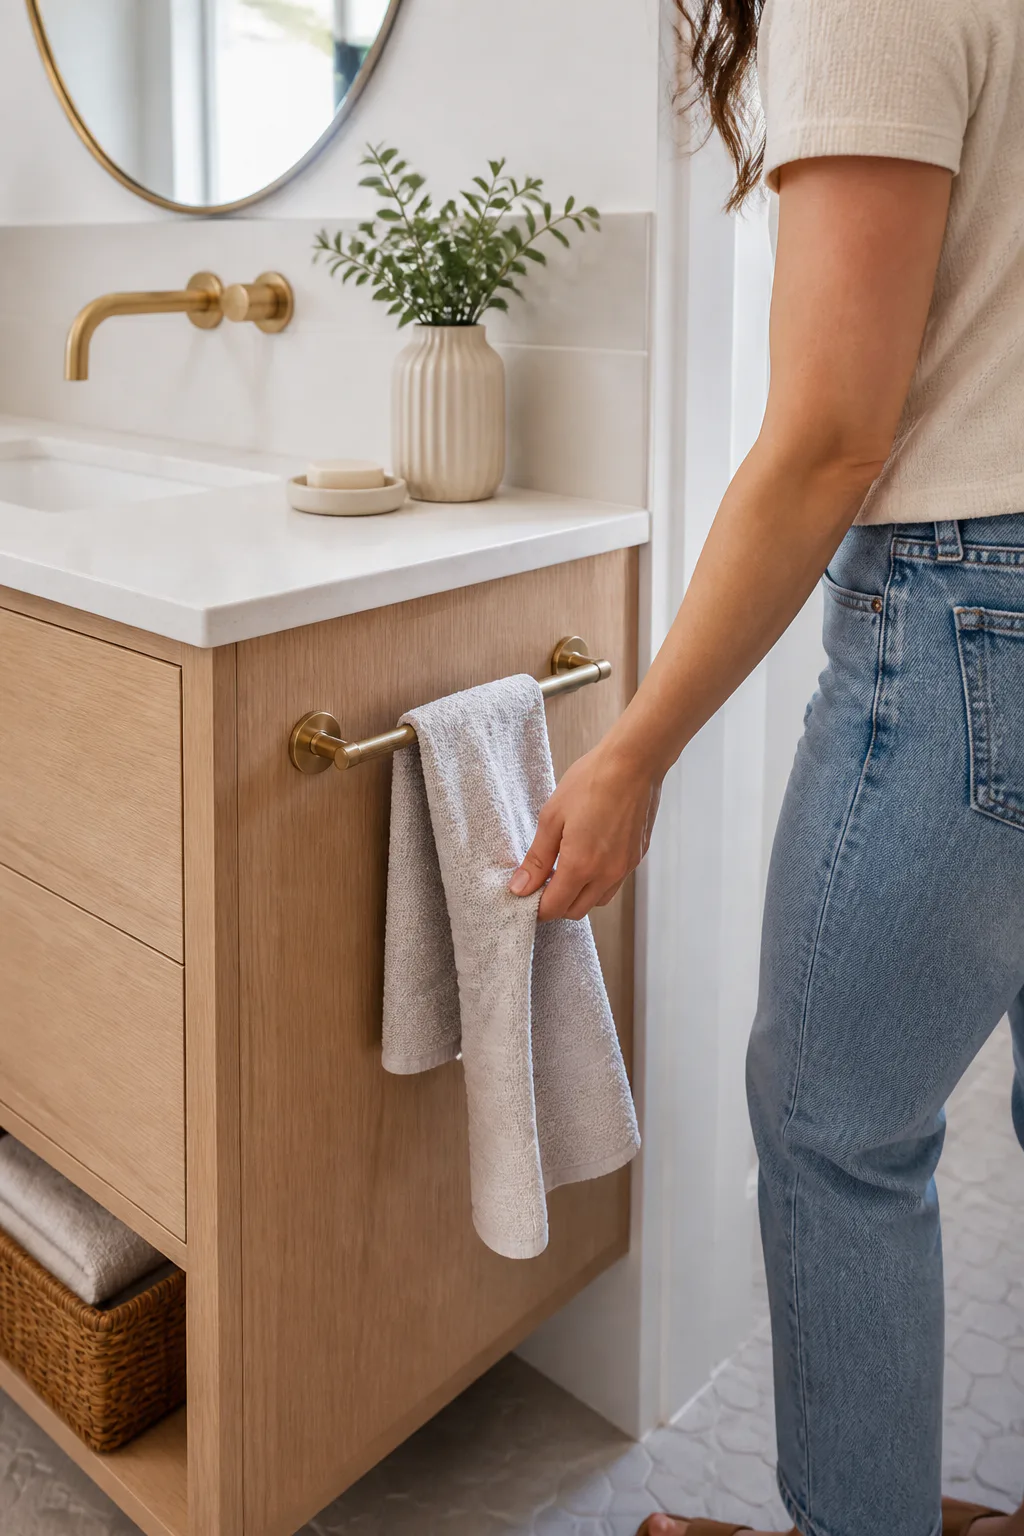
A towel bar doesn’t always need its own stretch of wall. Mounting a slim rack on the side of the vanity can place a hand towel close to the sink while keeping the wall free for a mirror, shelves, or artwork.
If the vanity side is not suitable, the back of the door may offer another discreet location. The key is choosing a spot where the towel can hang freely and dry, without catching on the door or getting in the way of people moving around.
Find a convenient location
Test the door and drawer movement before installing a bar, and make sure the fixture is attached securely to an appropriate surface. A compact ring or narrow bar may fit better than a full-size towel rail.
- Place the towel near the sink for easy access.
- Check that it won’t block drawers or cabinet doors.
- Use the back of the door if the vanity side is too tight.
- Choose a finish that coordinates with other bathroom hardware.
This small adjustment adds a useful landing spot for towels without claiming a full section of wall.
15. Slide a Slim Storage Tower Beside the Vanity
A narrow pullout storage tower can make use of the slim gap between a vanity and the wall. It offers a tucked-away place for toiletries and bathroom supplies, helping keep the countertop clear without adding a wide cabinet to the room.
This idea works best when the gap is measured carefully and the tower can slide out without hitting a door, fixture, or nearby handle. A vertical unit can hold more than its footprint suggests, but it should still be easy to access and simple to keep organized.
Make the narrow space useful
Measure the opening at several points and check the height available, including any trim or plumbing that may interfere. Choose a storage solution that suits the items you need to tuck away rather than filling it with supplies you rarely use.
- Confirm the pullout can move freely when fully loaded.
- Store everyday toiletries where they are easiest to reach.
- Use small organizers to keep narrow shelves orderly.
- Keep heavier items low for easier handling.
With a careful fit, this slim storage can turn a forgotten gap into practical, out-of-sight organization.
Final Thoughts
Small bathroom improvements work best when they respond to the way you use the room. A floating vanity or pocket door can improve circulation, while a recessed niche, shelves, or slim pullout can give everyday items a better home.
You don’t have to use every idea at once. Choose the changes that address your biggest space challenges, then bring them together with a consistent palette and finishes that suit your home. A few thoughtful updates can make a compact bathroom feel more open, organized, and personal.