15 Clever Shoe Storage Ideas for Every Room
Cluttered shoes can make a closet feel smaller and turn an entryway into an obstacle course. The right storage solution depends on where you have unused space, which pairs you reach for every day, and whether you want footwear tucked away or on display.
These shoe storage ideas cover small closets, narrow hallways, bedroom walls, and awkward spots beneath stairs or beds. Some use simple organizers, while others are DIY projects that can be adjusted to fit your home and collection.
Before choosing a setup, consider how many pairs you need to store and how easily you want to reach them. Keep everyday shoes close to the door, and reserve higher shelves or hidden storage for pairs you wear less often.
1. Double Closet Shelf Space with Shoe Slot Stackers
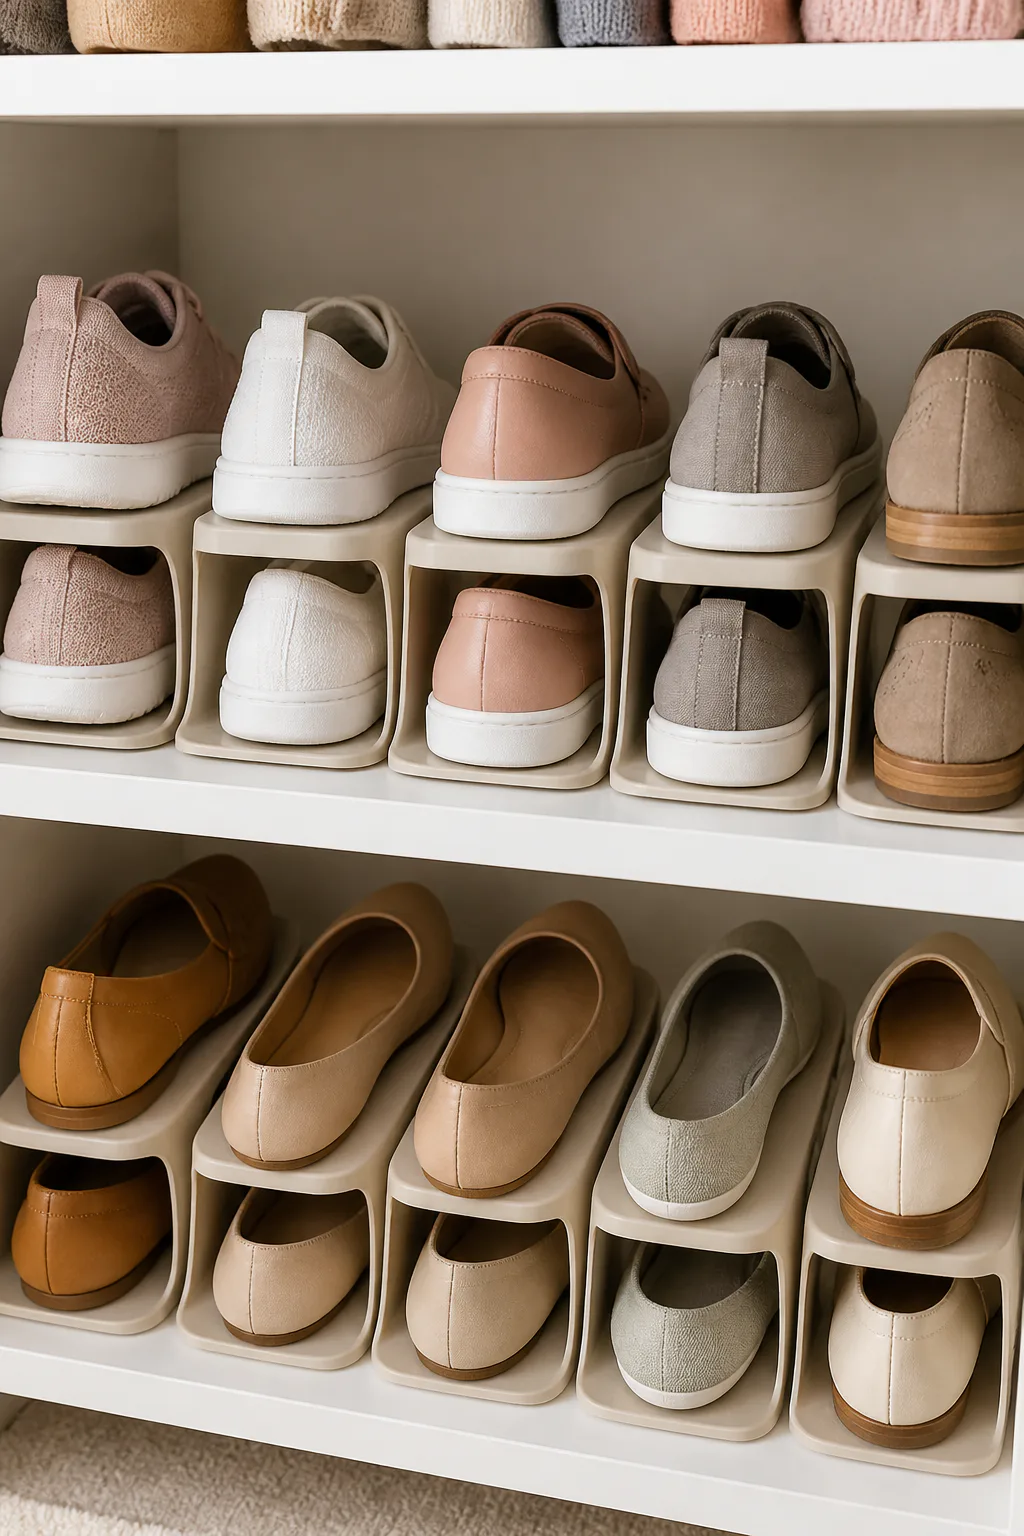
Shoe slot stackers hold one shoe above the other, letting you store a pair in roughly the footprint of a single shoe. They make good use of the open air above shoes on a closet shelf, where space is often wasted even when the shelf itself is full.
This is a practical choice for everyday sneakers, flats, and low-profile shoes that you want to see and grab quickly. Grouping pairs by type or color can make a crowded shelf feel more orderly without adding another storage unit to the closet.
How to make them work
Check the shelf’s height before arranging stackers, especially if there is another shelf directly above. Leave enough room to slide shoes in and out comfortably, and use stackers suited to the shape and weight of your footwear.
- Place frequently worn pairs at the front of the shelf.
- Use taller slots for sneakers and lower ones for flats.
- Wipe shoes clean before storing them close together.
Slot stackers are a small change that can make a familiar closet shelf much more useful.
2. Create a Heel-and-Flat Rack with Tension Rods

A pair of horizontal tension rods can turn a narrow closet gap into a simple rack for heels and flats. The rods take up little depth, so this arrangement can fit near the bottom of a closet or inside a cabinet where a full-size shoe shelf would feel bulky.
Heels can hook over a rod, while flats can rest across two closely spaced rods. It is a flexible option for footwear you want to keep visible, though the layout works best when the shoes are light and the rods are firmly supported.
Set up the rods securely
Measure the space between the side walls and follow the rod’s installation instructions. Test the fit before loading shoes, and check periodically that the rods have not shifted, particularly if the closet walls are smooth.
- Use one rod pair for flats and another for heels.
- Position the rods at a comfortable reaching height.
- Keep heavier shoes on a stable shelf instead.
- Avoid forcing rods against fragile or uneven surfaces.
The result is a lightweight, adjustable rack that makes use of a spot that might otherwise go empty.
3. Turn the Back of a Door into a Shoe Wall

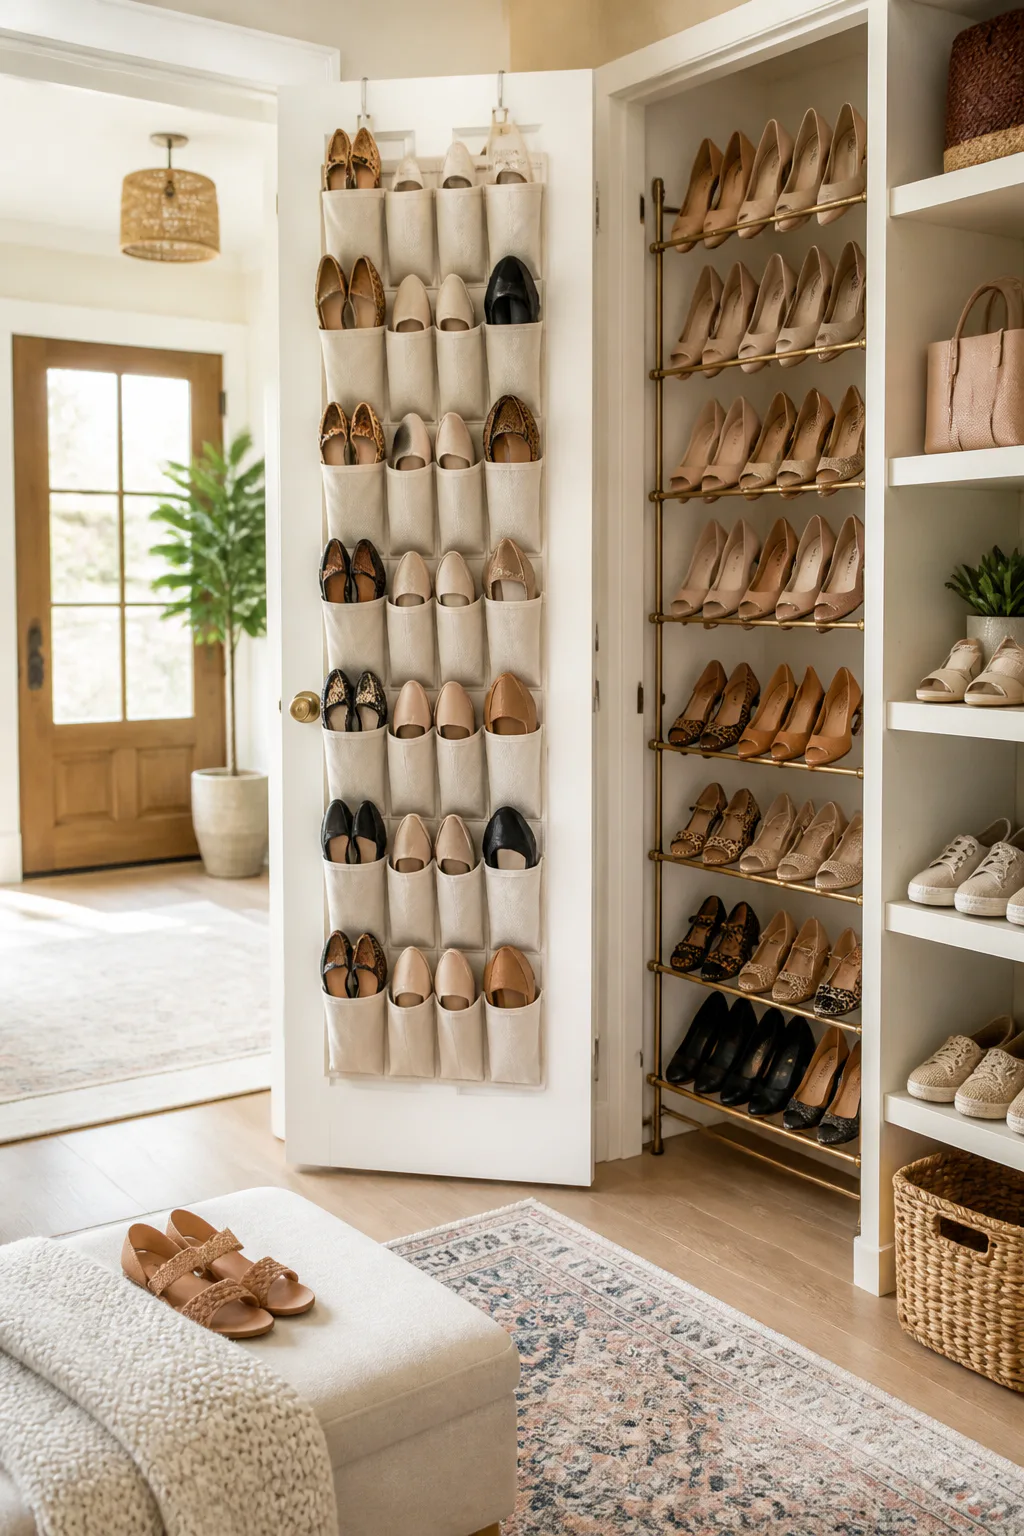
A clear-pocket organizer uses the back of a bedroom or closet door for vertical storage. Because the pockets keep individual pairs separated, you can see what is available at a glance instead of digging through a floor-level pile.
This approach suits small rooms where every bit of floor space matters. It is especially handy for flats, sandals, and other compact shoes; larger sneakers may need a pocket organizer designed with roomier compartments. Check that the door can still open fully once the organizer is loaded.
Keep the door easy to use
Hang the organizer using its intended hooks or mounting method, and make sure the door’s top edge and frame can support the arrangement. Put lighter shoes higher up and the pairs you wear most often in the easiest pockets to reach.
- Sort shoes into pockets by person, style, or season.
- Keep each pair together to make mornings simpler.
- Leave pockets unfilled if bulky shoes make the door awkward.
A door organizer can turn unused vertical space into a tidy, visible shoe zone without adding furniture.
4. Display Favorite Shoes on Crown Molding Shelves
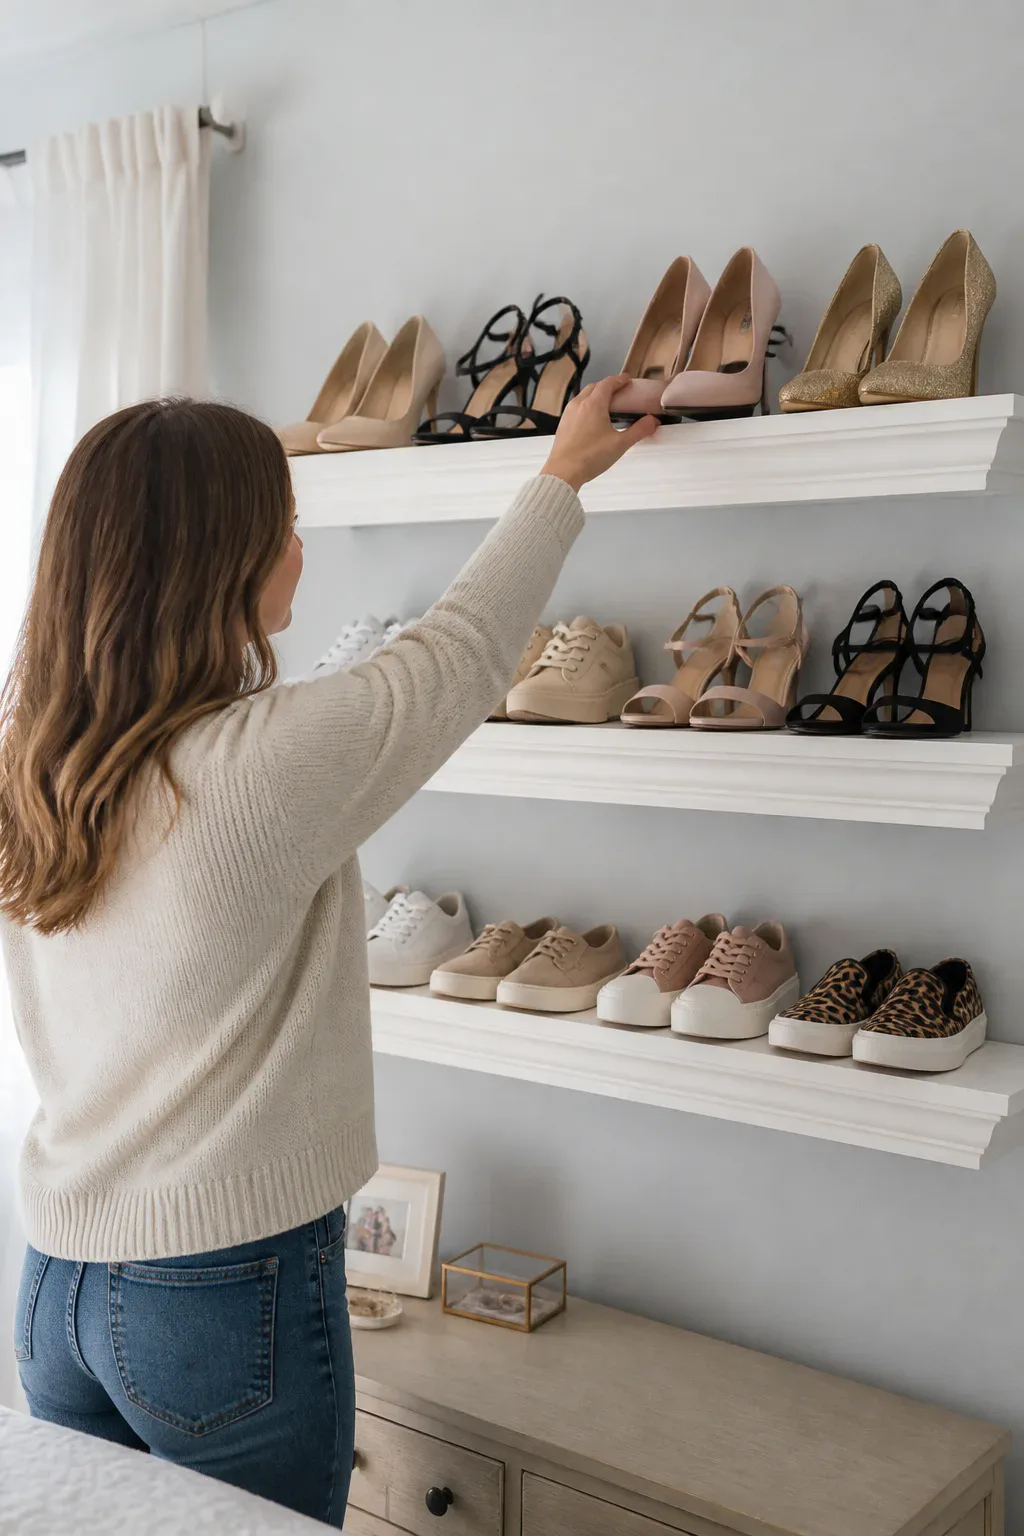
Crown molding mounted along a bedroom wall can double as a narrow ledge for displaying shoes. Its shaped profile can help support heels, making a row of favorite pairs feel more like a small collection display than ordinary closet storage.
Use this idea for shoes you enjoy seeing, such as special heels or collectible sneakers. A high wall keeps the display away from floor clutter, but the shoes should remain within comfortable reach if you plan to wear them regularly. The molding also needs to be installed securely, particularly when supporting heavier footwear.
Plan a display that feels intentional
Choose a wall with enough clear space and arrange the molding in a straight, level line. Decide whether you want a single shelf or several rows, leaving room to lift shoes off without knocking neighboring pairs.
- Use sturdy mounting appropriate for the wall surface.
- Space rows to fit the tallest shoes on display.
- Arrange pairs with similar colors for a calmer look.
- Keep the display away from places where shoes may be bumped.
This solution combines storage and personality, turning footwear into part of the room’s decor.
5. Add a Hanging Shoe Cubby to the Closet

A hanging fabric organizer adds a column of soft-sided cubbies to a closet without using floor space. Suspended from the closet rod, it creates separate homes for everyday sneakers, sandals, and other shoes that tend to collect beneath hanging clothes.
It is a useful choice when the closet has spare vertical room but little shelf space. Since fabric cubbies can flex, they are generally better for lighter shoes than heavy boots. The organizer can also help divide a shared closet, giving each person a clear section for frequently worn pairs.
Make the cubbies easy to access
Hang the organizer where its lower compartments will not drag on the floor, and leave enough room to pull shoes out without catching them on nearby clothing. Check the organizer’s dimensions against the closet rod and the space below it.
- Store daily shoes in the middle cubbies for easy reach.
- Use upper compartments for lighter, less-used pairs.
- Keep damp or muddy shoes elsewhere until they are dry.
A hanging cubby is a straightforward way to give a closet’s vertical space a more organized purpose.
6. Fit a Slim Tip-Out Cabinet in the Entryway

A shallow tip-out shoe cabinet can store footwear against a wall without projecting far into a narrow hallway. Its compartments tilt outward to hold shoes, making it a useful alternative when a conventional rack would restrict the walking path or crowd an entry door.
This style works well for keeping a small rotation of shoes near the front door. Capacity and shoe fit vary by cabinet design, so check the interior dimensions before choosing one, especially if you wear larger sizes or need room for sneakers. A slim cabinet can also give keys or a small catchall tray a defined place nearby.
Fit the cabinet to the hall
Measure the available wall and account for the cabinet doors as they tip open. Follow the installation guidance, including any wall anchoring instructions, so the unit stays stable during everyday use.
- Keep the most frequently worn pairs in the easiest compartment.
- Check that the cabinet does not block switches or doorways.
- Store bulky boots in a separate, more spacious spot.
With a careful fit, a shallow cabinet keeps shoes close at hand while preserving precious floor space.
7. Pair an Entryway Bench with Shoe Storage
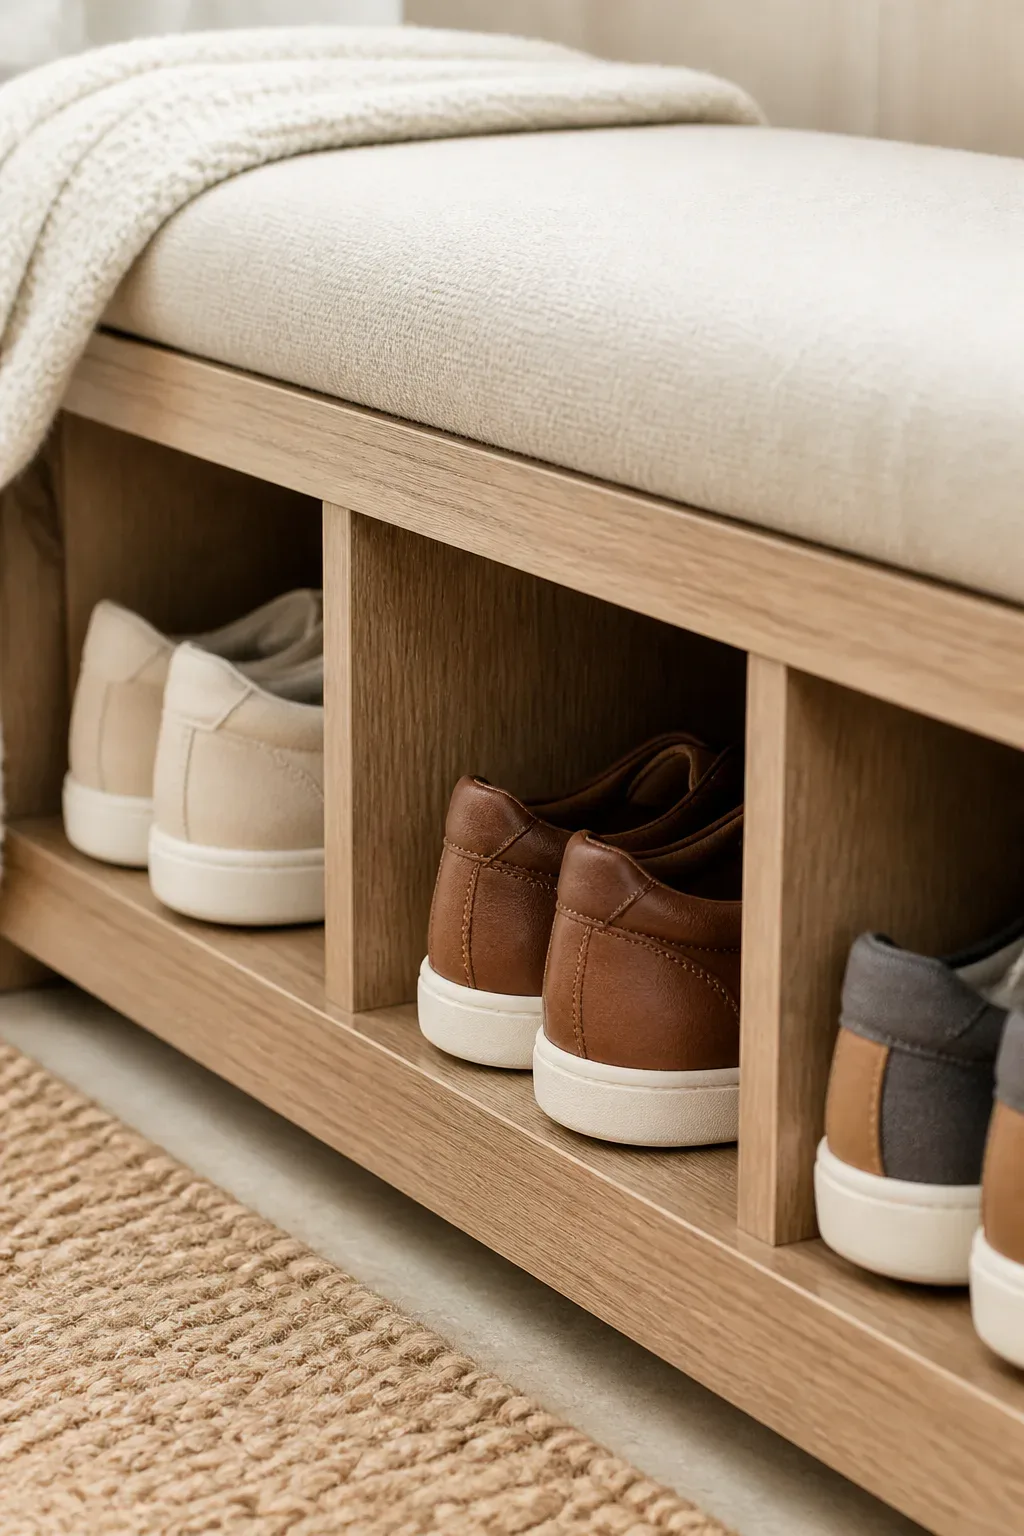
An entryway bench combines a place to sit with storage for the shoes you use most. Choose a design with open cubbies for quick access or a lift-up seat that conceals shoes when you prefer a less visible setup.
Positioning a bench near the door makes it easier to put on or remove footwear without balancing in the hallway. It can also encourage household members to leave shoes in one designated spot rather than scattering them through the entry. Make sure the bench fits without narrowing the main path through the room.
Choose a layout for your routine
Think about whether you want to see shoes at a glance or tuck them away. Open storage is convenient for daily pairs, while a closed seat can create a calmer look; either way, allow shoes to air out before enclosing them.
- Reserve the most accessible cubbies for everyday footwear.
- Use baskets inside larger openings to group small items.
- Keep the bench clear enough to use as a seat.
- Check the unit’s stability and follow assembly instructions.
A storage bench makes the entry more functional by bringing seating and shoe organization together.
8. Hide Seasonal Shoes in Rolling Under-Bed Drawers

The space beneath a bed can store shoes that are not part of your current rotation. Low-profile rolling drawers or bins slide out when needed and keep formal footwear, off-season sandals, or other occasional pairs out of sight in the meantime.
This is a good option for bedrooms with limited closet space, provided the bed frame leaves enough clearance. Measure both the opening and the distance beneath the frame before selecting containers. Shoes stored for a long stretch should be clean and dry, and delicate pairs may benefit from being kept in individual bags or boxes.
Keep hidden storage organized
Use separate bins for different seasons or occasions so you do not have to search through every container. Labeling the ends can help you identify what is inside without pulling each drawer fully into the room.
- Choose low bins that clear the bed frame easily.
- Keep special-occasion shoes together as a set.
- Leave room to pull drawers out without moving furniture.
- Check stored shoes from time to time for dust or moisture.
Under-bed storage keeps less-used shoes accessible without letting them take over the closet.
9. Build a Rearrangeable Shoe Wall with Pegboard
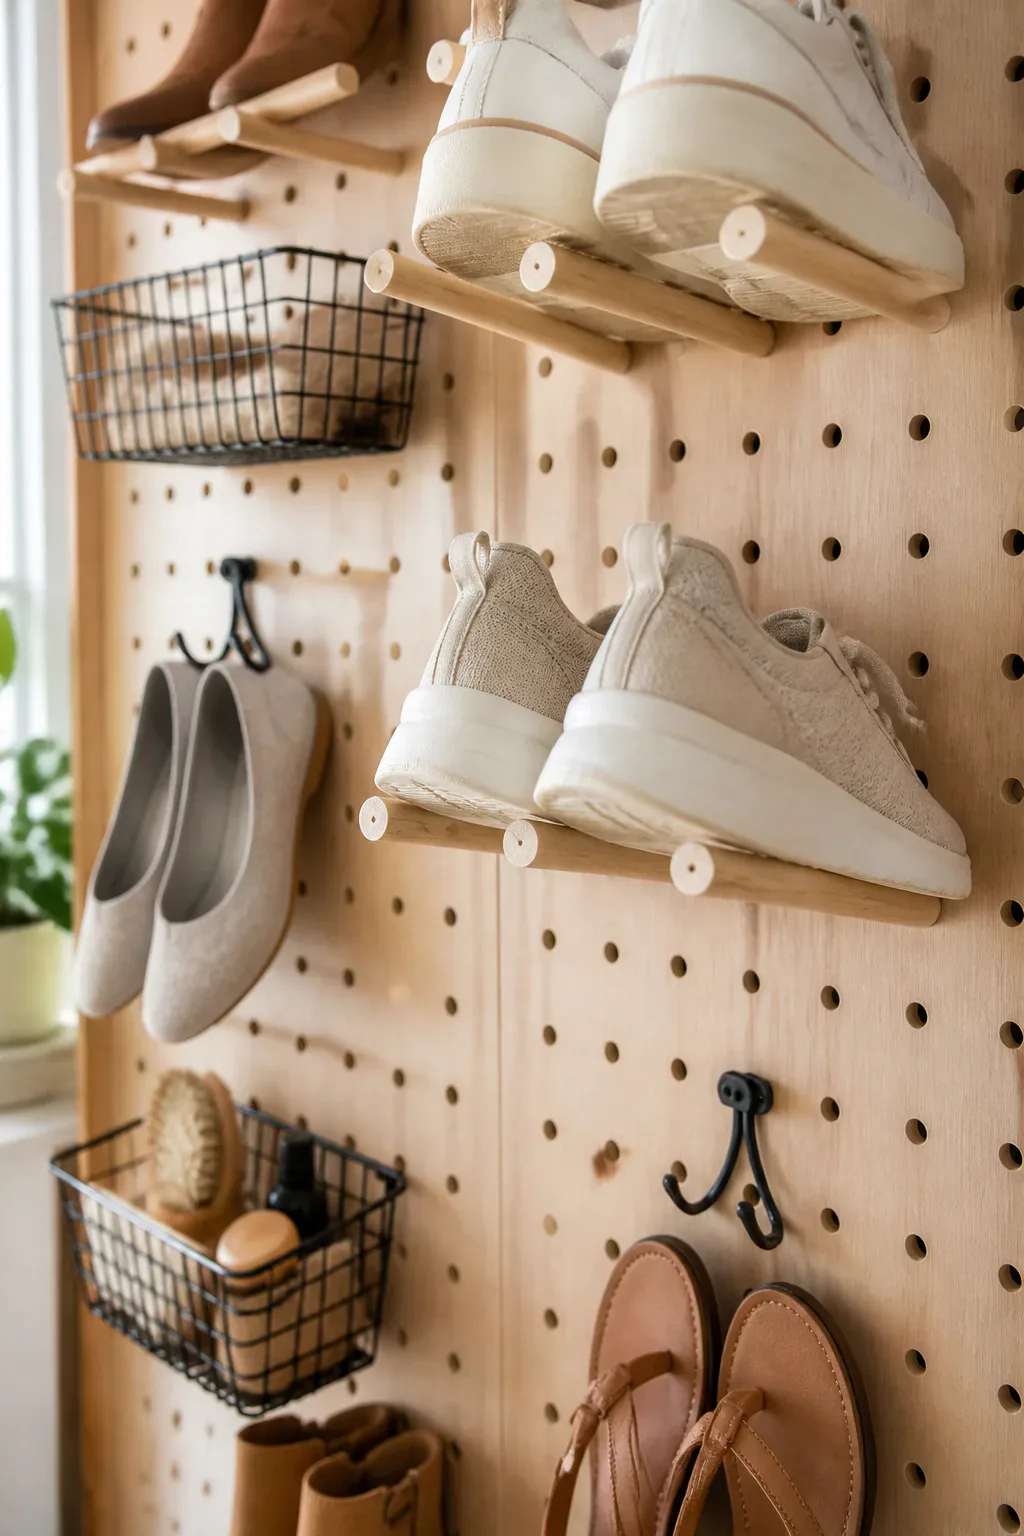
A pegboard wall in a mudroom or closet can adapt as your shoe collection changes. Movable dowels, hooks, and baskets let you create different storage zones instead of committing to fixed shelves that may not suit every pair.
This approach is useful for households with a changing mix of sneakers, sandals, and accessories. A pegboard can make a compact wall work harder, but the board and its mounting need to be appropriate for the weight placed on it. Plan the layout around the shoes you actually store, rather than filling every opening simply because it is available.
Arrange the board for easy changes
Start with sturdy supports and position the board where shoes can be reached without blocking a door or walkway. Try a simple layout first, then move the accessories as your needs shift.
- Use baskets for small items such as shoe-care supplies.
- Place the most-used pairs at a convenient height.
- Leave room between shoes so they are easy to remove.
- Recheck hooks and dowels after rearranging the load.
A flexible shoe wall is especially helpful when one fixed arrangement never seems to fit everything.
10. Make an Industrial Pipe Shoe Rack
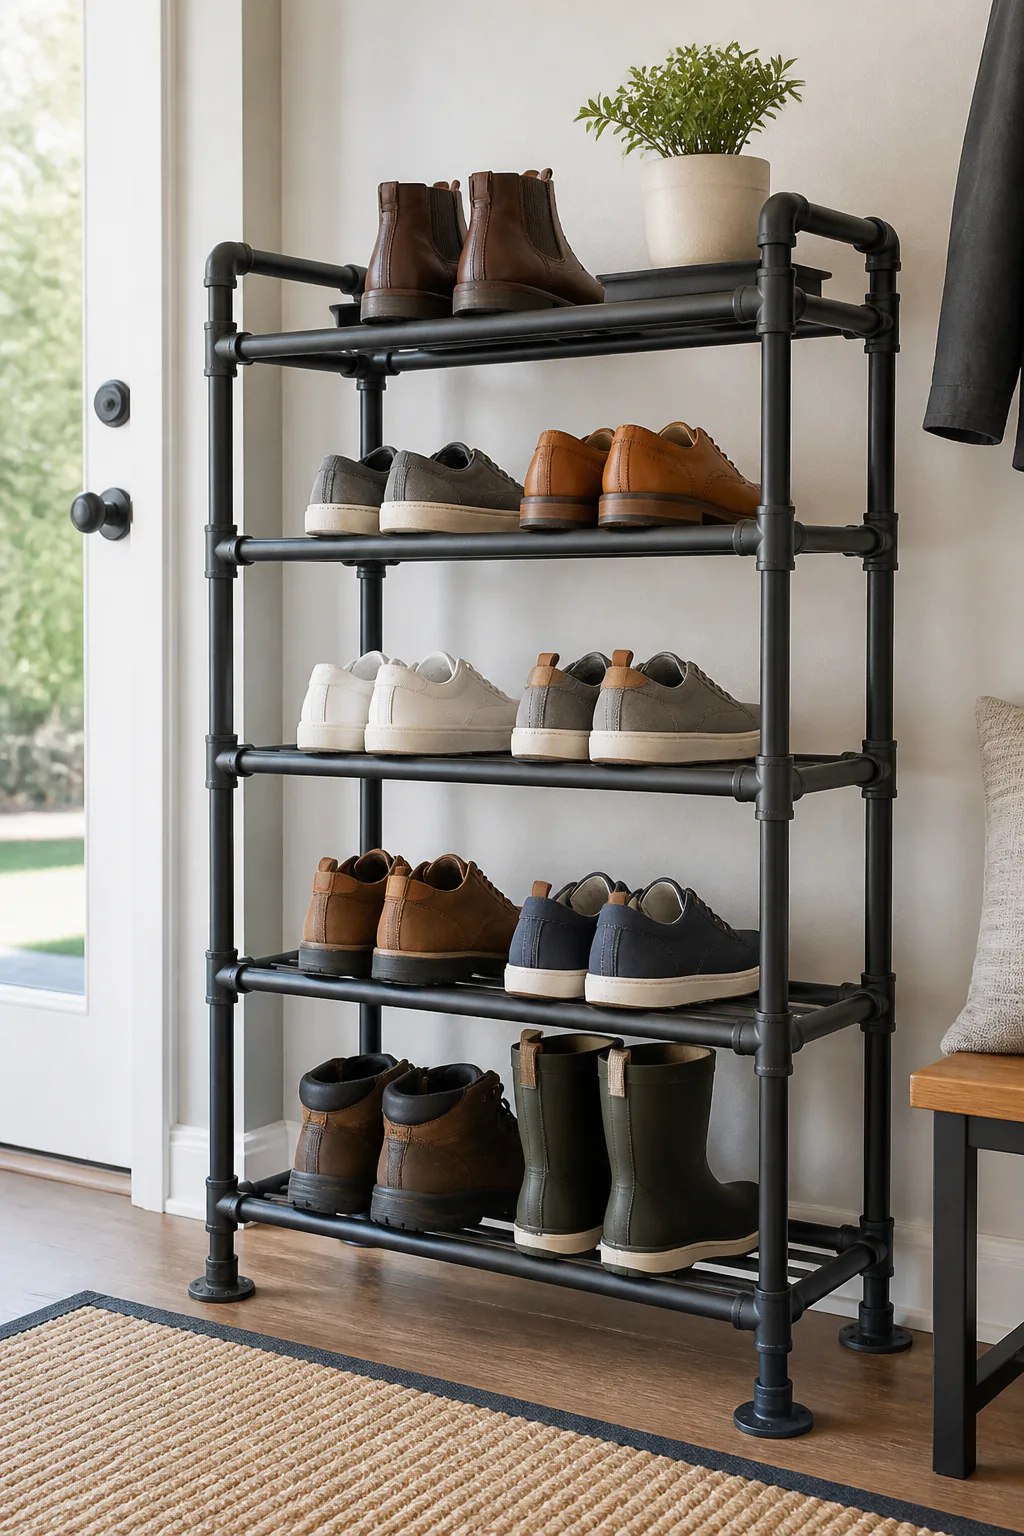
A multi-tier rack made from black iron plumbing pipes brings a rugged, industrial look to an entryway or closet. Open rails keep shoes visible and allow air to circulate, while the vertical tiers make use of floor space more efficiently than a loose row of pairs.
This can be a satisfying DIY project if you want a rack sized to a particular nook. Pipe fittings and shelf spacing can be adjusted to suit the room, but the finished structure should be stable and smooth enough that it will not snag clothing or scratch nearby surfaces. Consider how the industrial finish will look alongside your existing furniture.
Build for stability and access
Sketch the rack’s width and height before assembling it, and leave enough room between tiers for the footwear you plan to store. Check that the base sits level and that the rack will not wobble when shoes are removed.
- Use lower tiers for heavier shoes and boots.
- Keep the top tier within comfortable reach.
- Confirm every fitting is secure before loading the rack.
- Add floor protection if the rack rests on a delicate surface.
The open design makes this rack both a practical organizer and a visible part of the room’s style.
11. Stop Shoes from Sliding with Upside-Down Wire Shelving
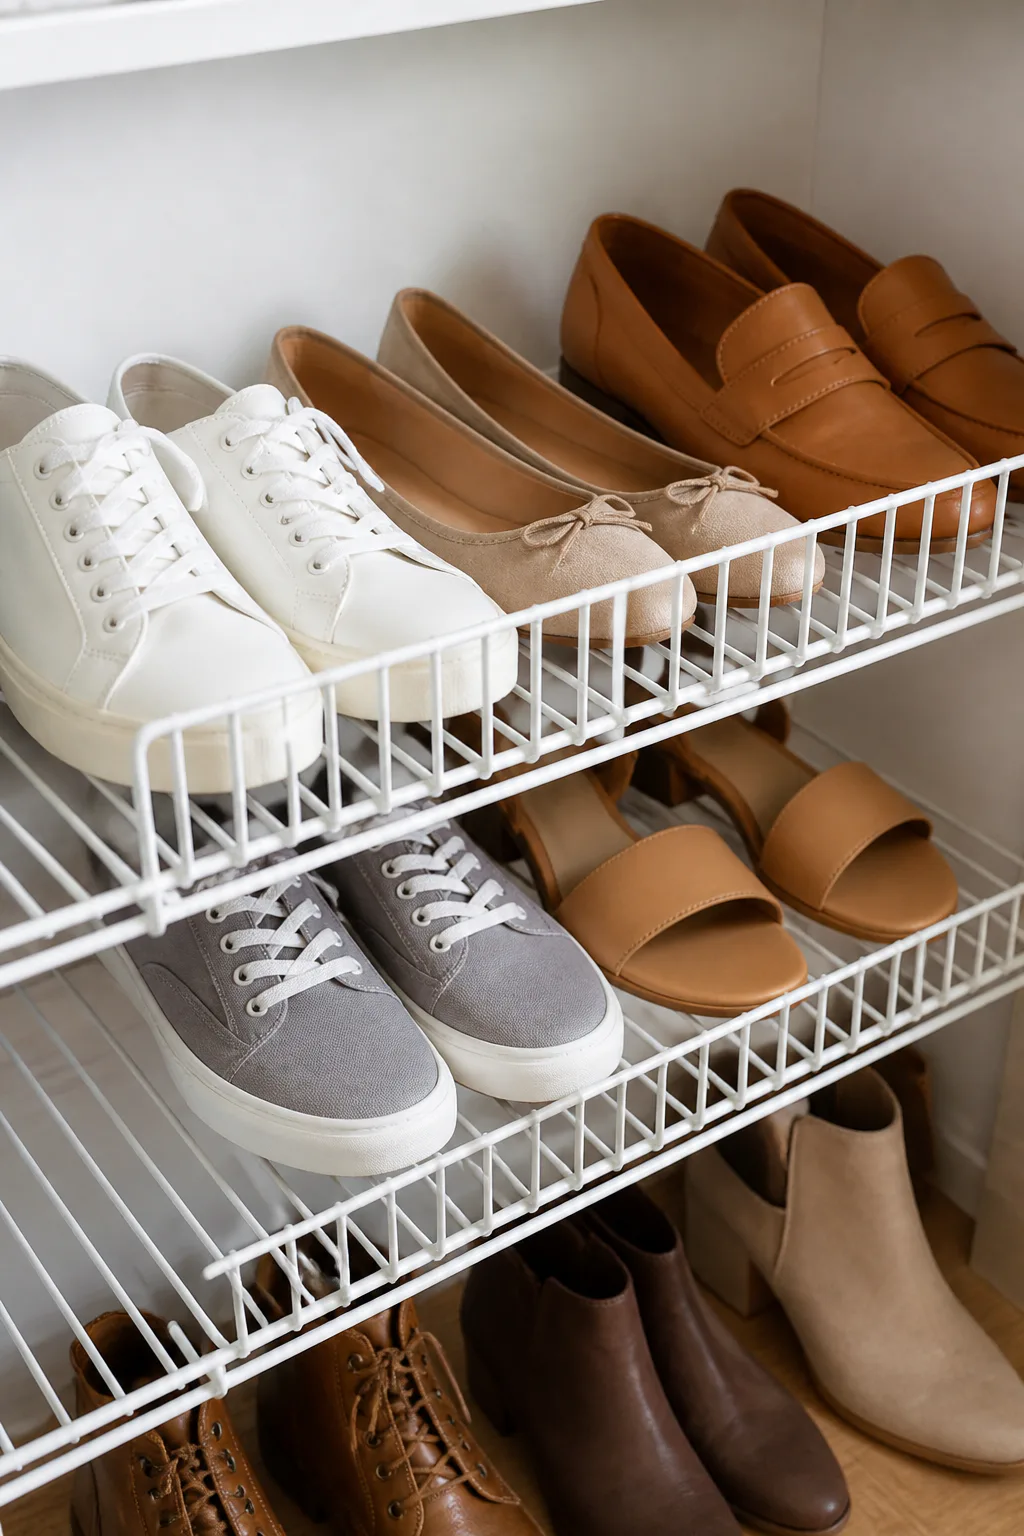
Turning wire closet shelving upside down can make its front edge act as a stopper for shoes. This small adjustment is helpful when angled shelves cause pairs to slide forward, leaving shoes jumbled on the closet floor or unevenly arranged along the shelf.
The idea works best with shoes that sit securely across the wires and benefit from a slight angle. Before changing an existing shelf, check how it is attached and whether its brackets are designed to support it in that position. If you are installing new shelving, follow the manufacturer’s guidance for orientation and weight limits.
Adjust the shelf thoughtfully
Test the arrangement with a few pairs before filling the shelf. Keep shoes balanced across the surface, and avoid placing footwear so close together that the wire lip makes removal awkward.
- Use the shelf for pairs that tend to slide on a slope.
- Check that the wire edge does not damage delicate shoes.
- Keep heavier footwear on a more stable shelf if needed.
- Secure the brackets before adding the full collection.
When the shelf design allows it, this simple flip can make angled storage much tidier.
12. Build a Honeycomb Shoe Organizer from PVC Pipes
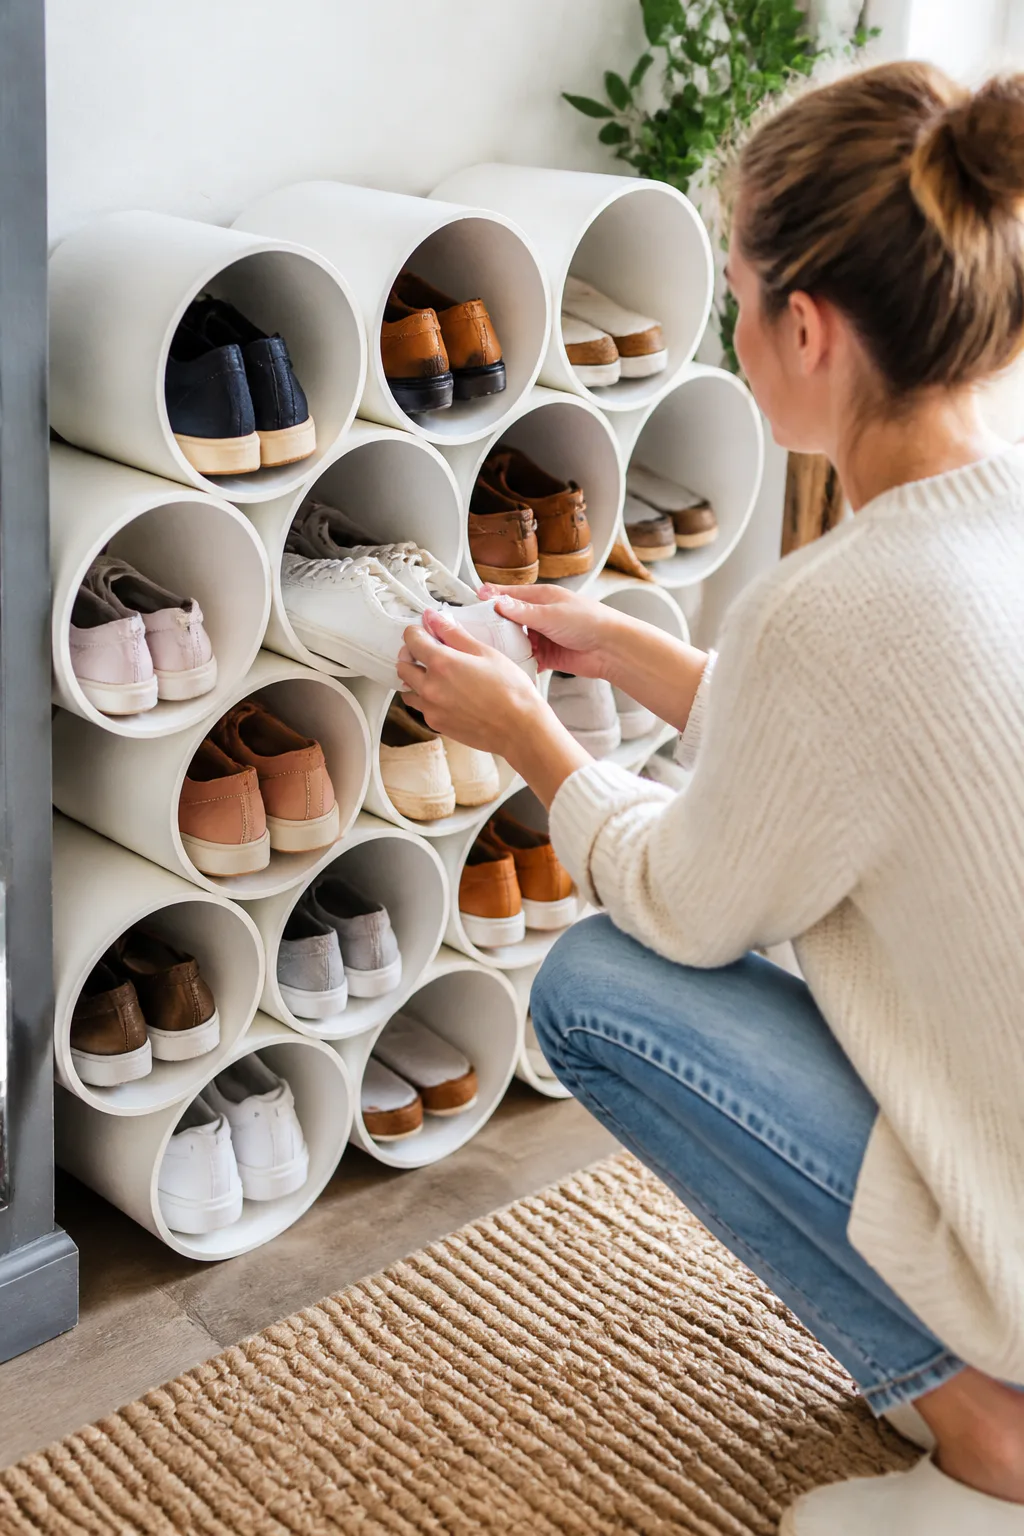
Wide PVC pipe sections can be arranged into a honeycomb-style organizer, giving each shoe or pair its own cylindrical space. The repeating openings create a graphic display that can fit a closet, mudroom, or bedroom wall, depending on the size of the finished unit.
Choose pipe diameters and lengths that suit the footwear you want to store. This design is most practical for compact shoes that slide into the openings without being squeezed; bulky sneakers and boots may need a different solution. A test arrangement can help you find a comfortable size before cutting or joining all the pieces.
Plan and assemble the compartments
Cut sections to a consistent length and arrange them in a stable pattern before fixing them together. Smooth cut edges, and make sure the completed organizer cannot tip or shift when shoes are removed.
- Measure shoes before choosing the pipe diameter.
- Keep each opening clean and free of sharp edges.
- Place the organizer where its depth will not block a walkway.
- Use separate openings for pairs you want to keep together.
The honeycomb layout turns simple materials into an easy-to-scan storage feature.
13. Create a Stackable Sneaker Display with Clear Boxes

Clear drop-front boxes let you see a sneaker collection while keeping pairs protected from everyday dust. Because the front opens, shoes can be retrieved without dismantling a tall stack, making this setup more convenient than boxes that can only be accessed from the top.
Modular boxes can be arranged in a closet, along a bedroom wall, or in another tidy display area. Check that the boxes are designed to stack securely and that each compartment is large enough for the shoes you own. Clear fronts make the collection visible, but a little sorting keeps the display from feeling visually busy.
Build a useful display
Stack boxes on a level surface and follow the product’s instructions for connecting or securing them. Place the pairs you wear most often where the drop fronts are easiest to reach, and avoid building a tower that feels unstable.
- Group sneakers by color, activity, or frequency of use.
- Keep shoes clean and dry before closing each box.
- Check the fit for high-tops or wider styles.
- Leave enough clearance to open each front panel.
This option balances visibility and protection for shoes you want to keep in good condition.
14. Turn Under-Stair Space into Shoe Cubbies
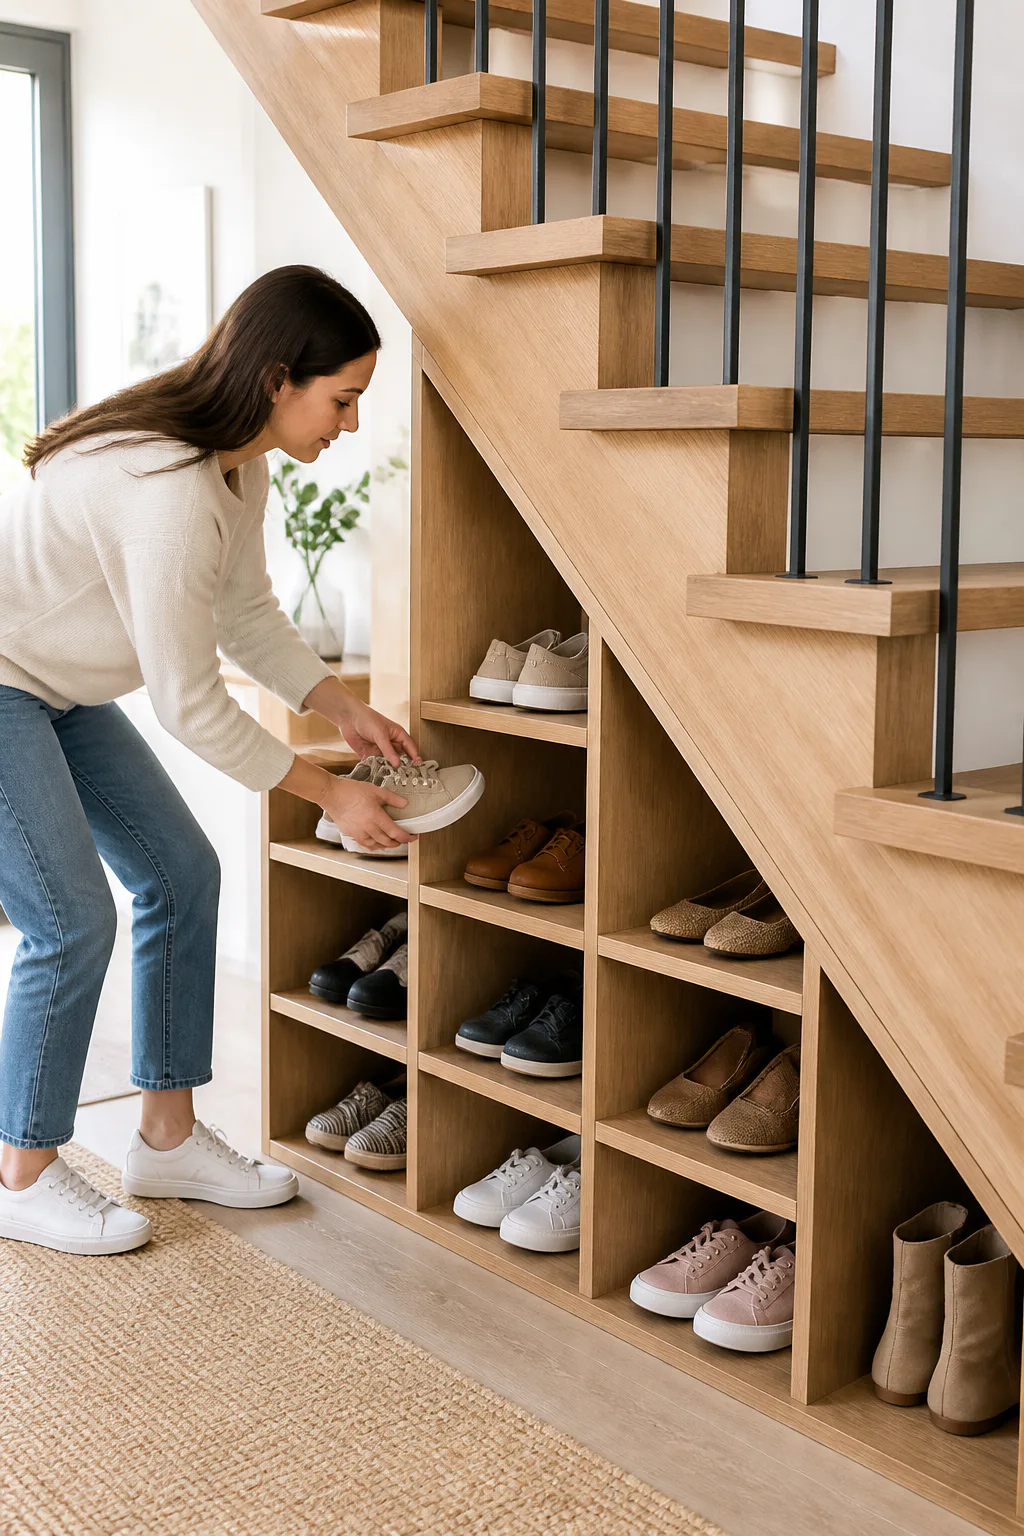
The sloping area beneath an open staircase can become useful shoe storage instead of remaining an awkward, empty nook. Open shelves or pull-out drawers can follow the triangular shape, giving the entryway a dedicated place for footwear without taking space from the center of the room.
Open cubbies make it easy to grab daily shoes, while drawers create a more concealed look. The right arrangement depends on the stair structure, the depth available, and how much access the space allows. For built-in work, plan carefully around the stairs and make sure the storage does not interfere with safe movement through the area.
Work with the shape of the stairs
Measure the available height at several points, since the slope creates compartments of different sizes. Put taller cubbies where there is more clearance and use the lower end for flats or smaller items.
- Keep everyday pairs near the open, easy-to-reach end.
- Use drawers for shoes you prefer to keep out of sight.
- Leave the stair route and nearby walkway clear.
- Choose finishes that coordinate with the entryway.
A well-planned under-stair setup turns a challenging corner into purposeful storage.
15. Hang Heels from a Hallway Copper Rod
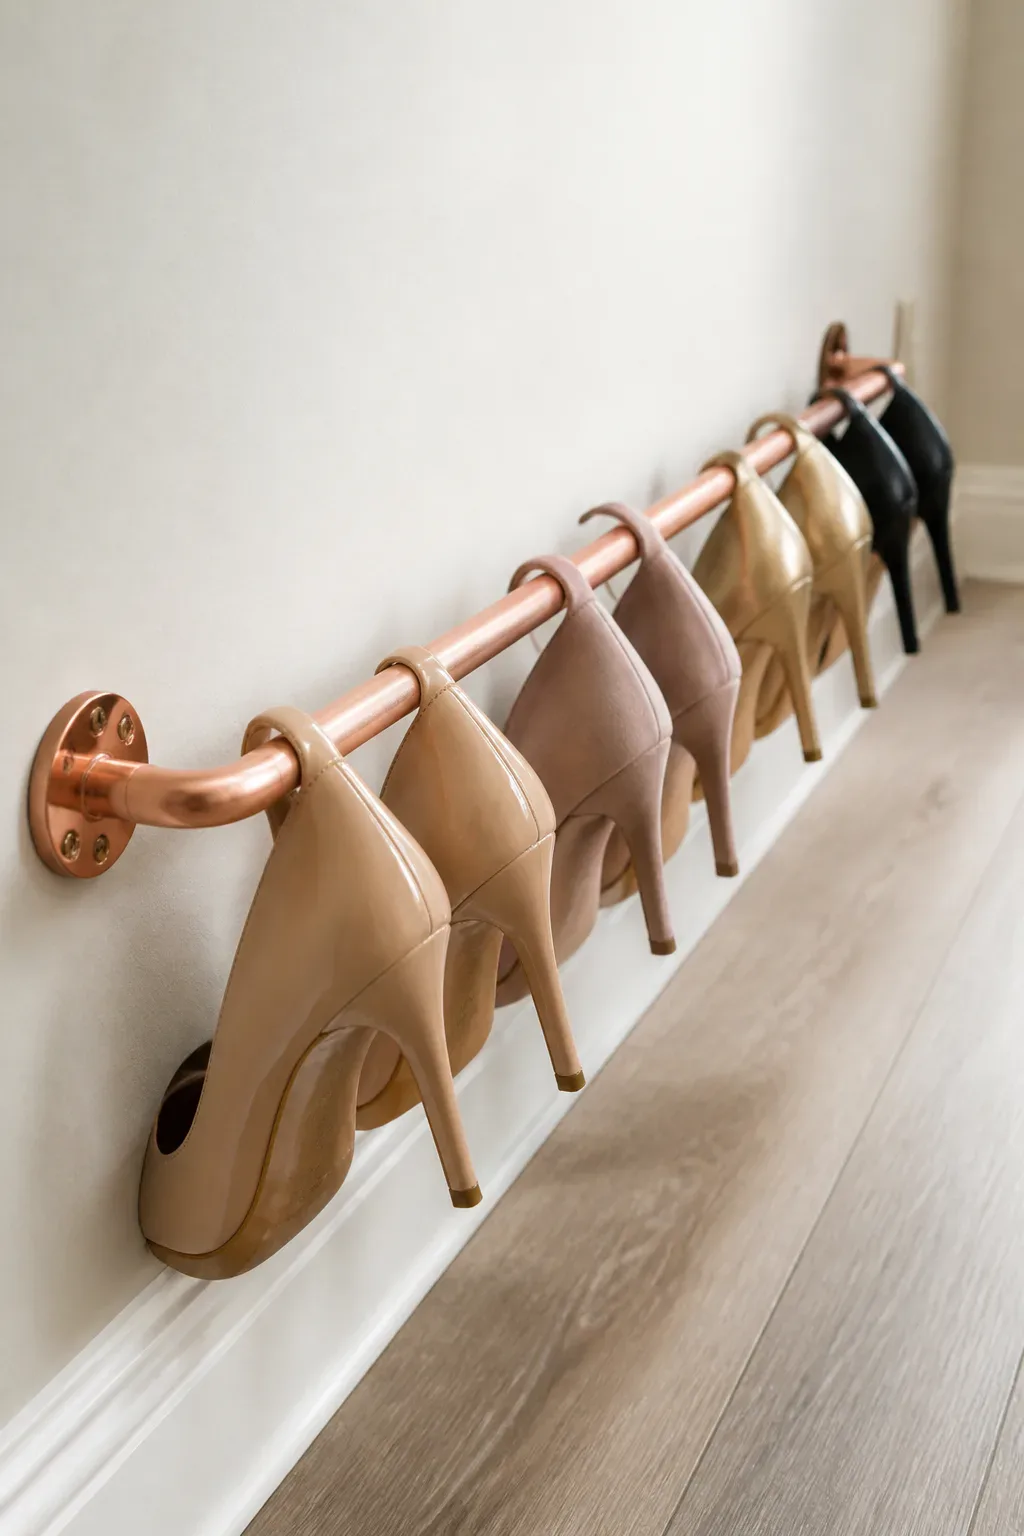
A copper or brass-toned rod mounted near the baseboard can hold heels by their heel backs. The shoes hang in a neat line, using a slim strip of wall and creating a small display that can work in a hallway, bedroom, or closet.
This idea is best for heels with a shape that can rest securely over the rod. It is less suited to flats, heavy footwear, or shoes with delicate details that could be marked by hanging. Since the rod sits low, choose a location where shoes will not be kicked or become a trip hazard.
Choose a safe, practical location
Measure the shoes and test the hanging position before mounting the rod. Use hardware suited to the wall surface, and leave enough room between pairs so each one can be lifted off easily.
- Hang only shoes that sit securely on the rod.
- Keep the rail clear of door swings and walking paths.
- Group favorite heels together for a tidy display.
- Check the mounts periodically for looseness.
A slim rail makes use of overlooked wall space while giving special heels a visible home.
Final Thoughts
Good shoe storage does not have to mean adding a large rack or sacrificing valuable floor space. Closet shelves, doors, walls, and the areas beneath beds or stairs can all help keep pairs organized when the solution matches the space and the way you use it.
Start with the shoes you reach for most, then choose one idea that suits your home and routine. A few thoughtful adjustments can make it easier to find the right pair, keep walkways clear, and give every shoe a place to return to.