
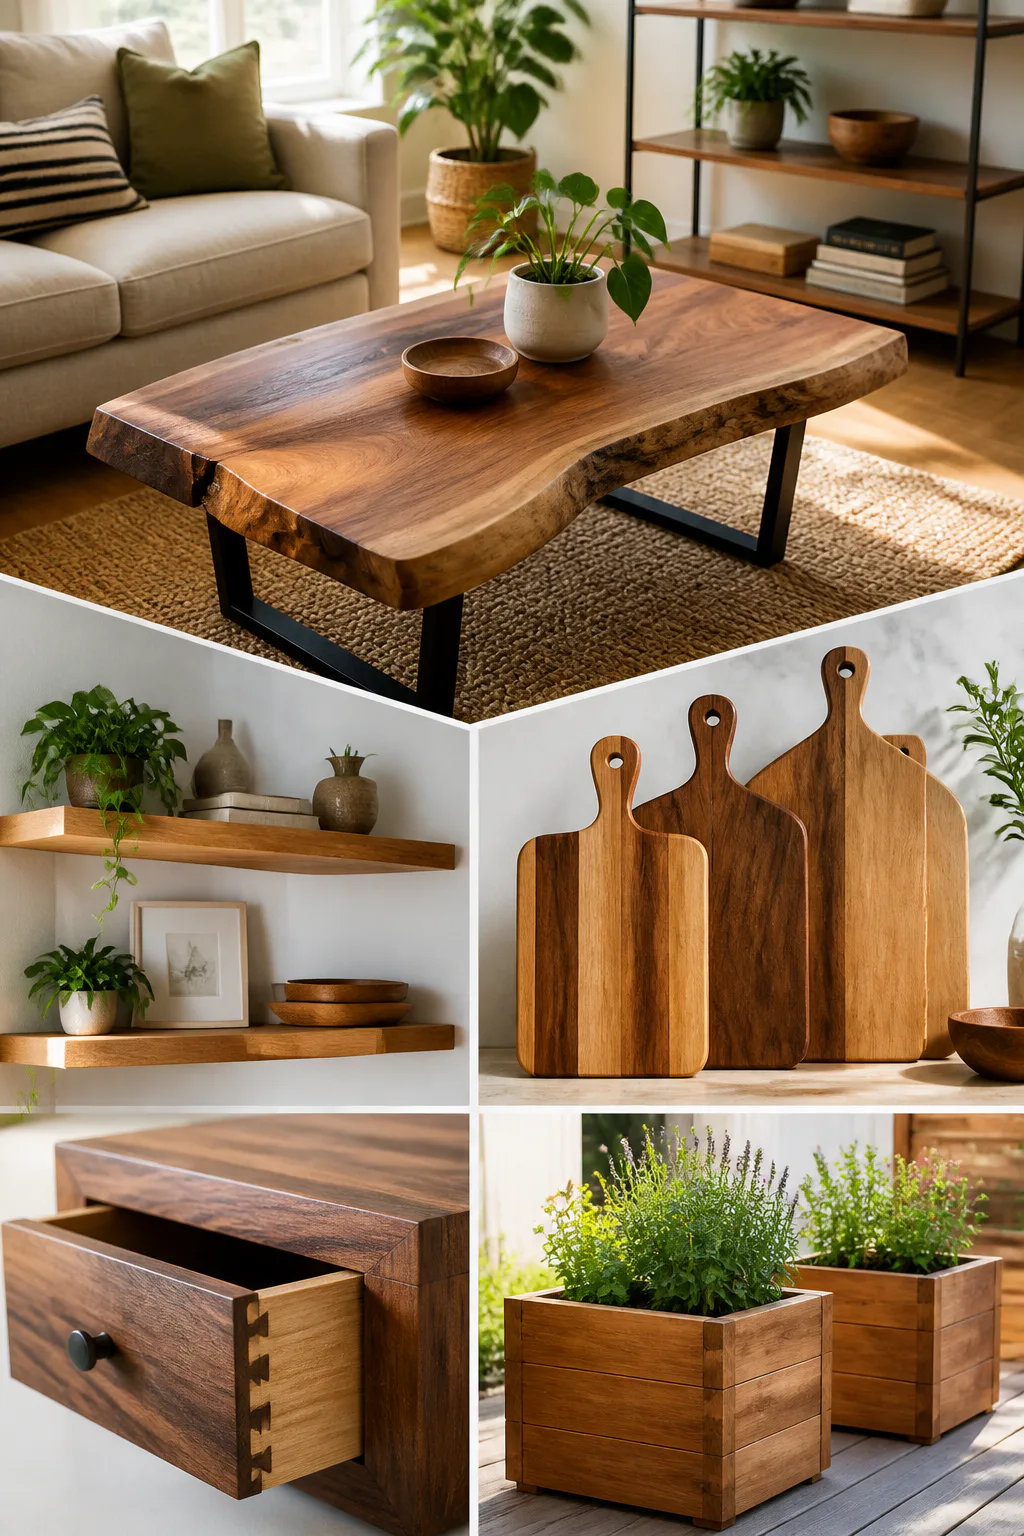
12 Clever Woodworking Projects for Every Skill Level
Woodworking projects can add useful storage, thoughtful details, and a little handmade character to your home. The ideas here range from small builds that help you practice careful measuring and sanding to larger pieces that ask you to think about strength, fit, and everyday use.
Each project is designed to have a place in a real room or garden, so you can picture how it might work before you start cutting. Some need only a small work surface and basic tools, while others are better tackled when you have room to assemble and check a larger piece.
Whether you are new to woodworking or ready to build something more substantial, begin with the project that suits your tools, available space, and patience. Measure the intended spot first, choose materials appropriate to the setting, and take time to test-fit parts before fastening them together.
1. Display Handmade Cutting Boards in a Kitchen Nook

A handmade cutting board is a useful project that can also bring warmth to a kitchen counter. Hardwood boards such as maple, walnut, or cherry offer attractive grain and are commonly used for food-preparation surfaces. The work gives you a chance to practice arranging pieces, gluing, clamping, and sanding until the surface feels smooth.
Once the boards are finished, stand them upright in a kitchen nook or along the backsplash where they are easy to reach. Varying their shapes and wood tones creates a collected look, while keeping the display compact enough to leave room for everyday cooking.
Build and style with care
Use a food-safe finish intended for cutting boards, and let it cure according to its directions before putting the boards to work. Keep the display simple so the grain remains the focus.
- Choose well-dried hardwood and avoid wood with cracks or loose knots.
- Clamp glued pieces evenly and clean up excess glue before it hardens.
- Sand progressively, then ease sharp edges for a comfortable grip.
- Stand boards where they can dry fully between uses.
2. Install Seamless Floating Shelves in the Living Room

Floating shelves provide display space without the visual weight of brackets beneath them. Their concealed supports make books, small framed prints, and a few favorite objects appear to sit directly on the wall, which suits living rooms where you want storage to feel light and uncluttered.
Plan the shelf length and depth around the wall and the items you intend to display. A pair of shorter shelves can frame a reading corner, while a longer run may work above a sofa or low cabinet. Before drilling, check the wall construction and mark a level line so the finished shelves look intentional.
Make the installation feel seamless
The hidden support needs to be securely fixed to suitable wall structure, and the wooden shelf must fit its hardware accurately. Take time to test the fit before mounting the piece permanently.
- Measure books and decor so the shelf depth is practical.
- Locate studs or use fixings suited to the wall material.
- Check level across the full span before securing supports.
- Style with a mix of books and open space rather than crowding the shelf.
3. Line a Sunny Windowsill with Wooden Planter Boxes

Wooden planter boxes can turn a sunny indoor windowsill into a small, useful garden. Their simple rectangular shape is approachable to build, and a row of matching boxes creates a tidy feature without taking over the room. They are especially handy for herbs or compact plants you want near the kitchen or a bright sitting area.
Measure the sill carefully, allowing room for the window to open and for the planters to be lifted out for watering. Consider the weight of damp soil and containers, too; a long box can become heavy once planted. Use a liner or separate nursery pots to help protect the wood from constant moisture.
Fit the boxes to the window
Keep construction straightforward with square corners and a stable base. A water-resistant finish can help, but it does not replace good drainage and a barrier between wet soil and the wood.
- Confirm the sill depth and width before cutting the pieces.
- Add drainage openings if the planting setup calls for them.
- Use a liner or removable pots to limit water exposure.
- Choose plants suited to the light the window actually receives.
4. Create a Built-In Desk Organizer for a Home Office
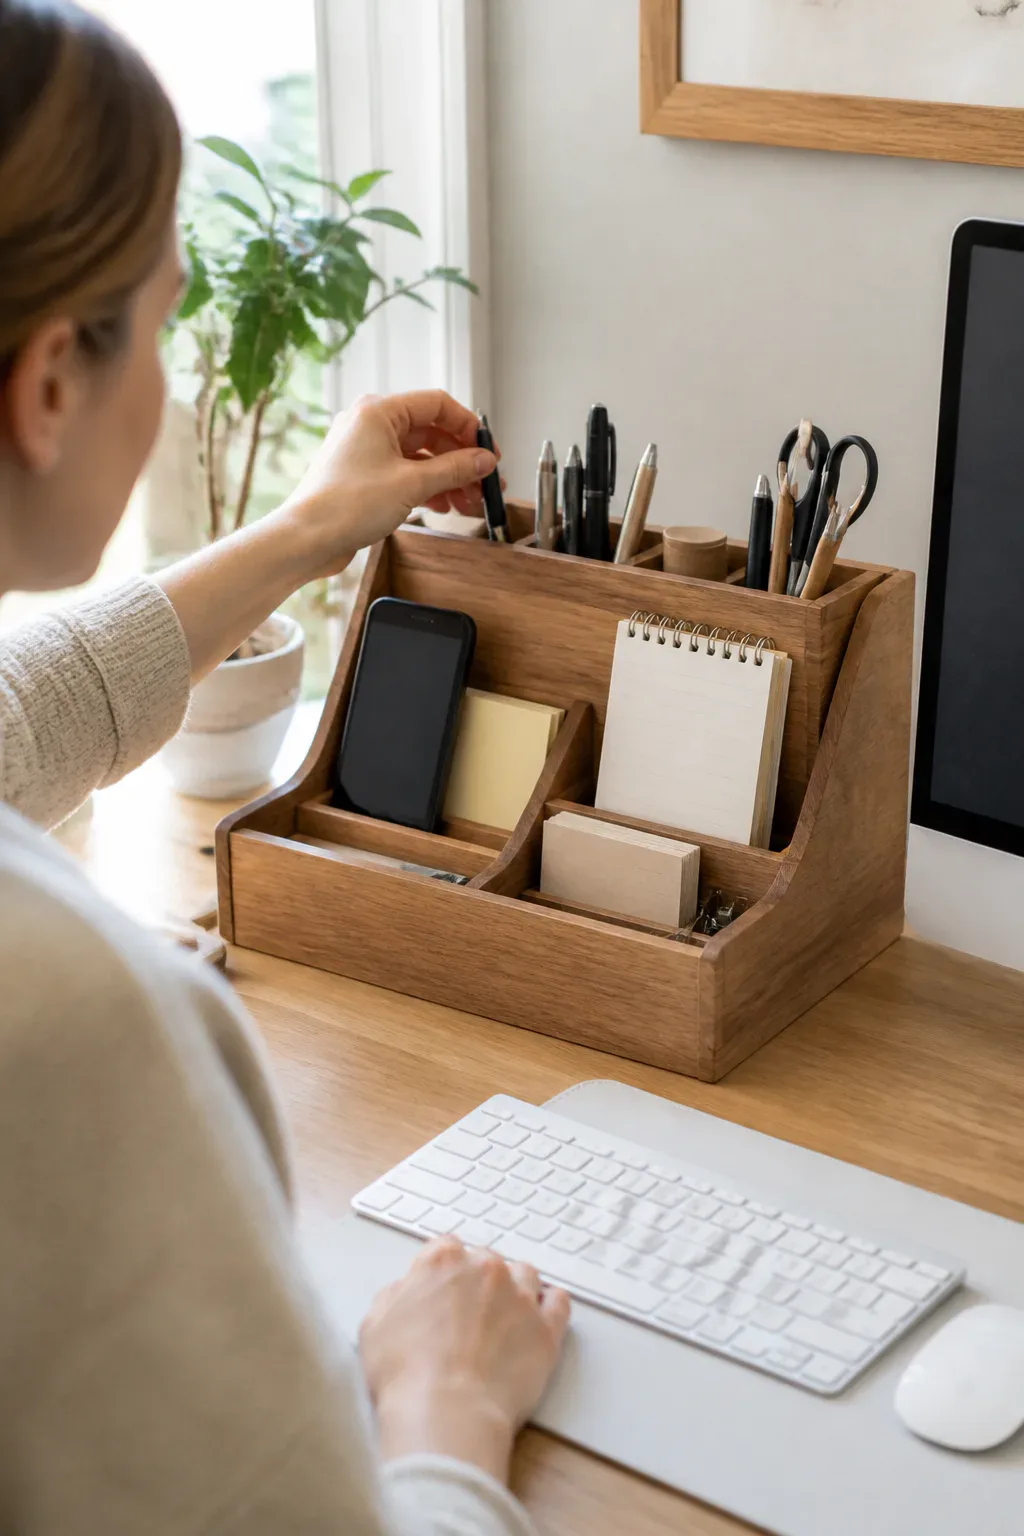
A wooden desk organizer gathers the small things that tend to spread across a workspace. A tiered caddy can hold pens, a phone, notepads, and other daily essentials while keeping the desk surface easier to use. Because you choose the compartments, the design can suit your own work habits instead of forcing everything into a standard tray.
Start by noticing what you reach for most often and how much desk space you can spare. A low front section can keep frequently used items visible, while taller compartments at the back can hold pens or tools. The organizer fits neatly beside a monitor or at the back corner of a desk.
Customize the compartments
Lay out the objects on paper before cutting grooves or assembling dividers. A quick mock-up helps you check that items fit and that the finished caddy will not crowd your work area.
- Measure your phone, pens, and notepad before sizing each section.
- Sand grooves and edges so small items slide in and out easily.
- Keep the base broad enough to prevent the organizer from tipping.
- Use a simple finish that is easy to wipe clean.
5. Add a Handmade Birdhouse to a Garden View

A birdhouse gives a garden a small crafted focal point and is a satisfying way to practice basic cuts and assembly. Its simple panels introduce useful skills such as measuring accurately, cutting angled roof pieces, and joining parts squarely. Place it where it can be seen from a window or from a favorite outdoor seating spot.
Build with the intended outdoor setting in mind. The roof should shed water, the entrance should suit the birdhouse design, and the structure needs a secure mounting point. If you plan to finish the exterior, choose a weather-suitable coating and keep the inside untreated so the nesting space remains appropriate.
Build for the garden, not just the view
Follow guidance appropriate to the bird species and region when deciding on entrance size and placement. A decorative house is most useful when its design and location support safe, practical use.
- Make clean cuts and check that the assembled box is square.
- Design the roof with an overhang to help shield the walls.
- Use outdoor-suitable materials and fasteners.
- Choose a stable location away from hazards and easy disturbance.
6. Anchor the Living Room with a Wooden Coffee Table

A low-profile coffee table can become the practical center of a living room, offering a place for drinks, books, and everyday items. Building one lets you move beyond small accessories and practice assembling a frame and attaching legs. A straightforward shape also makes it easier to adjust the dimensions to suit your seating.
Measure the space between the sofa and chairs before choosing the tabletop size. The table should be easy to reach without blocking the path through the room, and its height should feel comfortable beside the surrounding furniture. A clean frame and visible wood grain can make the piece feel warm without adding unnecessary ornament.
Prioritize a stable frame
Dry-fit the frame and check for wobble before final assembly. Strong, carefully aligned joints matter more than decorative details on a table that will see daily use.
- Plan the footprint around walkways and seating clearance.
- Check that legs are equal in length and sit square to the frame.
- Sand the tabletop and soften edges before applying a finish.
- Choose a finish suited to the spills and handling a coffee table may get.
7. Make a Hook-and-Shelf Entryway Coat Rack

A hook-and-shelf coat rack helps give an entryway a clear place for coats, keys, and incoming mail. The backboard is a manageable woodworking project, while the combination of hooks and a narrow shelf makes the finished piece genuinely useful. It can fit in a small hallway or near the door where a larger storage unit would feel bulky.
Before building, decide what the rack needs to hold. The spacing between hooks should suit coats and bags, and the shelf should be deep enough for a few small items without projecting awkwardly into a narrow passage. A simple wood finish can complement the entryway without competing with other wall decor.
Mount it where it can do its job
Secure the rack to wall structure appropriate for the expected load. Even a well-built backboard can pull away if the mounting method is not suited to the wall and the weight of coats or bags.
- Mark hook positions before drilling so spacing stays consistent.
- Keep the top shelf narrow enough for the available wall space.
- Use hooks suited to the items you plan to hang.
- Check the rack is level and firmly mounted before use.
8. Build Raised Beds for a Backyard Vegetable Garden

Raised wooden beds create a defined planting area for vegetables and herbs, helping a backyard garden feel organized. The box-frame construction is simple in concept, but the finished bed needs to be sturdy enough to hold soil and withstand outdoor conditions. Arrange one bed near a convenient path or group several into a dedicated growing area.
Think about sunlight, watering access, and how you will reach the center of the bed before choosing its dimensions. A layout that leaves room to move around makes planting and harvesting more comfortable. Rot-resistant wood, such as cedar or Douglas fir, is a useful option to consider for an outdoor project exposed to soil and weather.
Plan the bed before filling it
Build on a reasonably level spot and make sure the corners are firmly joined. If you are placing beds on a hard surface, consider how water will drain; in a garden, prepare the ground for the intended planting setup.
- Choose a location with suitable sun for the crops you want to grow.
- Keep the width practical so you can reach plants from the sides.
- Use durable materials and outdoor-suitable fasteners.
- Leave clear paths for watering, tending, and harvesting.
9. Style a Bedroom Tray for Breakfast in Bed

A wooden serving tray is a small project with plenty of everyday uses, from carrying breakfast to holding a book and a cup of tea. Its flat base and attached or routed handles make it a good opportunity to practice clean edges, careful sanding, and a smooth finish. When it is not in use, keep it on a bedroom bench or bedside table.
Choose a footprint that is large enough to carry what you need but still easy to lift and store. Side handles make the tray more comfortable to carry, while a shallow raised edge can help keep items from sliding. A calm, natural finish works well in a bedroom and lets the wood grain remain visible.
Make it comfortable to carry
Check the handle openings or attached grips by holding the unfinished tray before you apply the finish. That simple test can reveal sharp edges or awkward proportions while they are still easy to correct.
- Round over corners and sand the edges smooth.
- Position handles so the tray stays balanced when lifted.
- Add a modest lip if you want extra support for dishes.
- Use a finish that is suitable for a surface used around food and drink.
10. Create a Tiered Plant Display by a Bright Window

A tiered plant stand gives houseplants different heights, helping a collection read as a composed display instead of a row of pots. A cross-leg stand or small ladder-style shelf can make use of a bright window area while keeping plants off the floor. The design can be compact enough for a corner or wide enough to sit beneath a window.
Plan the tiers around the pot sizes and the light each plant needs. Leave room for leaves to spread and for you to reach each pot when watering. Because soil and water add weight, keep the structure stable and avoid making the upper levels too deep or crowded.
Balance the levels and the footprint
Test the stand on a level surface before loading it with plants. If you build a ladder-style version, make sure the shelves are secure and the legs cannot shift under the weight of the pots.
- Measure your largest pots before deciding shelf depth.
- Place heavier pots on lower levels for a steadier display.
- Allow space between plants for light and airflow.
- Protect the wood from drips with a suitable finish or saucers.
11. Arrange Custom Wood Frames in a Gallery Wall

Custom wooden frames let you bring a consistent material and finish to a gallery wall. Making matching frames is a useful way to practice measuring and cutting mitered corners, and the finished pieces can hold photographs, prints, or children’s artwork. Group them above a console, along a stairway, or on a living-room wall.
Decide on the overall arrangement before making every frame. A set can feel coordinated through matching wood and profile while still using different sizes. Measure the artwork and any matting carefully, since the opening and backing need to fit without pinching or leaving the contents loose.
Get the layout right before hanging
Accurate corner cuts help the frames meet neatly, so check each miter and dry-fit the pieces before fastening. On the wall, arrange paper templates first to preview spacing and balance.
- Measure artwork and mats before sizing the frame openings.
- Use a consistent profile or finish to tie different sizes together.
- Dry-fit mitered corners and check for gaps before assembly.
- Use hanging hardware suited to the frame and wall.
12. Fit a Handmade Bench into the Mudroom
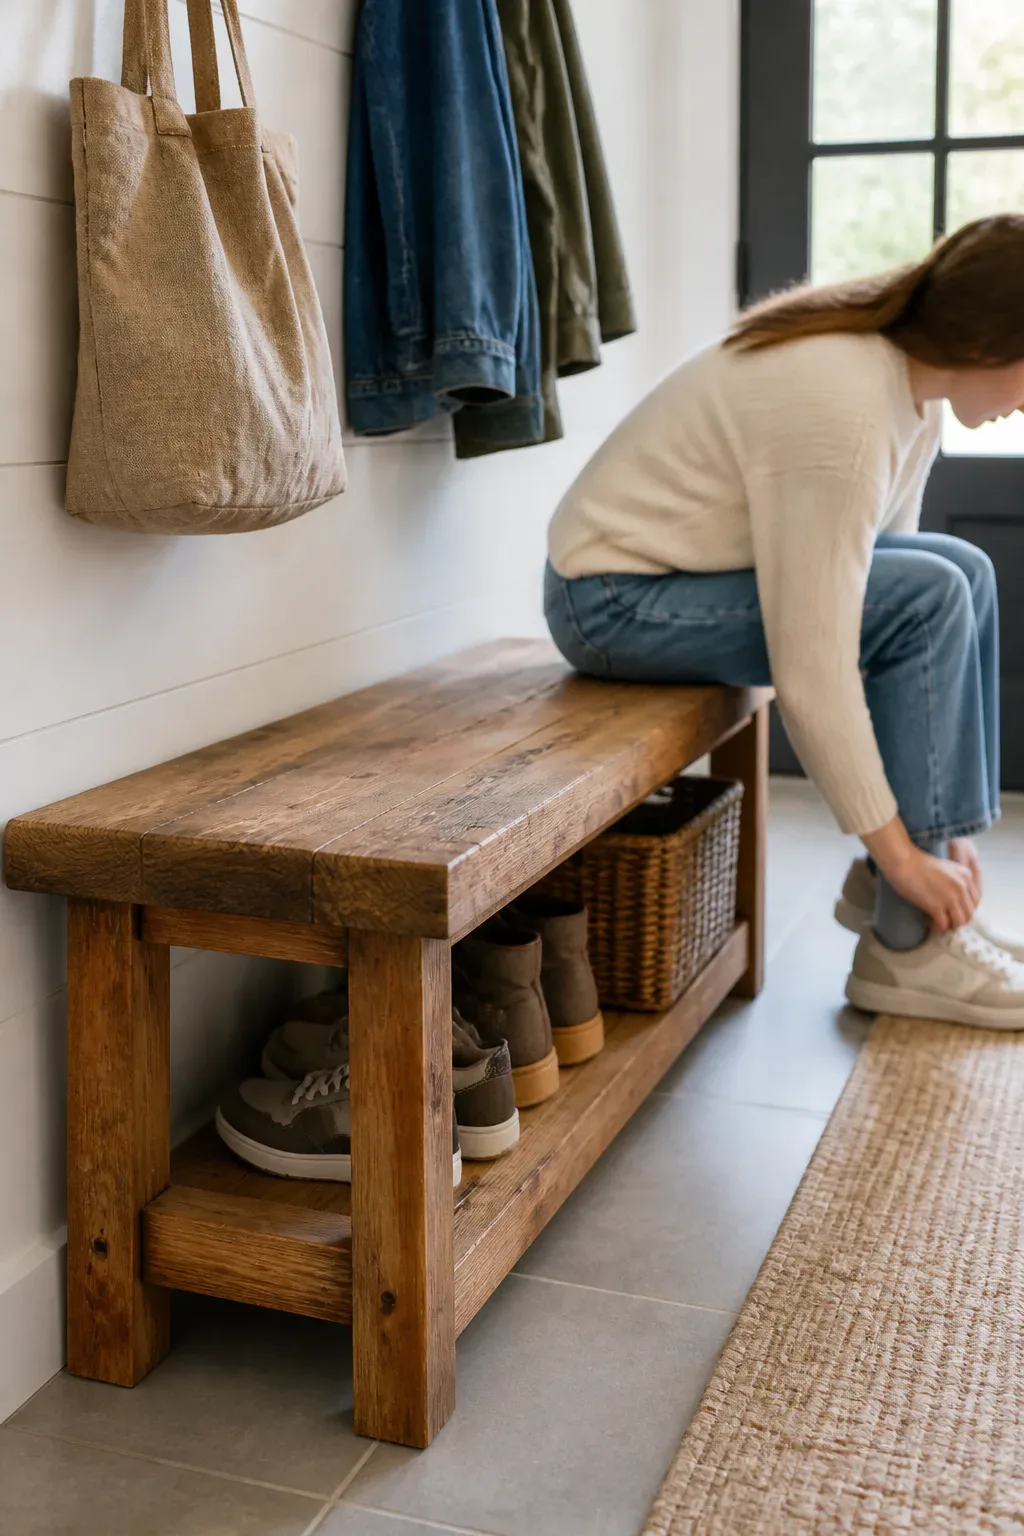
A sturdy wooden bench can make a mudroom more comfortable by giving everyone a place to sit while putting on or taking off shoes. It can also help define a practical drop zone near the door. A simple design with a seat and strong legs is a useful introduction to load-bearing construction and joinery.
Measure the available wall and floor space, then consider who will use the bench and how much clearance is needed around it. A compact bench can sit beneath hooks or beside a shoe area, while a longer version may suit a wider entry. Keep the shape uncomplicated so it is easy to wipe down after daily use.
Build for everyday sitting
Use secure joints and check the bench for movement before it goes into service. Pocket-hole joinery can help with assembly, but careful alignment and strong connections are essential for a piece that supports people.
- Choose a seat height and depth that feel comfortable to use.
- Reinforce the frame and check that the legs sit evenly.
- Sand edges smooth and apply a finish suited to a busy entryway.
- Place the bench where it will not obstruct the door or walkway.
Final Thoughts
These woodworking projects bring together useful home pieces and approachable ways to practice core skills, from sanding and simple assembly to accurate cuts and sturdy joinery. A cutting board, tray, or organizer may suit a smaller workspace, while a bench, coffee table, or raised bed calls for more room and careful planning.
Choose one idea that fits your space and current comfort level, then measure twice and work through the build at a steady pace. A well-planned handmade piece does not need elaborate details to feel special; it simply needs to work for your home and be made with care.



