15 Clever Small Kitchen Ideas to Maximize Space
A small kitchen can still feel organized, comfortable, and ready for everyday cooking. The key is to make each part of the room work harder: use vertical space, keep counters clear, and choose features that don’t block the paths you need to move through.
These ideas cover a range of layouts, from a narrow galley to a studio apartment’s one-wall kitchen. Some are simple swaps, while others may be easier to include during a remodel, so consider your space, budget, and whether you rent before choosing what to try.
Start with the problem you notice most. If storage is tight, look upward or add pull-outs; if the kitchen feels crowded, focus on open sightlines, compact seating, and clear floor space. A few thoughtful changes can make a compact room feel easier to use without adding square footage.
1. Extend Cabinets All the Way to the Ceiling

Upper cabinets that stop short of the ceiling leave a strip of space that often collects dust instead of serving a purpose. Extending cabinetry upward captures that unused area for less frequently needed items, such as serving pieces or seasonal kitchenware. It also creates a clean vertical line that can make the room feel taller.
This approach works especially well in kitchens with a simple cabinet layout, where a continuous run can look intentional rather than crowded. If full-height cabinets are out of reach, add a smaller top cabinet or use matching trim to visually connect the existing cabinets to the ceiling.
Plan storage by how often you use it
Keep everyday dishes and glasses at a comfortable height, and reserve the uppermost shelves for items you reach for occasionally. Before committing to a design, check the ceiling height and allow for any unevenness that could affect installation.
- Store rarely used platters or seasonal items on the highest shelves.
- Use matching cabinet finishes to create a calm, continuous look.
- Include a safe way to reach high storage, such as a step stool.
With a little planning, the space above your current cabinets can become useful storage instead of visual clutter.
2. Replace Upper Cabinets with Floating Shelves

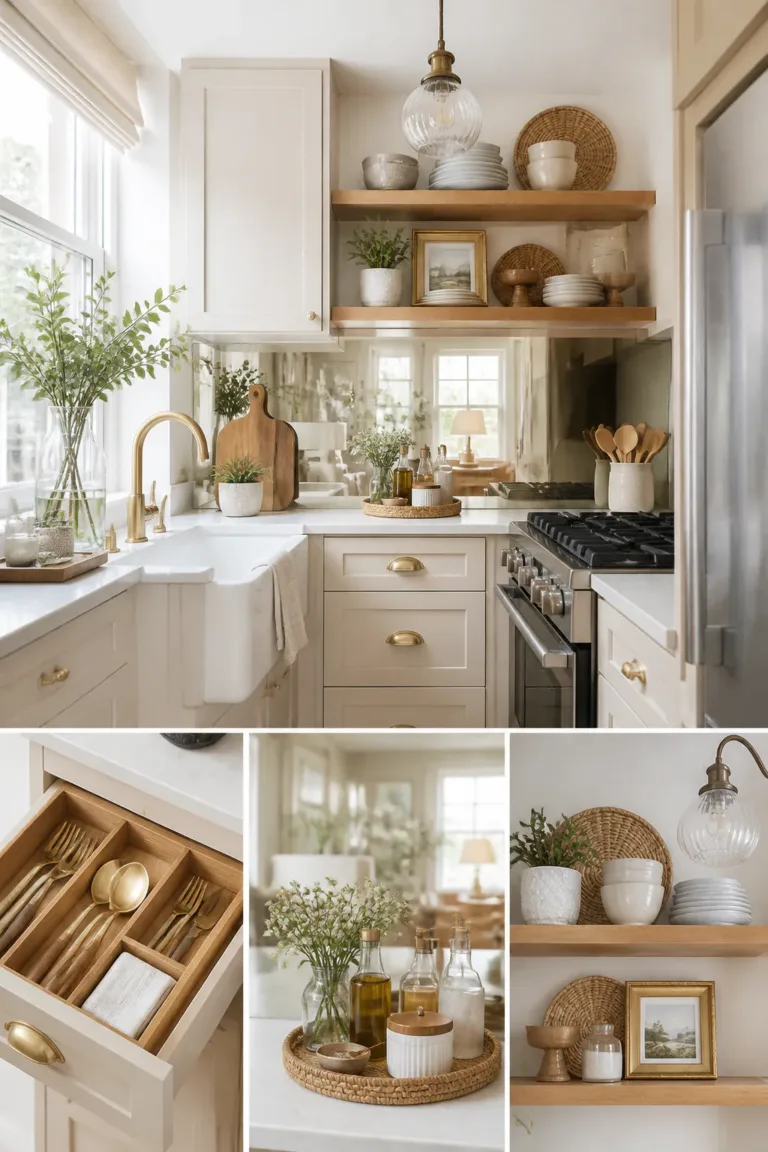
Floating shelves can make a small kitchen feel more open by breaking up a solid wall of upper cabinets. They keep frequently used plates, mugs, and pantry jars close at hand while leaving more of the wall visible. That extra visual breathing room can be especially welcome in a narrow kitchen or one with limited natural light.
Shelves are not a one-for-one replacement for closed storage, so consider what you actually want on display. A few neatly arranged everyday pieces can feel warm and practical; too many items may make the wall look busy and collect grease or dust.
Choose a useful, manageable arrangement
Place shelves where they are easy to reach and away from areas where cooking splatter is constant. Check that wall fixings are suitable for the wall and the weight of the items you plan to store.
- Keep the most-used dishes on the lowest, easiest-to-reach shelf.
- Group similar items to make the display look orderly.
- Leave some open space rather than filling every inch.
- Use a nearby cabinet or drawer for less attractive kitchen supplies.
Floating shelves work best when they bring both convenience and a lighter look to the room.
3. Tuck Backless Stools Beneath the Counter

In a compact kitchen, seating can quickly become an obstacle if it sticks out into a walkway. Backless stools are easy to slide under a counter or island when nobody is sitting, helping the floor feel clearer and making it easier to move between cooking zones.
This idea suits a breakfast bar, peninsula, or counter with an overhang deep enough for comfortable legroom. Measure carefully before buying: a stool that technically fits may still be awkward to pull out, or may leave too little space for people to pass behind it.
Make the seating fit the way you live
Consider seat height, stability, and how long people will typically sit there. A simple stool can work well for a quick meal or coffee, while longer conversations may call for a more supportive seat if the room can accommodate one.
- Measure the counter height and available knee space first.
- Choose stools that slide fully beneath the counter edge.
- Keep the number of seats proportional to the available walkway.
- Look for a sturdy, easy-to-clean surface for daily use.
When the stools disappear neatly after meals, the kitchen can shift back into a more open workspace.
4. Arrange the Kitchen Along One Wall

A one-wall kitchen places cabinets, appliances, and work surfaces in a single linear run. By keeping the main functions against one wall, it can free the center of a studio or small apartment for dining, circulation, or living space. The streamlined arrangement also gives the room a simpler visual outline.
This layout can work well when the kitchen is part of an open-plan room, but it requires thoughtful organization because everything shares one line. You will want enough counter space between key appliances for food preparation, and storage that makes use of the full height and width available.
Keep the working sequence practical
Plan where groceries land, where food is prepared, and how dishes move from cooking to washing. A compact layout should still leave comfortable access to the sink, cooktop, and refrigerator.
- Place work surfaces beside the appliances where you need them most.
- Use vertical cabinets or shelves to supplement limited lower storage.
- Keep frequently used tools close to the main preparation area.
- Protect a clear route through the room, especially near appliance doors.
A well-planned one-wall kitchen feels intentional rather than like a row of appliances squeezed together.
5. Blend Appliances into the Cabinetry

Panel-ready appliances can sit behind fronts that match the surrounding cabinetry, creating a smoother, less interrupted appearance. In a small kitchen, reducing visual contrast between large appliances and cabinets can help the room feel calmer and less crowded, particularly in an open-plan space where the kitchen is always in view.
This is often a remodel-level choice, so check appliance dimensions, cabinet requirements, and installation needs before settling on a design. Not every appliance can accept a cabinet panel, and the finish should be selected with practical cleaning and everyday use in mind.
Balance a seamless look with convenience
Think about which appliance makes the biggest visual impact. A concealed dishwasher may be a straightforward starting point, while an integrated refrigerator can require more detailed planning for ventilation, door clearance, and storage capacity.
- Confirm that the appliance is designed for a custom cabinet front.
- Coordinate panel finishes with the rest of the cabinetry.
- Check door swing and handle access before finalizing the layout.
- Compare the installation requirements with your remodel plans.
Blended appliances are most effective when they simplify the overall view without making daily tasks less convenient.
6. Add a Glossy Backsplash to Bounce Light

A glossy backsplash can reflect light across a compact kitchen and give the wall a brighter, more open appearance. It is a useful option when a room has limited daylight or when dark surfaces make the work area feel enclosed. Reflective tile, polished finishes, or other easy-to-clean glossy materials can each bring a little more light into the scene.
The backsplash also sits in a hardworking area, so appearance is only part of the decision. Consider how the finish will look with the countertop, cabinets, and lighting, and remember that reflective surfaces may show splashes or fingerprints more readily than matte ones.
Use shine with a clear purpose
A restrained finish can brighten the room without making every surface compete for attention. Samples viewed in your kitchen’s actual light can help you decide whether the reflection feels soft and welcoming or overly busy.
- Choose a backsplash finish that is suitable for a cooking area.
- Pair reflective surfaces with calmer cabinet and countertop finishes.
- Use under-cabinet lighting to bring out the backsplash’s brightness.
- Consider how easy the surface will be to wipe clean.
A light-catching backsplash can support the room’s overall sense of openness while protecting the wall behind the counter.
7. Mount a Magnetic Knife and Utensil Rail
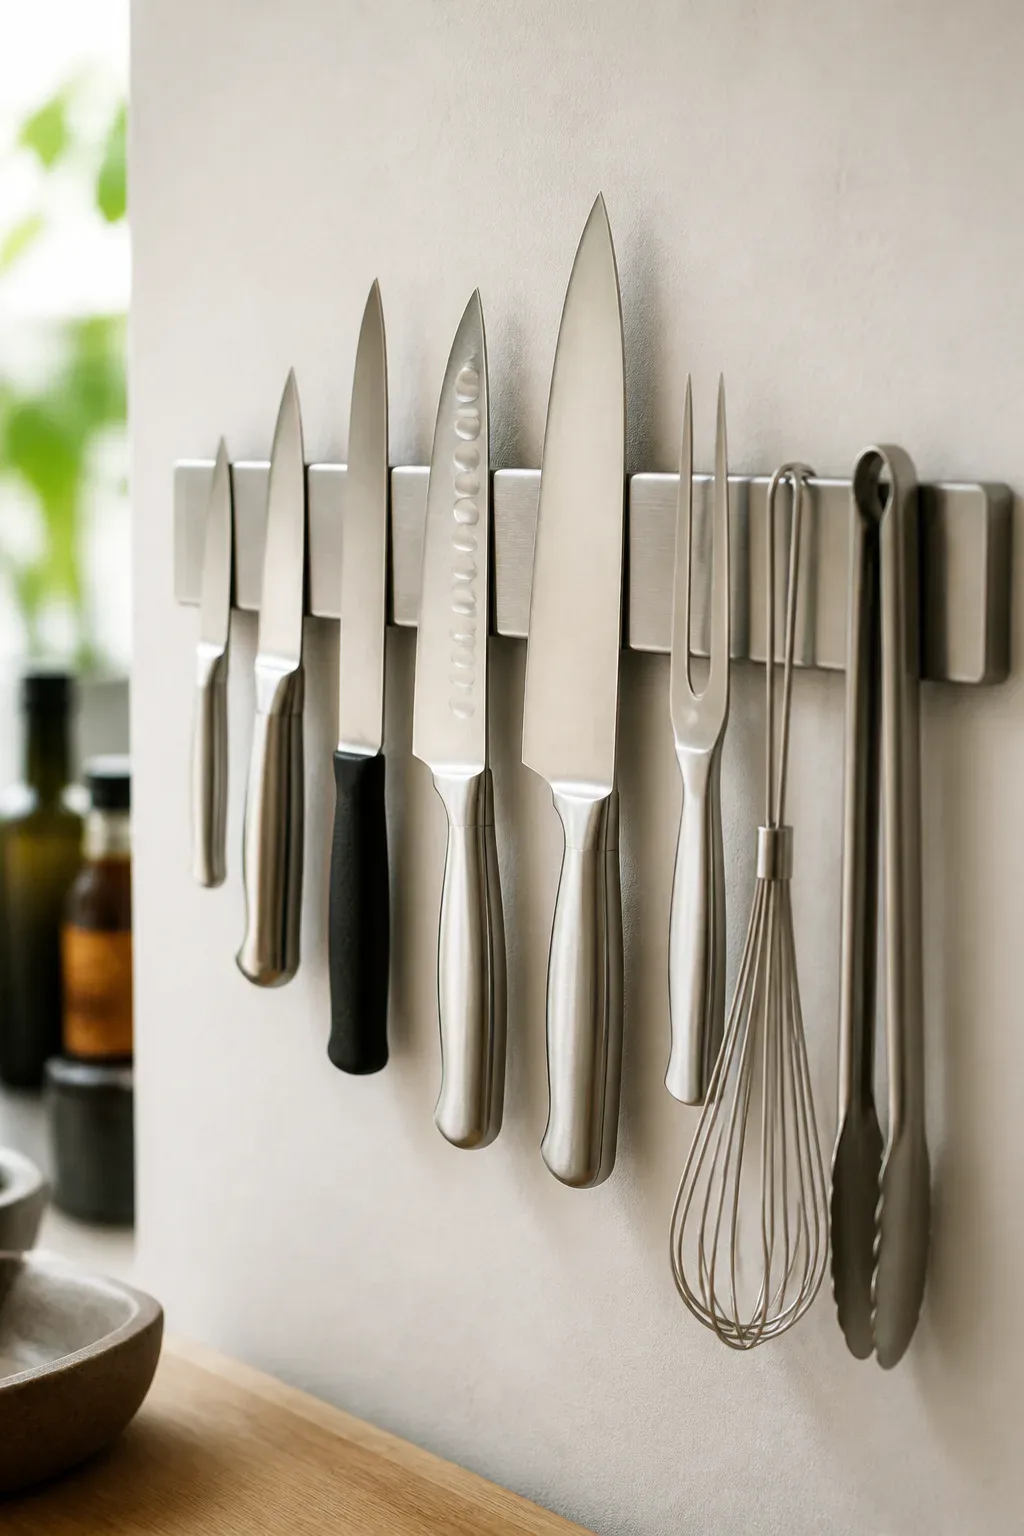
A wall-mounted magnetic rail can move knives and selected tools off a crowded counter and out of an overfilled drawer. Keeping everyday pieces visible can also make cooking more efficient, because you can reach what you need without searching through a utensil crock or cutlery tray.
Place the rail where it is convenient but not in the way of food preparation or passing traffic. If you have children or pets, take extra care with the height and location of sharp tools. A magnetic rail can also hold compatible spice tins or metal utensils, but avoid turning it into a catchall that becomes difficult to use.
Install it securely and keep it orderly
Follow the mounting instructions for your wall type and check that the rail is strong enough for its contents. Arrange items so handles are easy to grasp and sharp edges are not exposed to accidental contact.
- Choose a spot close to your main preparation area.
- Confirm the rail is fixed securely before loading it.
- Store only items that are compatible with the magnetic surface.
- Leave enough room to remove and replace each tool safely.
Used thoughtfully, a rail turns unused wall space into practical storage and gives the counter more room to work.
8. Install a Deep Single-Basin Sink

A deep single-basin sink offers one generous washing area instead of dividing the sink into smaller compartments. That open basin can make it easier to wash large pots, baking sheets, and other cookware that may be awkward to fit in a split sink. In a small kitchen, a well-chosen sink can support daily tasks without requiring a larger counter footprint.
Consider how the sink will fit with your existing counter, plumbing, and cabinet storage. A deeper basin can be useful, but it should still feel comfortable for the people who use it and leave enough room for the faucet and any accessories you rely on.
Choose a basin around your routine
Think about whether you wash dishes by hand, use a dishwasher, or need room to rinse produce. The right configuration depends on your habits as much as on the available dimensions.
- Measure the cabinet and countertop opening before selecting a sink.
- Check that large cookware can fit comfortably inside the basin.
- Choose a faucet with enough reach for the sink’s size.
- Plan where drying racks or sink accessories will go.
A single-basin design can make the washing zone feel more capable while keeping the surrounding counter clear.
9. Fit a Narrow Pull-Out Pantry Tower

A narrow pull-out pantry tower can make a slim gap beside a refrigerator or cabinet useful. Its tiered racks slide outward, bringing stored food into view instead of leaving items hidden at the back of a deep cupboard. This can be especially helpful for canned goods, jars, and other pantry staples used regularly.
Before choosing a unit, measure the opening carefully and consider how much room it needs to move. The contents should be easy to see and reach, but the shelves also need to be stable enough for the weight of the items you plan to store.
Make a small storage gap count
Group similar supplies together and arrange heavier items on lower shelves. A pull-out is most useful when you can find what you need quickly, rather than having to unload several items to reach one ingredient.
- Measure the width, height, and depth of the available space.
- Check that the pull-out clears nearby handles and appliance doors.
- Place heavier jars or cans on lower tiers.
- Use categories to keep snacks, baking goods, or pantry staples organized.
Even a narrow slot can offer surprisingly practical storage when every shelf slides into view.
10. Hang Pots and Pans on a Wall Pegboard

A wall pegboard can turn cookware storage into an accessible arrangement while freeing cabinet shelves for other items. Pots, pans, and selected utensils stay visible and easy to grab, and the wall itself becomes part of the kitchen’s storage plan. This approach can suit a compact kitchen where deep drawers are limited or already full.
Because cookware can be heavy, choose a wall and mounting method that can support the load. The display should also be placed where hanging pieces will not interfere with cooking, opening cabinets, or moving through the room.
Arrange the display for easy access
Start with the pieces you reach for most and leave space between them so handles do not catch. A tidy arrangement feels useful rather than crowded, and it is easier to keep clean when the board is not overloaded.
- Use secure fixings appropriate for the wall and the cookware weight.
- Hang frequently used pans where you can reach them safely.
- Keep the board away from areas with heavy splatter or steam.
- Leave room to adjust hooks as your storage needs change.
A pegboard makes storage visible and flexible, while giving cabinets back to items better kept behind closed doors.
11. Roll in a Storage-Packed Prep Island
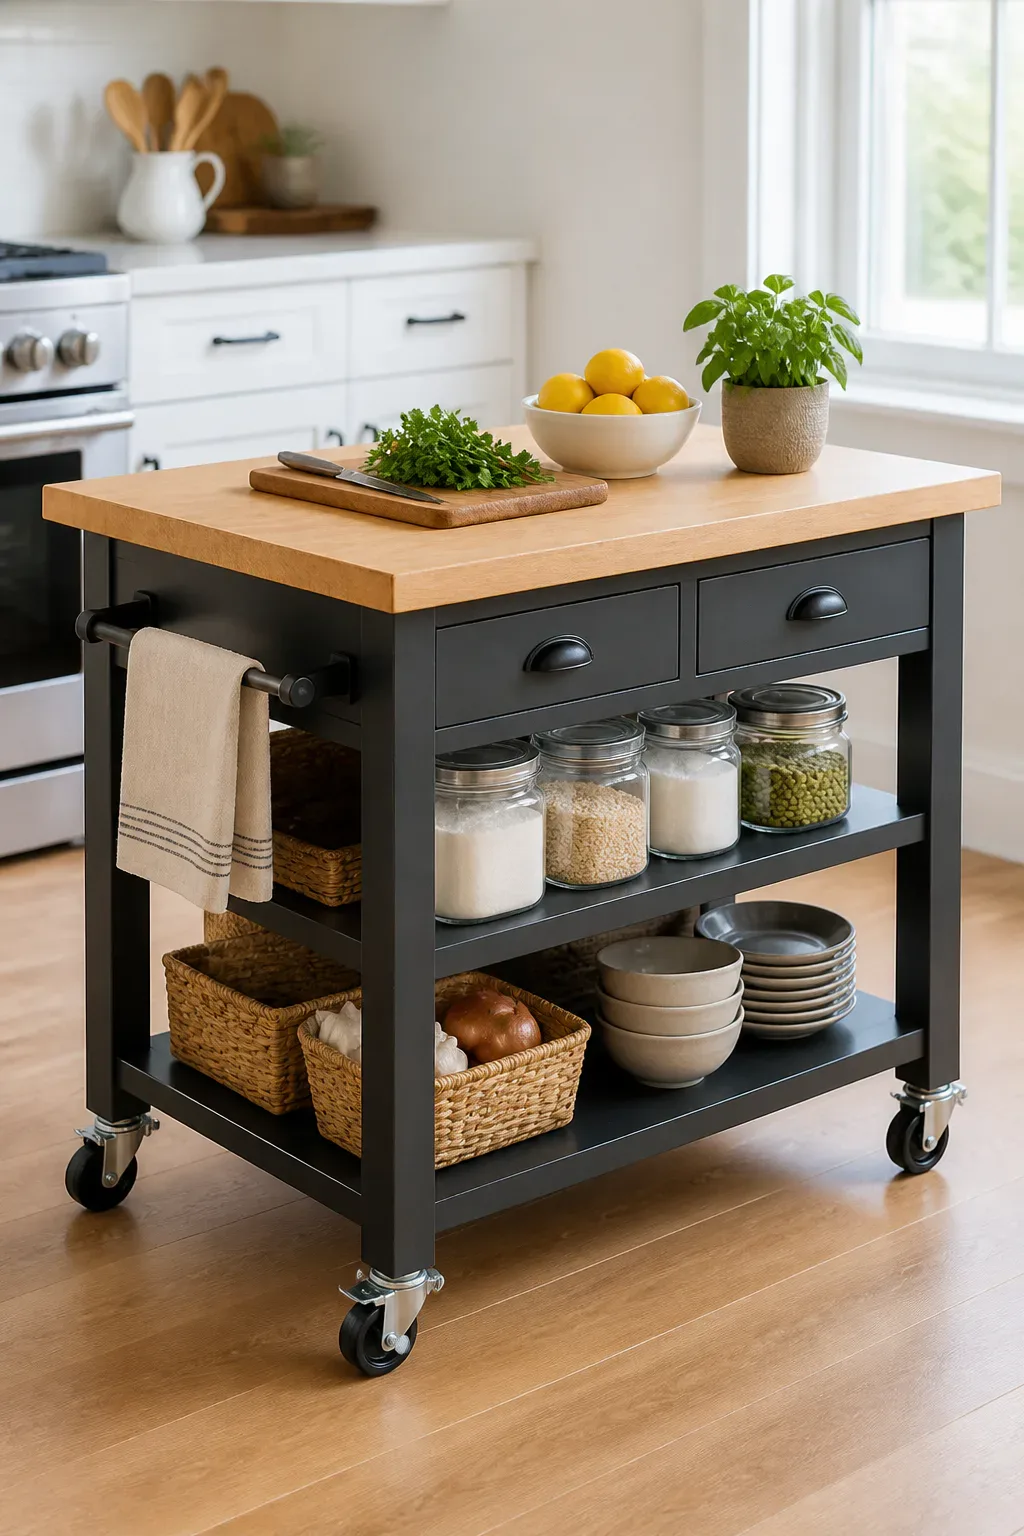
A movable prep island or cart can add work surface and storage without permanently claiming the middle of a small kitchen. Roll it into place when you are chopping or baking, then move it aside when you need a clearer walkway. The flexibility is especially useful in multipurpose rooms where the kitchen shares space with dining or living areas.
Look for a size that suits the room even when the cart is in use. Storage features such as shelves, drawers, or a butcher-block top can make it more helpful, but an oversized island may block cabinets or make it difficult to move between work zones.
Choose mobility without sacrificing stability
Check that the wheels lock securely and that the cart has a suitable working height. Think through where it will live when not needed, so it can be tucked away without creating another obstacle.
- Measure the open floor area and nearby cabinet clearances.
- Choose storage that matches the tools or ingredients you want close by.
- Use locking wheels to keep the cart steady during prep.
- Plan a parking spot that preserves a clear route through the kitchen.
A well-sized rolling island adds flexibility, giving you extra workspace only when you need it.
12. Illuminate the Counter with Under-Cabinet LEDs

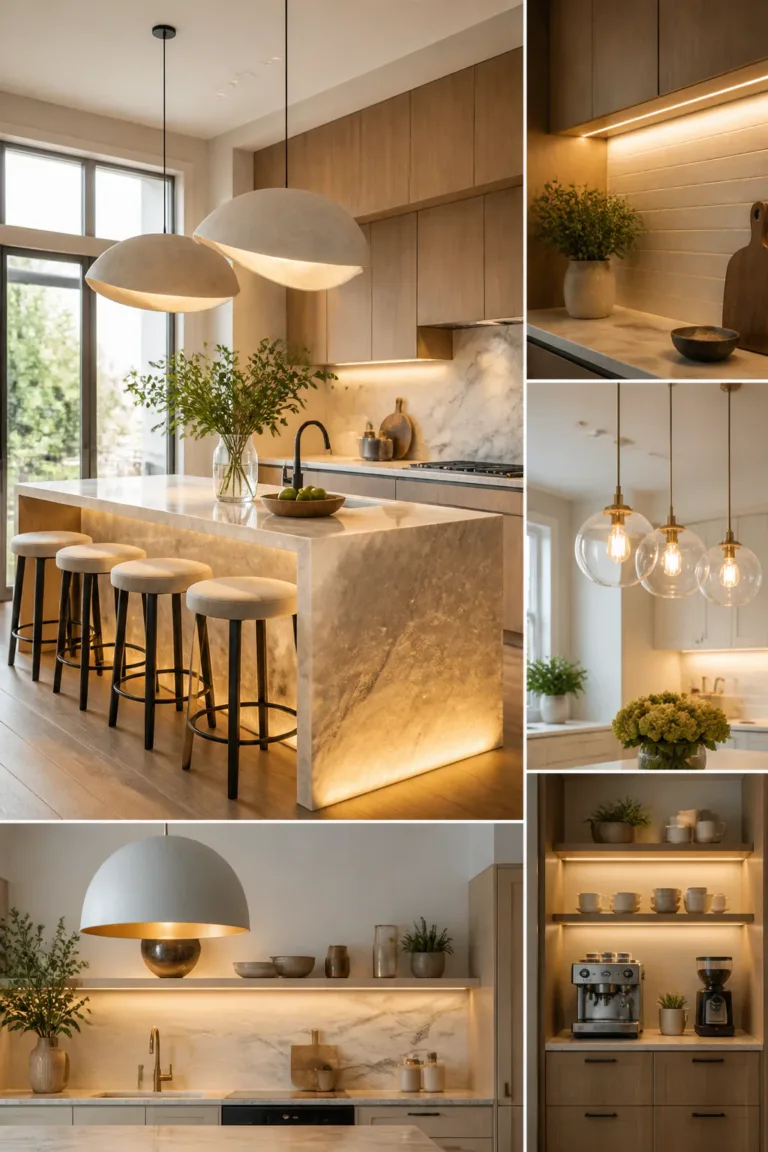
Lighting beneath upper cabinets directs light onto the counter where you chop, mix, and prepare food. It can reduce shadows cast by overhead fixtures and make a dark work surface feel brighter without taking up any counter space. Slim LED strips are one option for adding this layer beneath existing cabinets.
Think of under-cabinet lighting as task lighting rather than a replacement for the room’s other lights. The color and intensity should work with the kitchen’s existing lighting, and wires or power connections need to be planned neatly so the installation does not add visual clutter.
Light the work surface evenly
Position fixtures so the counter is illuminated across the areas where you actually work. If you are renting or avoiding major changes, look for an installation approach suited to your situation and follow its safety directions.
- Cover the main preparation and cleanup areas with useful light.
- Check that the light tone works with nearby fixtures.
- Keep wiring concealed and clear of heat or water sources.
- Use controls that are convenient to reach during everyday tasks.
Good task lighting can make a small kitchen feel more comfortable as well as more functional.
13. Use a Sliding Door for the Pantry

A hinged pantry door needs room to swing, which can compete with a narrow walkway or nearby cabinet doors. A sliding or pocket door avoids that arc and can make the surrounding floor easier to use. This can be a helpful change in a galley kitchen, a tight corner, or any layout where the pantry door regularly gets in the way.
A sliding door does require its own planning. A pocket door needs space inside the wall, while a surface-mounted slider needs clear wall area to travel across. Check the pantry opening and nearby switches, trim, and furniture before choosing between the options.
Choose a door that suits the space
Consider privacy, sound, and how often the pantry is open. The door should move smoothly and provide access without blocking the items stored inside or creating a pinch point in a busy route.
- Measure the full path the door will travel.
- Check for wall obstacles or utilities before planning a pocket door.
- Make sure the opening remains wide enough for pantry access.
- Choose hardware that is easy to operate and maintain.
Removing the door swing can make nearby movement feel easier, even though the kitchen’s footprint stays the same.
14. Create a Light Monochrome Kitchen

A light monochrome palette uses related pale shades across cabinetry, walls, and backsplash to create a cohesive view. When fewer strong contrasts divide the room, the eye can move more easily across the surfaces, helping a small kitchen feel calm and airy. Soft whites, warm greiges, and other gentle neutrals can all support this effect.
Monochrome does not have to mean flat or sterile. Texture, subtle shifts in tone, and warm materials can bring depth while keeping the overall palette unified. Consider how the colors look in both natural and artificial light before committing to paint, tile, or cabinetry.
Add depth without breaking the calm
Choose a few coordinated finishes rather than trying to make every surface identical. A textured backsplash, natural wood detail, or a slightly deeper countertop can add interest while preserving the light overall look.
- Compare color samples in the kitchen at different times of day.
- Use a small range of related tones for a connected appearance.
- Bring in texture through tile, wood, or fabric accents.
- Choose finishes that suit the room’s cleaning and maintenance needs.
A light, coordinated palette supports a spacious feeling without relying on a single shade everywhere.
15. Build a Countertop Appliance Garage

A countertop appliance garage gives small appliances a dedicated place behind a roll-up, pocket, or other space-saving door. A toaster, blender, or coffee maker can stay plugged in and ready to use while remaining out of sight when the counter needs to look clear. It is a useful option for kitchens where everyday appliances take over the main work surface.
The cabinet needs enough depth and height for the appliances, their cords, and comfortable access. It should also be planned with safety and ventilation in mind, especially for appliances that generate heat. Do not use an appliance inside a closed enclosure unless its instructions allow it.
Keep convenience and safety together
Decide which appliances earn a place in the garage and arrange them so they are easy to lift or operate. A door that opens without blocking nearby work areas will make the storage more pleasant to use.
- Measure appliances, including plugs and cord clearance.
- Choose a door style that fits the available cabinet space.
- Follow appliance guidance for heat, ventilation, and operation.
- Keep the interior organized so cords and accessories stay manageable.
When planned well, an appliance garage keeps useful tools close while giving the counter a cleaner, more open appearance.
Final Thoughts
The most effective small kitchen ideas solve a specific everyday problem: crowded counters, hard-to-reach storage, dim work surfaces, or blocked walkways. Start by noticing where the kitchen feels least comfortable, then choose changes that support your layout rather than adding features just because they look appealing.
You do not need to take on a full remodel to make a compact kitchen work better. A few considered adjustments—such as adding a rail, improving task lighting, or choosing seating that tucks away—can make daily routines feel simpler. Build on what works for your home, and let practical choices create a kitchen that feels more open and welcoming.