

16 Clever Valentine Box Ideas for Kids
Valentine’s Day card boxes can be much more than a place to collect classroom cards. With a spare shoe box, a few craft supplies, and a little imagination, you can make a creature, vehicle, or favorite character that’s fun to decorate and easy for classmates to use.
These 16 Valentine box ideas range from fuzzy monsters and friendly pets to a pixelated Creeper and a rocket ship. Each one starts with a simple box or container, so you can adapt the project to whatever you already have at home.
Most designs work well as a family craft or classroom project. Adults can help with cutting openings and attaching heavier pieces, while kids can choose colors, add details, and personalize their finished creation.
1. Make a Fuzzy Love Monster Box
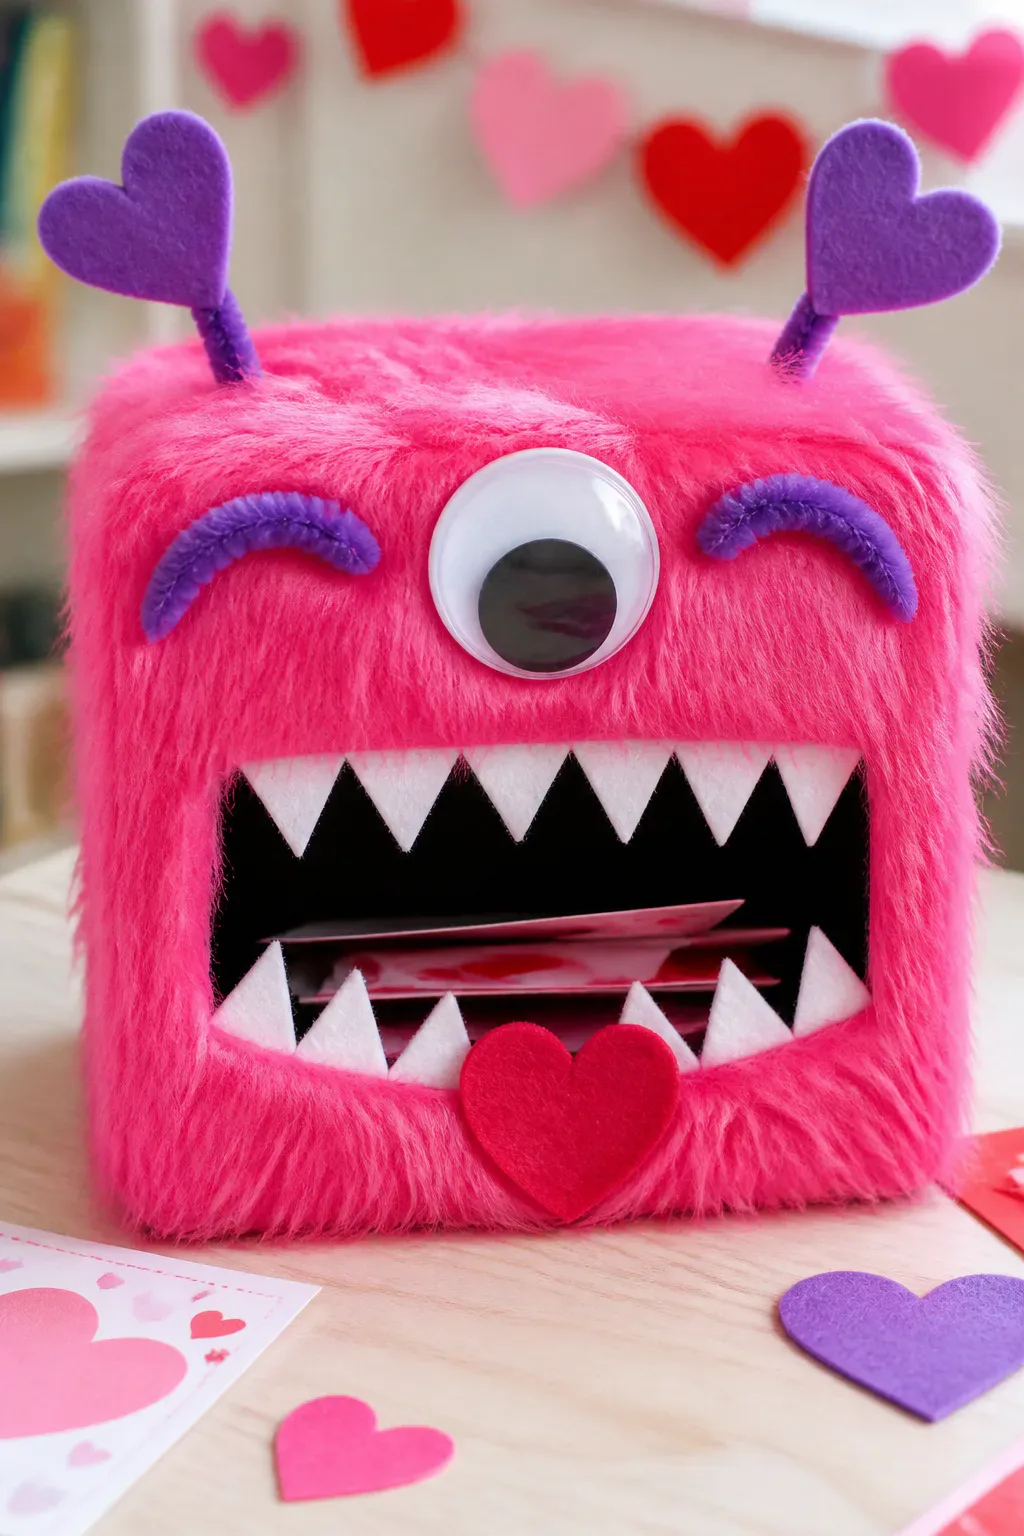
A love monster is a cheerful choice for kids who want a Valentine box with plenty of personality. Cover a shoe box in bright faux fur, felt, or colored paper, then add one oversized googly eye—or a playful cluster of them. The soft, bold texture makes the box stand out on a classroom desk or card-collection table.
Give your monster a big mouth so the card slot feels like part of the design. A dark paper opening framed with white paper teeth can look silly rather than scary, and a few pipe-cleaner eyebrows or horns add even more character.
How to pull it off
Cut the card opening before decorating, and reinforce the edges if the material is thick. Keep the mouth wide enough for folded cards, but leave plenty of room for the box lid to open later.
- Use felt or paper if faux fur is difficult to glue.
- Place large eyes above the mouth for an expressive face.
- Make the teeth from white cardstock for sturdy, clean shapes.
Let your child name the monster or add a heart-shaped tongue to make the design their own.
2. Build a Puppy or Kitty Mailbox

Turn a simple box into a little pet house by adding a peaked roof, a paper door, and details inspired by a favorite dog or cat. A shoe box can become the house itself, while a separate piece of cardstock makes an easy roof. Choose colors and markings that resemble a real pet or invent a colorful make-believe companion.
Paper ears, a button nose, and yarn whiskers help the animal’s face take shape. The card slot can sit in the roof, on the front of the house, or inside a large door-shaped outline so it feels naturally built into the mailbox.
Design tips
Plan the opening before attaching the roof or face pieces. If you want a door flap, cut three sides of a paper rectangle and fold the fourth side as a hinge; keep the actual card slot behind or above it so cards can drop into the box.
- Use construction paper for floppy ears or pointed cat ears.
- Twist yarn into whiskers and secure the ends with glue.
- Add a paper nameplate to make it feel like a real pet home.
A simple paw-print path leading to the house ties the whole scene together.
3. Create a Foil-Covered Robot Box

A robot box is a great way to build upward instead of decorating only the front of a container. Stack a smaller box on a larger one to make a head and body, then cover the shapes with foil or silver paper for a classic metallic look. Colorful foil or painted cardboard can give the robot a more playful style.
The chest offers a natural place for a Valentine message, heart panel, or pretend control screen. Bottle caps, paper circles, and drawn buttons add dimension, while spring-shaped antennae make the head easy to recognize from across the room.
How to assemble it
Make the card slot in the larger body before stacking the pieces. Use a sturdy adhesive to join the boxes, and ask an adult to help with wire or any sharp-edged materials used for antennae.
- Cover cardboard with foil for easier handling than loose foil alone.
- Use bottle caps or paper circles as control knobs.
- Add a heart-shaped screen with a marker-drawn display.
Repeated circles and matching colors help the robot look coordinated rather than cluttered.
4. Make a Shark with a Card-Eating Mouth
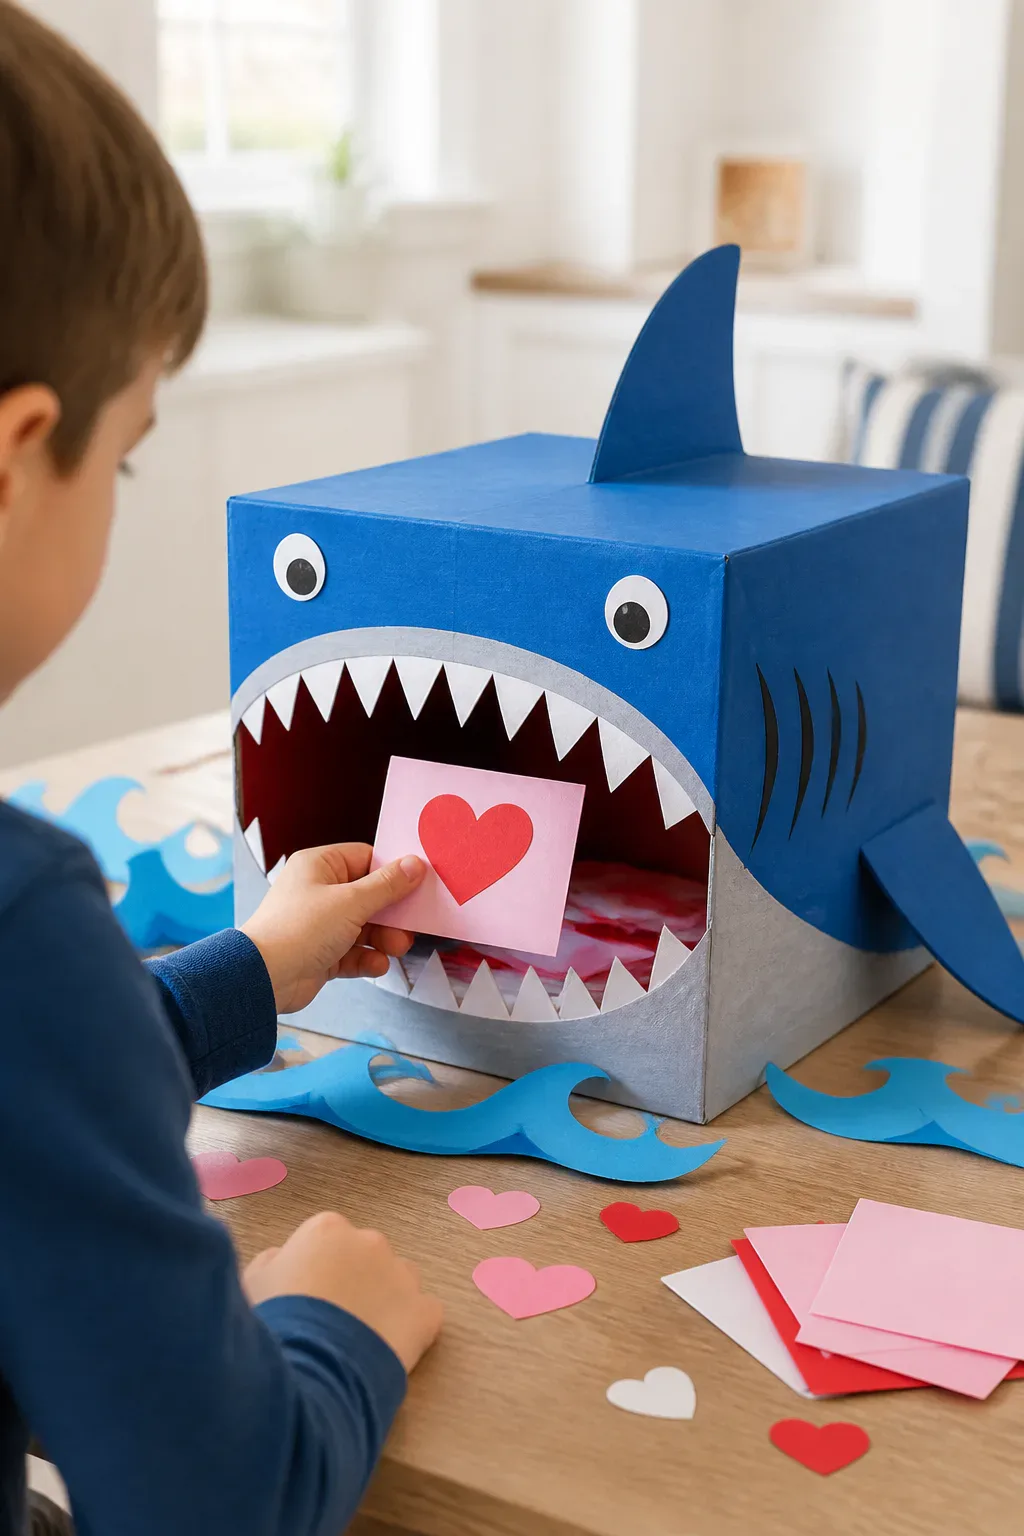
Give a blue shoe box a dramatic transformation into a shark that appears ready to gobble up Valentine cards. Paint or cover the box in blue, then add a lighter underside to suggest the shark’s belly. A wide mouth across the front makes the card opening part of the character instead of a separate feature.
White paper triangles along the mouth create the familiar toothy look, while small eyes and simple gill marks help finish the face. This idea works especially well when the box lid or front panel can be decorated without blocking access to the inside.
Make the mouth usable
Mark the opening first, checking that it will fit the cards your child expects to receive. Cut the mouth with adult help, then glue teeth around the edge without covering the opening or leaving sharp paper points sticking into the slot.
- Use white cardstock for teeth that hold their shape.
- Add a red or dark-colored mouth interior for contrast.
- Draw curved gill lines near the sides of the box.
A few paper waves around the base can make the shark look like it’s swimming through a sea of Valentines.
5. Design a Colorful Gumball Machine
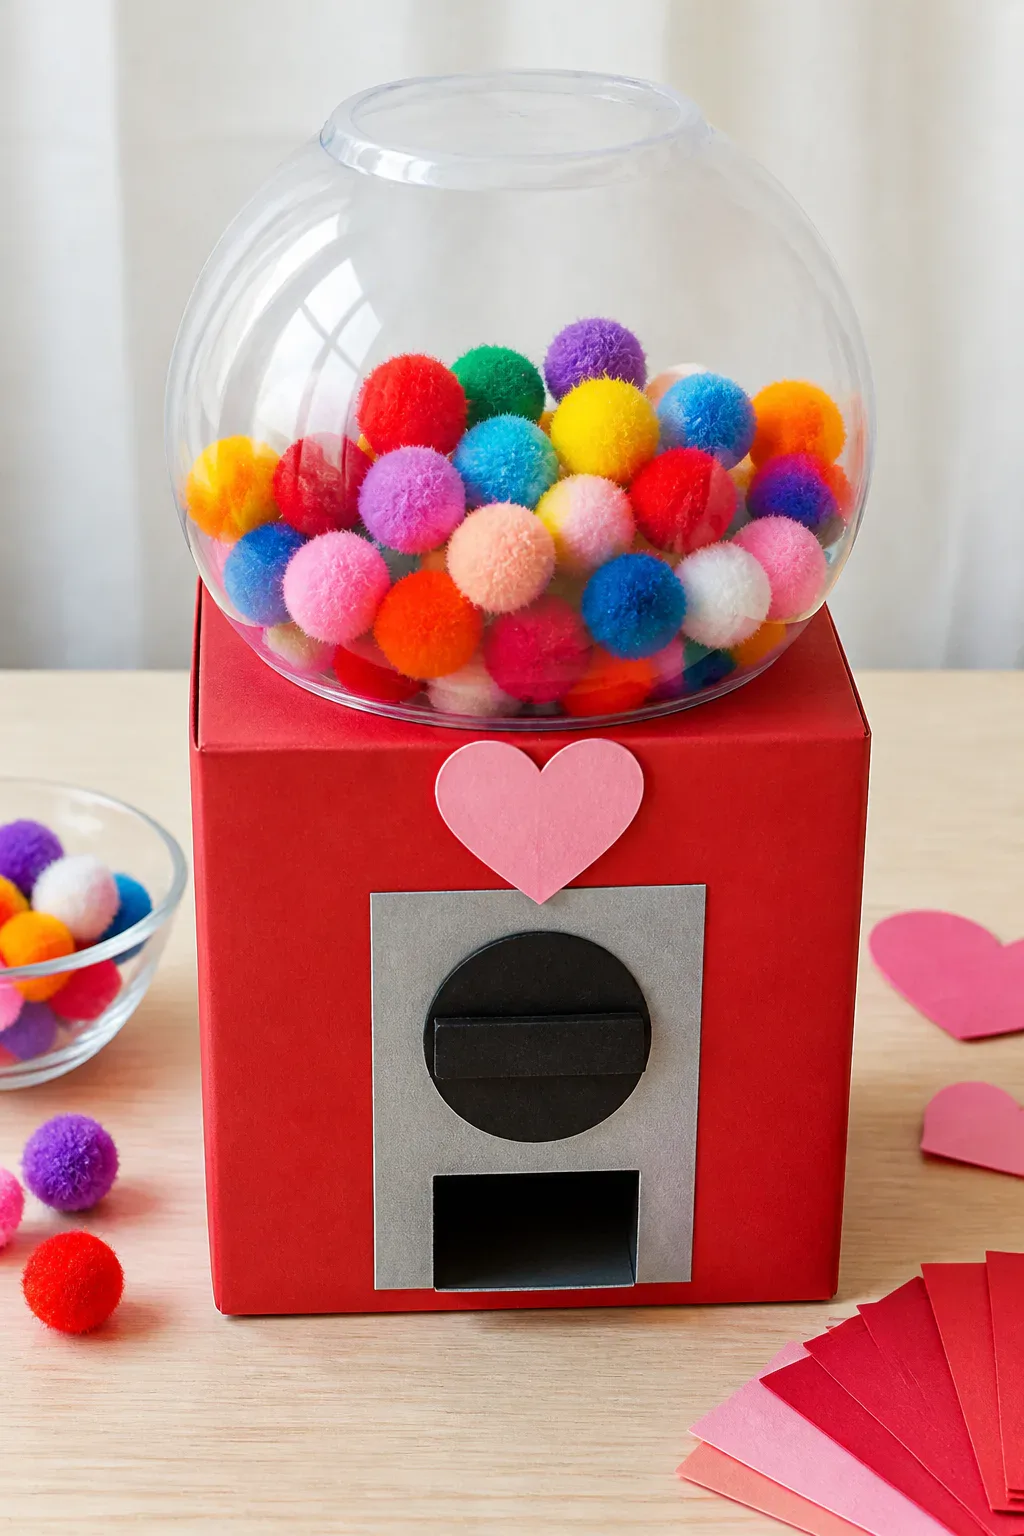
A gumball machine box brings bright colors and a clear, rounded detail to the classroom. Use a red shoe box as the base, then place a transparent plastic bowl or cup upside down on top to suggest the globe. Fill it with pom-poms or paper circles in different colors for a cheerful display.
Because the clear top is mostly decorative, keep the real card slot in the sturdy box underneath. That way, the cards go into a stable container rather than getting caught among the pretend gumballs. A paper coin slot or dispenser panel on the front adds to the machine-like effect.
Build the display
Attach the clear bowl securely and check that it won’t tip when the box is moved. If the bowl is removable, make sure the pom-poms are contained and the opening underneath doesn’t interfere with collecting cards.
- Choose several pom-pom colors for a lively gumball mix.
- Use a paper square as the machine’s dispenser panel.
- Add a pretend coin slot without cutting through the box.
A small heart label on the front can turn the imaginary machine into a Valentine treat station.
6. Build a Hot Wheels Race Car Garage
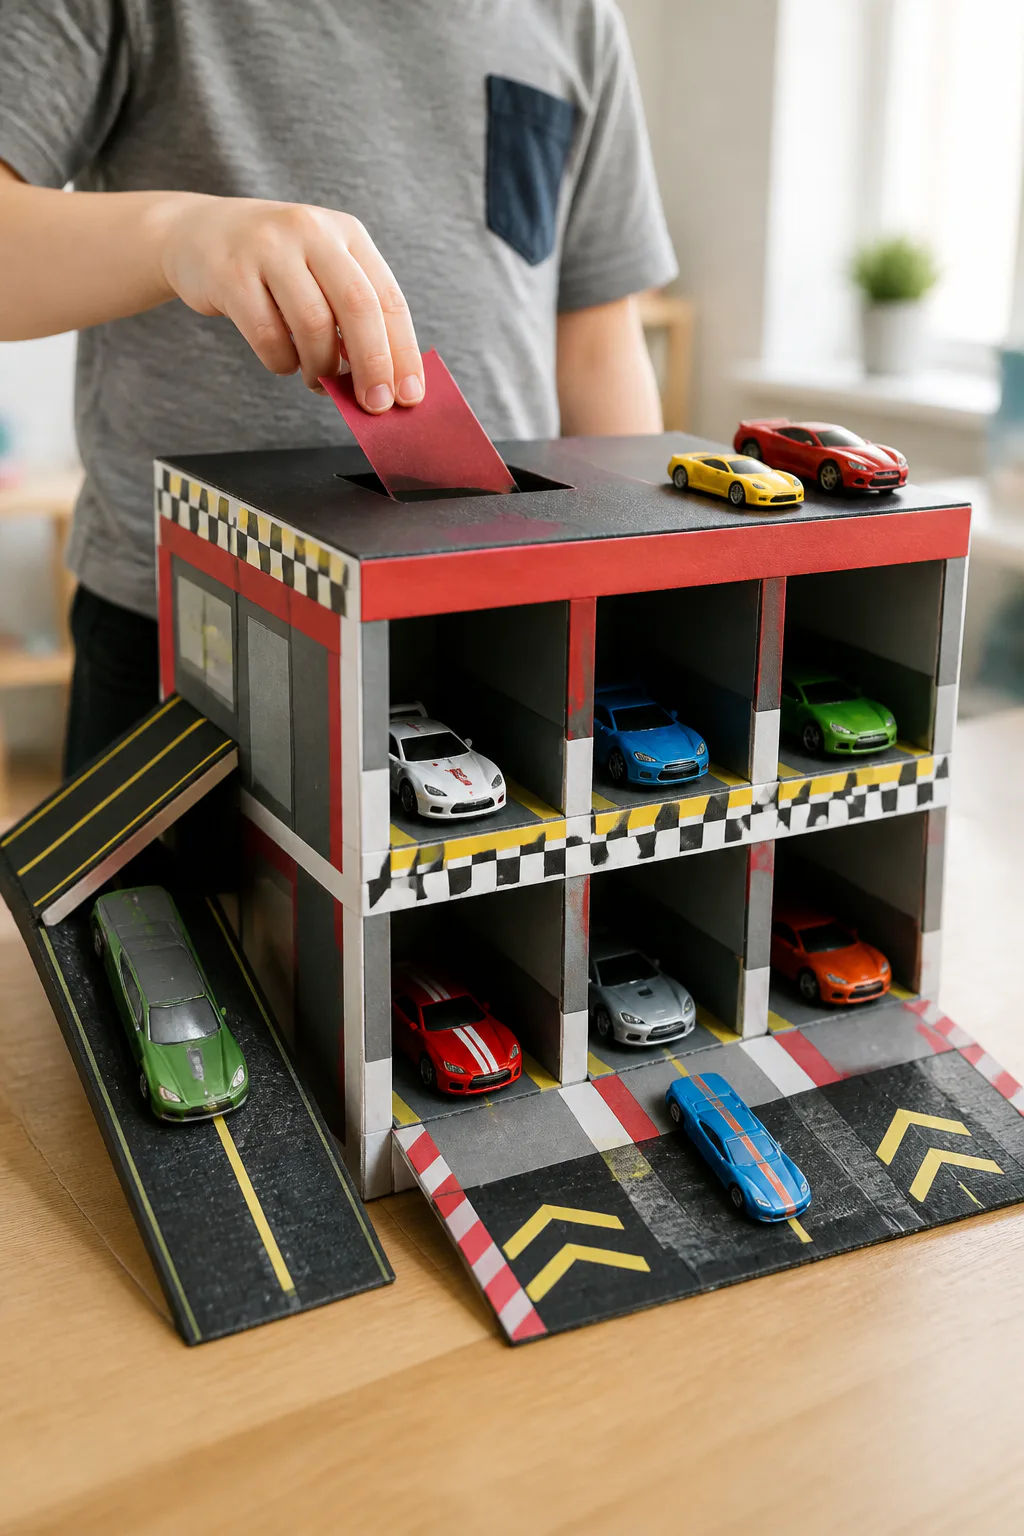
For a child who loves toy cars, a race-car garage can double as a card box and a miniature display. Cover a sturdy carton in colors inspired by a pit stop or parking garage, then add drawn bay doors, signs, and lane markings. Toy cars attached to the top or sides make the theme immediately clear.
Ramp cutouts can suggest cars racing into the garage, but the design should still leave a dependable place for cards to enter. A broad opening on the roof or back may be easier to use than a narrow slot hidden among the ramps.
Plan the garage layout
Sketch the front and sides before adding details so there’s room for the card slot, car display, and any ramps. Keep small toy cars secured if the box will be carried, and avoid placing them where they cover the opening.
- Draw parking bays or pit-stop markings with a ruler.
- Make ramps from folded cardstock or thin cardboard.
- Attach a few favorite cars where they won’t block card access.
Adding a child’s name to a garage sign gives the whole scene a personal finish.
7. Create a Fortnite Supply Drop Box
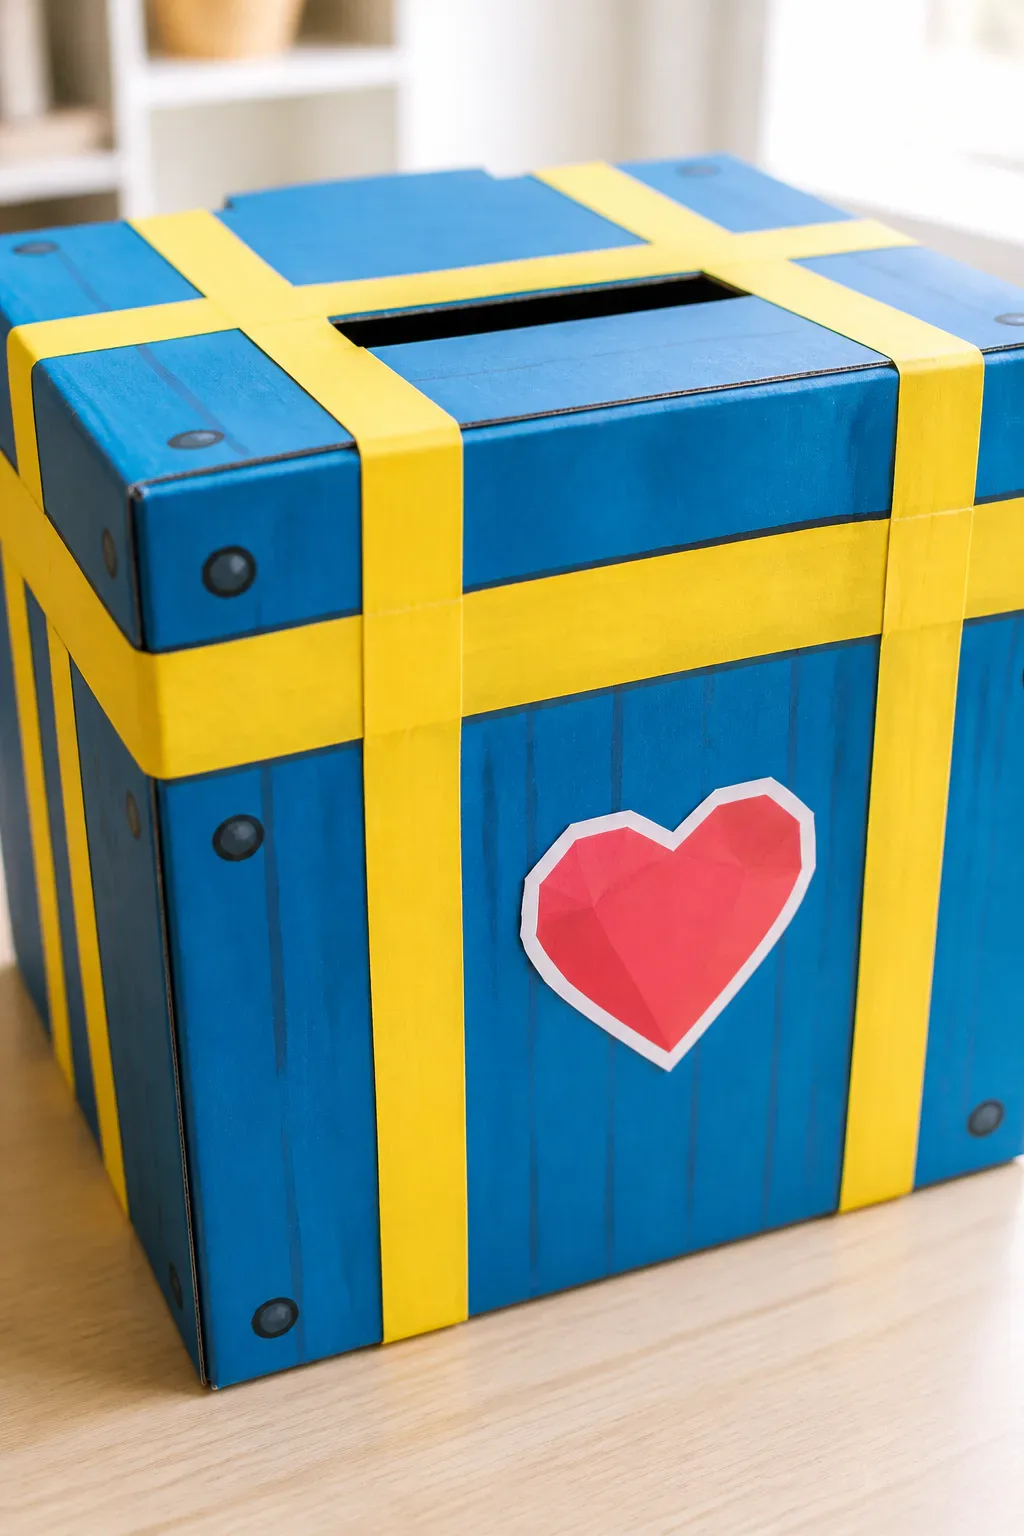
A supply-drop-inspired box is a fun option for a child who enjoys the game’s bold loot-crate look. Start with a sturdy box and decorate it in blue and yellow, using broad blocks of color to make the design readable. Simple stenciled markings or hand-drawn crate details can suggest the theme without requiring complicated construction.
Keep the card slot visible and easy to reach, perhaps on the top of the box or along a clear section of one side. The rest of the surface can carry the visual details, such as stripes, labels, or a heart-themed badge that makes the project feel right for Valentine’s Day.
Decorate the crate
Paint or cover the box before adding smaller markings. If using paint, let it dry completely before handling the box or attaching paper details, and test markers on a scrap piece of the same surface.
- Use yellow strips to create strong contrast against blue.
- Draw simple crate labels or use paper cutout shapes.
- Add a heart emblem to connect the game theme to the holiday.
The design can be as detailed or as simple as your available time and supplies allow.
8. Make a Unicorn with a Rainbow Mane
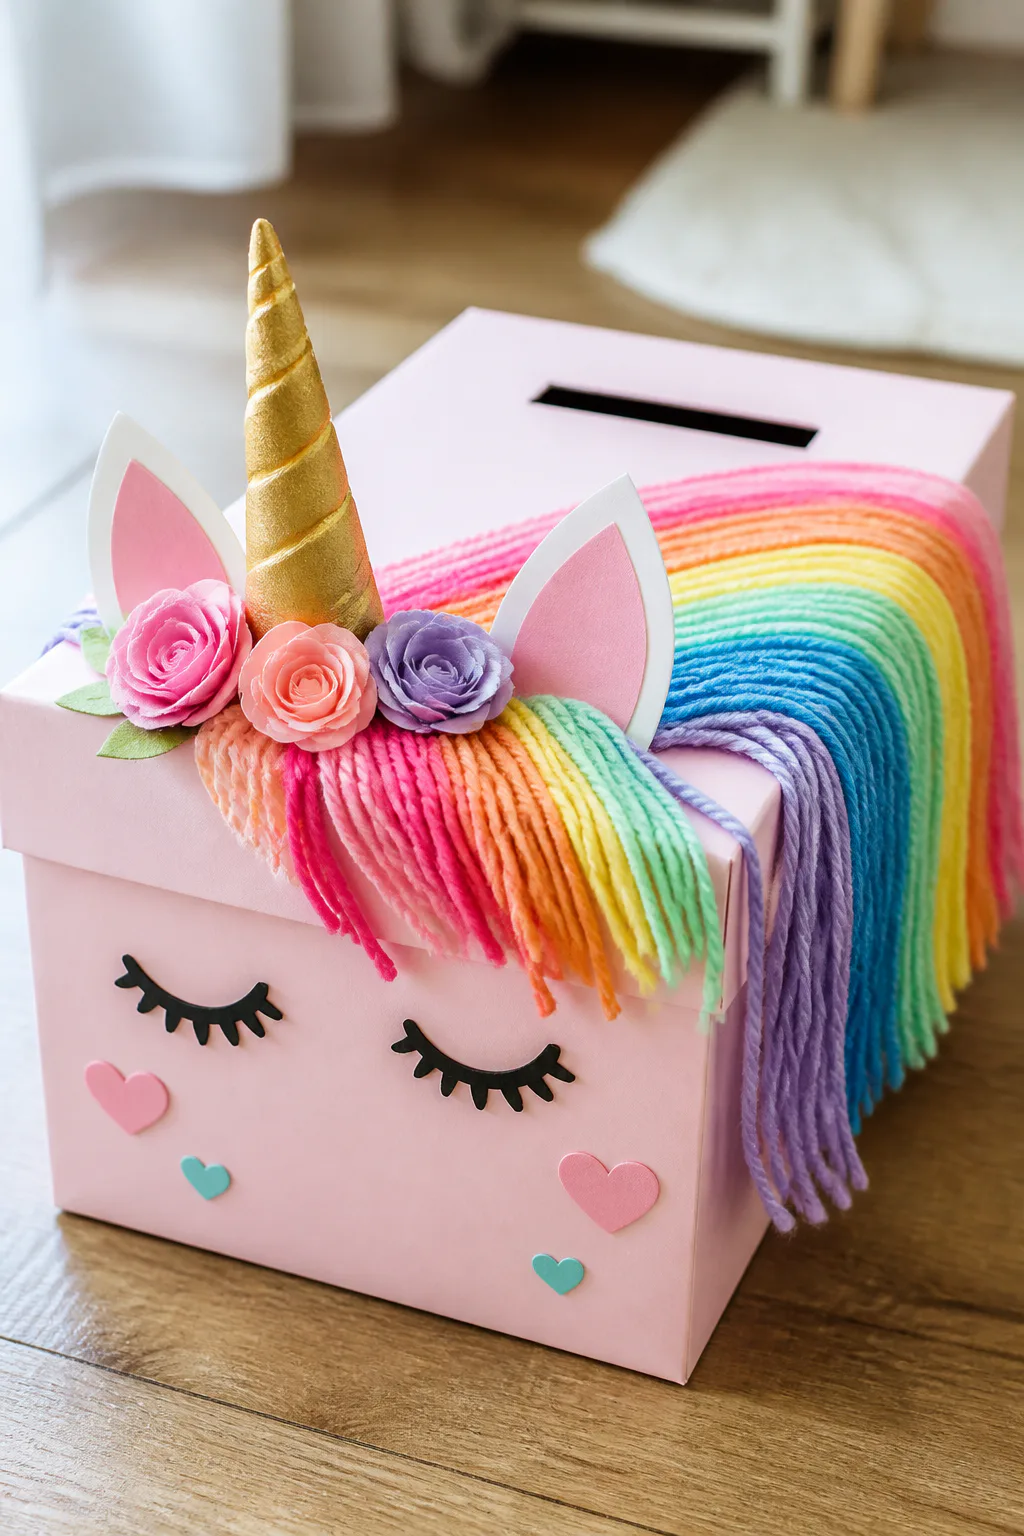
A unicorn box brings soft color and playful texture to a Valentine card collection. Cover a shoe box in white, pink, or another pastel shade, then add a gold paper horn near one corner of the lid. A flowing yarn mane gives the design movement and creates a nice contrast against the smooth box.
Paper flowers, ears, and closed or open eyes help shape the unicorn’s face. Place the card slot where it won’t disappear beneath the mane; the top or back of the box is often a practical choice. A rainbow arrangement of yarn makes the project colorful without needing many extra decorations.
Style the mane
Cut yarn into manageable lengths and attach it in layers, working from the forehead toward the back. Keep the strands clear of the card opening, and use a sturdy paper horn rather than a sharp pointed material.
- Choose three or more yarn colors for a rainbow effect.
- Add paper flowers near the horn or along the mane.
- Use cardstock ears to help them stand upright.
A few small hearts around the face can make the unicorn feel especially suited to the holiday.
9. Craft a Pixelated Minecraft Creeper
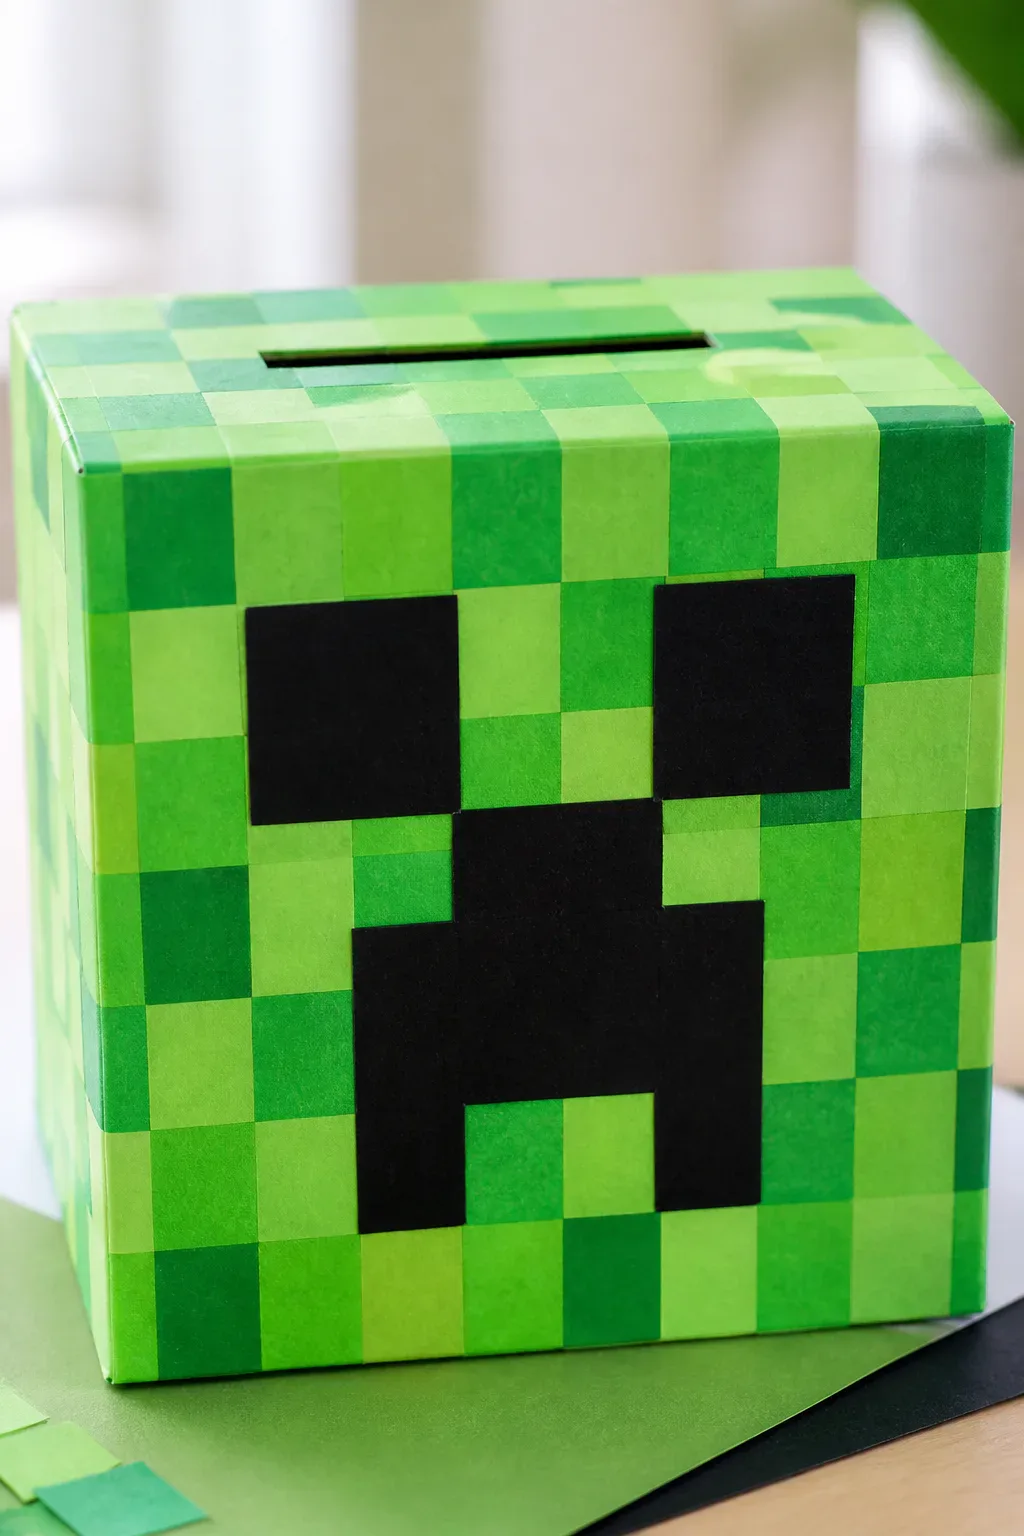
A Minecraft Creeper is a natural fit for a square box because its recognizable face is made from blocky shapes. Cover the box in green paper or paint it green, then use black squares to create the face. Keeping the pieces aligned to an imaginary grid makes the design look intentional and true to its pixelated style.
This project is simple to customize while still staying recognizable. You can use several shades of green across the box, or keep the sides solid and reserve the black details for the front. Put the card slot on top so the face can remain unobstructed.
Make the pixel pattern
Plan the face on paper before gluing anything down. A quick sketch helps you space the eyes and mouth evenly, especially if the box front is small or the paper squares are cut by hand.
- Cut black squares in consistent sizes for a tidy grid.
- Use different green shades for a block-inspired background.
- Place the card slot on top or toward the back of the lid.
For a finishing touch, add a small paper heart or Valentine message on one side of the box.
10. Turn a Box into a Retro Television

A retro television gives a rectangular box a charming, old-fashioned look. Paint it or cover it in a solid color, then draw a screen on the front with rounded corners and simple controls along the side. The screen can show a Valentine greeting, a heart-filled picture, or a made-up “Valentine Channel.”
Keep the box opening separate from the screen design so cards can be collected without covering the main feature. A slot on the top or side works well, while drawn knobs and a paper antenna can complete the television shape without making it difficult to carry.
Create the screen
Use a large paper rectangle as the screen if drawing directly on the box feels tricky. Add a border, then decorate the center with a simple scene that can be seen clearly from a few steps away.
- Draw two or three control knobs beside the screen.
- Add a Valentine program title in bold lettering.
- Make antennae from paper strips or pipe cleaners.
A neatly framed screen makes this design feel finished even with just a few decorations.
11. Make an Alligator with a Long Tail

A long shoe box makes a handy base for an alligator, with the narrow shape already suggesting a body. Paint it green or cover it in green paper, then add a paper tail at the back and small legs along the sides. The card opening can become the alligator’s mouth, giving the box a playful, interactive feature.
White paper teeth along the opening create a jagged grin, while eyes near the front help make the face easy to spot. Be sure the lid still opens for removing cards, and avoid adding decorations that could snag cards as they slide inside.
Shape the alligator
Cut the tail from lightweight cardboard and attach it securely, keeping it short enough that it won’t catch on nearby desks or bags. Arrange teeth around the slot with enough space for cards to pass through smoothly.
- Use a folded paper strip for a sturdy, tapered tail.
- Add small paper legs along both long sides.
- Draw scales with markers or attach simple paper shapes.
A curved smile and bright eyes can make the alligator look friendly rather than fierce.
12. Create a Frog on a Lily Pad
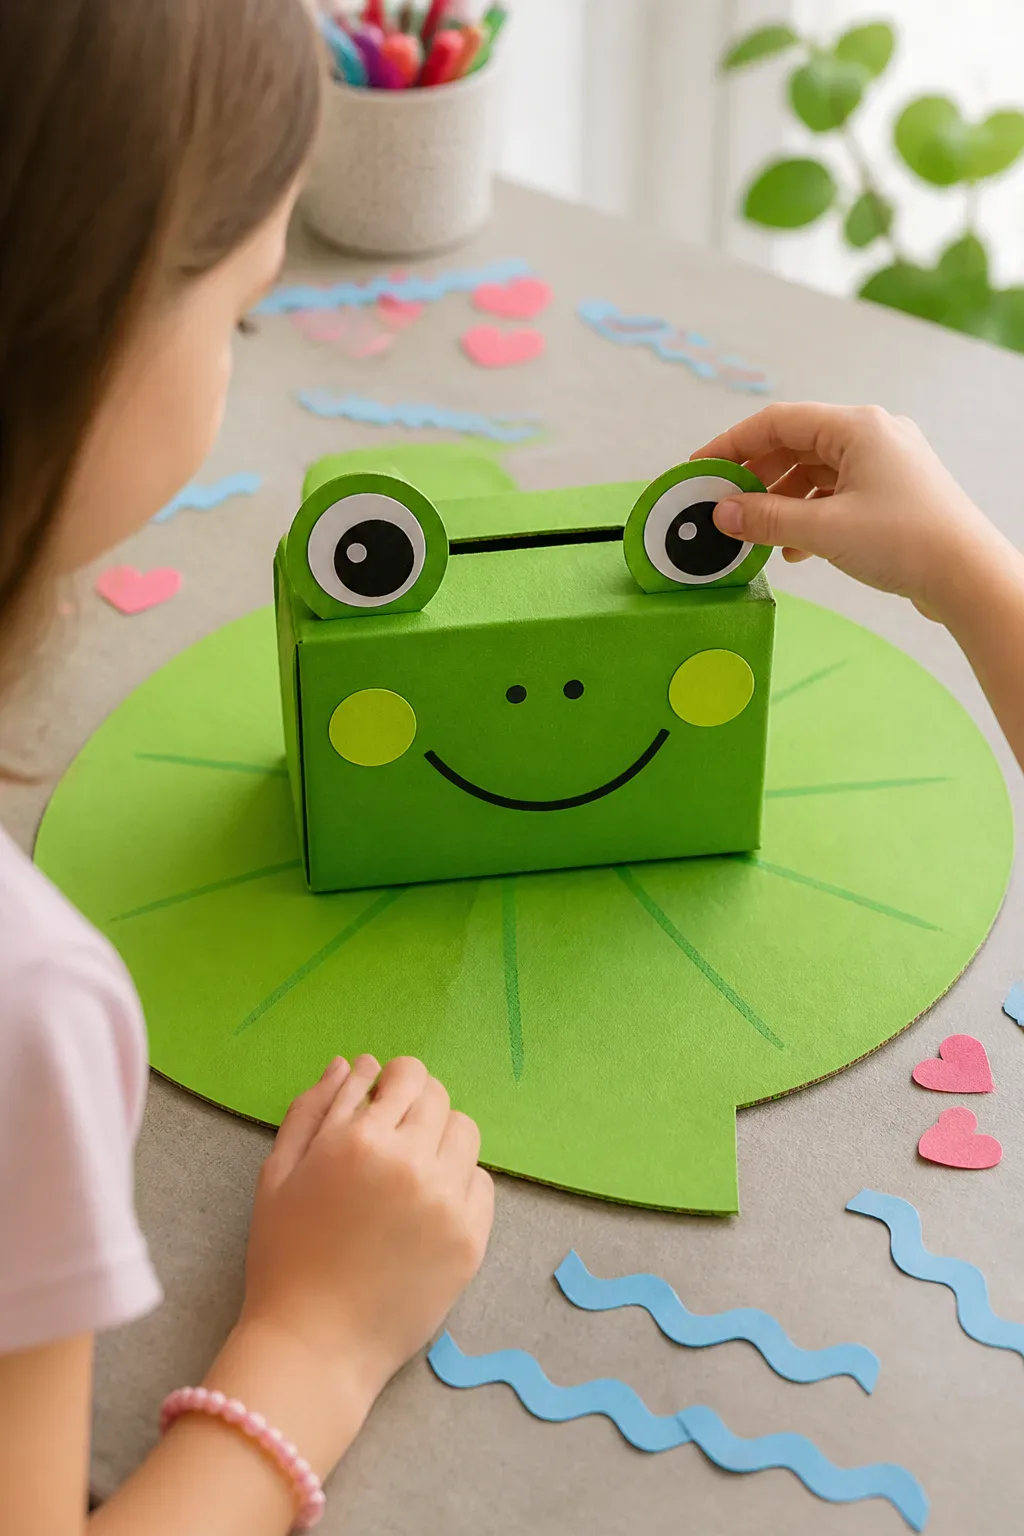
Make a bright-green box the center of a cheerful pond scene by adding bulging eyes and placing it on a large paper lily pad. The raised eyes give the frog plenty of expression, while the broad lily pad creates a decorative base that helps the box stand out on a table.
Keep the frog’s card slot on top or behind its face so the opening remains practical. The lily pad can be cut from green poster paper or lightweight cardboard, with a small notch added at one edge to suggest its familiar shape.
Bring the pond scene to life
Attach the frog box securely to the lily pad, but leave enough room around it for the container to open. For eyes, use paper circles or lightweight craft pieces, and check that any raised decorations won’t get crushed when the box is moved.
- Layer two circles for each eye to create a raised look.
- Add a curved smile and small nostrils to the front.
- Cut a notch in the lily pad and draw simple veins.
Paper water ripples or tiny heart shapes can finish the scene without crowding the frog.
13. Design a Beehive and Honeycomb Box

A beehive box brings warm yellow and brown colors to a Valentine craft. Wrap the box in yellow paper, then add brown bands or strips to suggest the rounded layers of a hive. Paper bees around the sides make the theme easy to recognize, and heart-shaped wings add a sweet holiday detail.
This design can be made with a standard rectangular box; there’s no need to build a complicated hive shape. Keep the card slot near the top and decorate around it, leaving enough open space for cards to drop inside easily.
Add hive details
Use paper strips, yarn, or twine for the hive bands, choosing a material that lies flat and won’t catch on cards. Make bees from simple yellow-and-black shapes, then attach them around the box in a loose flying pattern.
- Alternate yellow and brown details for clear contrast.
- Give each paper bee small heart-shaped wings.
- Add a few drawn honeycomb cells near the card slot.
A small “Bee mine” sign can be a playful finishing touch if your child wants to include a message.
14. Build a Bright Red Fire Truck Box

A rectangular box can become a bright red fire truck with just a few recognizable details. Add black paper wheels, windows, and a ladder along one side, then place a small light on top. The simple truck shape is easy to understand, and its large sides offer plenty of space for decorative details.
Position the card slot on the roof or toward the back so it doesn’t interfere with the ladder or windows. If you add raised wheels, make sure the truck still sits steadily on a flat surface and can be opened to remove the cards.
Build the truck details
Cut matching wheel shapes from black cardstock and attach them at an even height. Make the ladder from paper strips or thin cardboard, and secure it close to the side of the box so it won’t catch on other projects.
- Add a paper ladder along one side panel.
- Use white or yellow strips for reflective-looking accents.
- Make the top light from a paper shape or craft gem.
A child’s name on the side can turn the fire truck into a personalized rescue vehicle for Valentines.
15. Make a Rocket Ship Card Box

A rocket ship gives a tall container a natural space-themed makeover. Use a cylindrical container or tall box as the body, then paint it with simple shuttle-inspired details. Foil fins add shine, while tissue-paper flames at the bottom suggest the rocket is ready for launch.
Place the card slot near the top, leaving the nose cone and any decorations clear. Since a tall box can be less stable than a low shoe box, check that the base sits flat and that the attached fins or flames don’t make it tip when cards are added.
Prepare for launch
Attach the fins evenly around the lower part of the rocket and keep tissue flames light enough that they won’t pull on the container. If the box will be carried to school, use secure attachments and avoid long pieces that could tear off in transit.
- Use foil-covered cardboard for lightweight fins.
- Add windows, stripes, or a heart-shaped mission badge.
- Cut the slot in a flat, accessible part near the top.
A label such as “Valentine Express” can make the rocket’s mission clear.
16. Create a One-Eyed Minion Mailbox
A one-eyed Minion-inspired mailbox is a bright, recognizable choice for fans of the cheerful character style. Wrap a box in yellow and blue paper, using yellow for the upper section and blue for the overalls. A large silver-rimmed goggle with one eye gives the front its focal point.
The card slot can run through the overall strap as part of the design, but make sure the opening is wide enough and doesn’t get covered by the goggle or paper details. A simple smile and a few drawn hair marks can complete the face without making the front feel crowded.
Make the goggle and slot
Cut the slot before adding the strap, then position the paper trim around it carefully. Layer silver or gray paper rings to create the goggle frame, and use a large paper circle for the eye if you want to avoid loose craft pieces.
- Separate the yellow and blue areas with a clean paper edge.
- Use layered circles for a bold goggle frame.
- Add a small pocket shape to the overalls.
Keep the details lightweight so the box stays easy to carry and open.
Final Thoughts
The best Valentine box is one that feels fun to make and works well for collecting cards. Whether your child chooses a creature, a vehicle, or a favorite character-inspired design, start with a sturdy container and plan the card slot before adding decorations.
Use the materials you already have, simplify details when time is short, and let your child make choices along the way. A few thoughtful colors and personal touches can turn an ordinary box into a memorable part of Valentine’s Day.



