

13 Beautiful Easter Crafts Ideas for Kids and Home
Easter crafts can be as simple as painting a few eggs or as involved as sewing a little basket for an egg hunt. These ideas mix hands-on projects for kids with cheerful decorations you can display around the home.
You’ll find options for different ages and materials, from cardboard tubes and paper plates to felt, yarn, and real flowers. Many can be made with supplies you may already have, and you can adjust the details to suit your family’s style.
If you’re crafting with young children, choose washable paints and handle scissors or hot glue yourself. Set out a tray or scrap paper before you begin, and let everyone personalize their project with their favorite spring colors.
1. Make Botanical-Dyed Eggs with Leaf Prints

For a natural-looking Easter display, dye eggs with colors made from ingredients such as onion skins, turmeric, or red cabbage. The shades tend to be soft and varied, giving each egg a one-of-a-kind finish that looks lovely in a bowl or nestled among spring greenery.
To add a botanical print, place a small leaf or petal against the shell before dyeing. The covered area resists the color, leaving a delicate silhouette when you remove the plant. This project suits a kitchen table or a relaxed afternoon of crafting, though an adult should handle hot water and any eggs being boiled.
How to get a clear leaf print
Choose flat leaves with distinct outlines, and hold each one firmly against the shell while you secure it in a small piece of fine fabric or an old stocking. Keep the egg submerged in dye for an even color, then remove the wrapping once it is cool.
- Try onion skins for warm orange or gold tones.
- Use turmeric for a bright yellow, or red cabbage for a soft blue.
- Keep the leaf flat and snug against the shell to preserve its shape.
2. Paint Salt-Textured Easter Egg Art

Salt painting turns a simple egg outline into raised, sparkling artwork. The texture gives watercolors a path to travel, so colors spread along the salted lines and mingle in a way that feels delightfully unpredictable. It’s a satisfying choice for kids who enjoy watching materials change as they work.
Because the design is made on cardstock, the finished eggs can be displayed without worrying about fragile shells. Make a few in different colors and hang them on a wall, arrange them on a spring bulletin board, or use them as handmade cards for family.
How to make the raised design
Draw an egg shape with school glue on sturdy cardstock, then cover the wet glue with fine table salt. Shake away the extra salt and let the design set briefly before touching it with watercolor.
- Use heavy cardstock so the paper holds up to damp paint.
- Apply color with a dropper or a lightly loaded brush.
- Tap the color onto the salt instead of brushing hard across it.
- Let the finished artwork dry flat before displaying it.
3. Create Puffy-Paint Marbled Paper Eggs

These paper eggs combine swirled color with a soft, raised finish. A mixture of shaving cream and white glue makes a fluffy surface, while drops of paint create marbling when gently swirled together. The result is playful and tactile without needing to decorate a real egg.
Use the finished shapes as a garland, attach them to folded cards, or add them to a seasonal collage. This project works well at a craft table where children can experiment with color, but the shaving cream mixture can be messy, so it helps to cover the work surface first.
Make the marbled texture
Mix equal parts white school glue and shaving cream, then tint the mixture with a few drops of paint or food coloring. Press paper egg cutouts into the swirled surface and lift them carefully to reveal the pattern.
- Cut several eggs from cardstock before mixing the puffy paint.
- Swirl colors lightly with a toothpick to keep the pattern distinct.
- Use a tray or washable mat to catch extra foam and paint.
- Allow the eggs to dry fully before hanging or stacking them.
4. Build Cardboard Tube Bunnies and Chicks
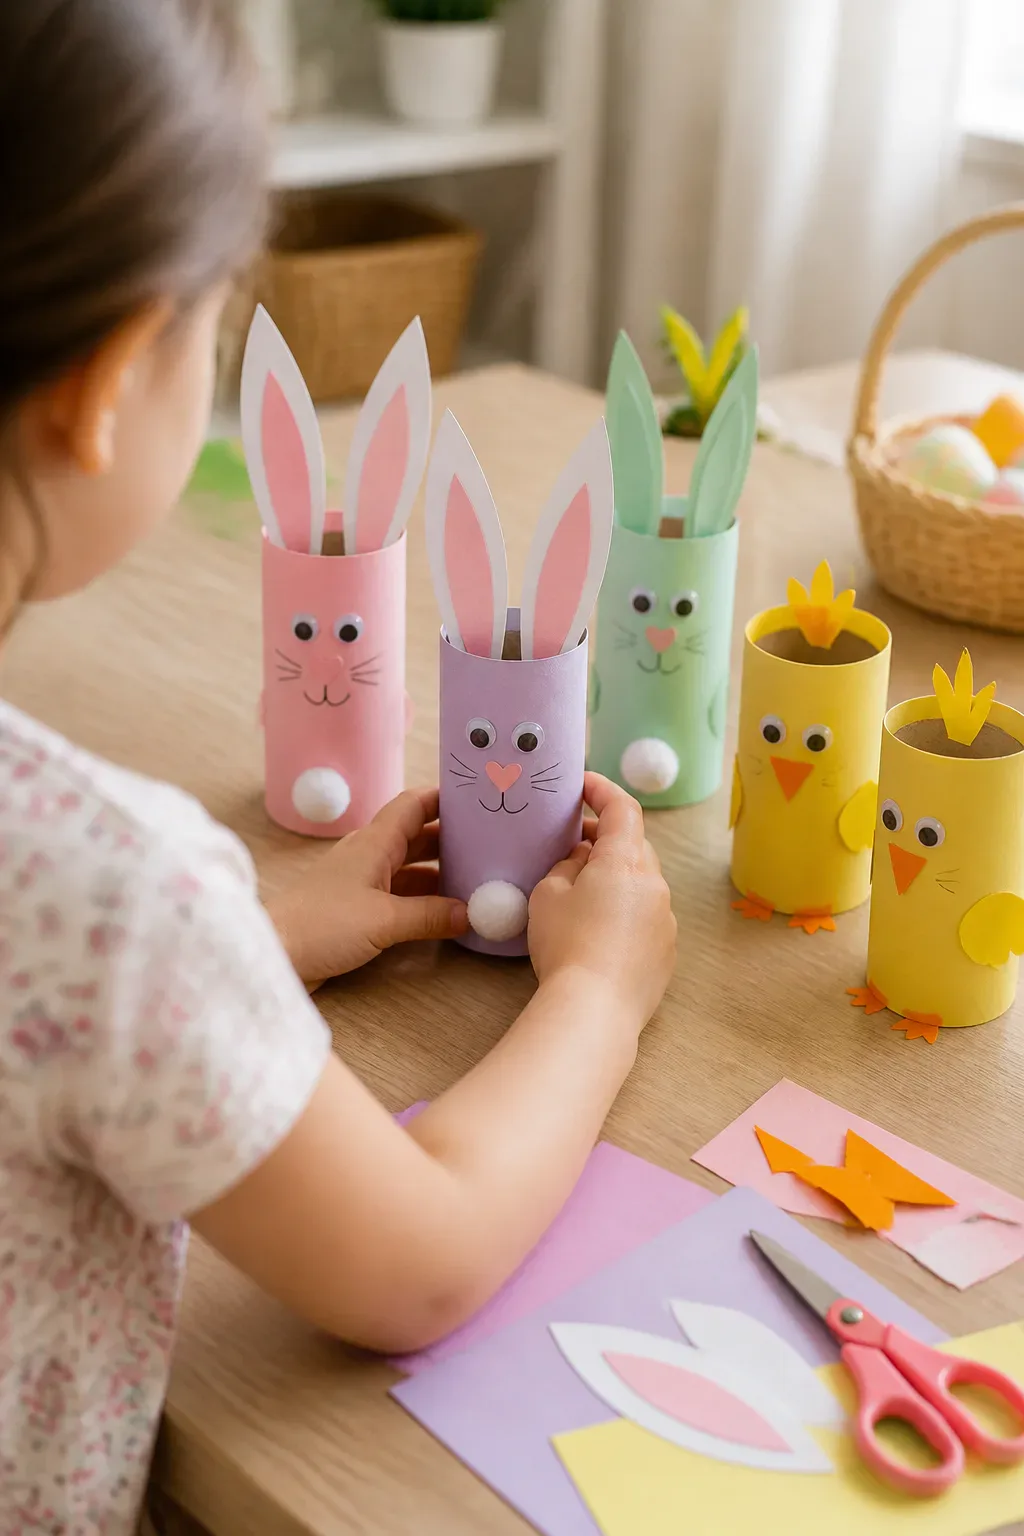
Clean cardboard tubes make sturdy little bodies for a lineup of Easter characters. Wrap them in pastel paper, then add bunny ears, chick beaks, and simple faces. Since each tube stands upright, the finished critters can decorate a desk, shelf, or children’s table.
This project is easy to adapt for different ages. Younger children can choose colors and glue on pre-cut details, while older kids can design their own ears, wings, and expressions. A group of bunnies and chicks looks especially cheerful when the characters share a palette but have different features.
Build a playful lineup
Cut construction paper to fit around each tube and secure it with glue or tape. Add paper ears or a beak, then finish with drawn eyes, googly eyes, or small cotton tails. Let glue dry before standing the figures together.
- Use pastel paper for a soft spring look or bright colors for a bold display.
- Cut bunny ears and chick beaks from contrasting scraps.
- Draw faces if you want a simple alternative to small craft pieces.
- Arrange the finished characters in a row or in an Easter centerpiece.
5. Make Fluffy Fork-Printed Easter Chicks

A fork can make a surprisingly effective printing tool for a fluffy chick. When you press the back of a fork into yellow paint and move it in a small circle, the prongs leave a feathery edge around the body. Each print looks a little different, giving a page of chicks a lively, handmade feel.
This quick project is a good fit for younger children who are learning to make prints and add simple details. Use paper as a background for a spring picture, or cut out the finished chicks to decorate a card or classroom display.
Print and finish each chick
Pour a small amount of yellow tempera or acrylic paint onto a plate. Dip the back of a plastic fork into the paint, press it onto paper in a circular motion, and let the print dry before adding a face.
- Use a light touch so the fork marks stay visible.
- Add a small orange triangle for the beak.
- Draw eyes with a marker or add them after the paint dries.
- Make a few chicks in different sizes for a playful scene.
6. Wrap Cardboard Eggs in Pastel Yarn

Yarn-wrapped eggs add color and texture without requiring paint or a complicated technique. Cut sturdy cardboard into egg shapes, then wind yarn around each one until the surface is covered. Crossing the strands in different directions creates a woven look that feels cheerful and cozy.
This is a useful project for using up yarn scraps, and it can be done at a relaxed pace while watching a movie or chatting at the table. The finished eggs are durable enough to display in a bowl, hang from a branch, or tuck into a spring garland.
Keep the wrapping neat
Secure one end of the yarn to the back of the cardboard with a small dab of glue, then wrap the yarn snugly around the shape. Change direction as you go, and make sure the edges are covered before fastening the final end.
- Choose stiff cardboard that will hold its shape while wrapping.
- Combine two or three pastel shades for a simple color pattern.
- Keep the yarn firm but not so tight that the cardboard bends.
- Glue down loose ends on the back for a tidy finish.
7. Paint Bunny-Face Mason Jar Vases

A painted jar can become a sweet spring vase with just a few details. Choose a soft shade for the glass, add a simple bunny face near the bottom, and fill the jar with tulips or faux grass. The result works as a centerpiece, a mantel accent, or a cheerful decoration on a bedside table.
Wide-mouth jars are easy to paint and can hold a small bunch of flowers. If you’re using fresh stems, keep the inside of the jar clear and use it as a regular vase; place painted details on the outside. For a longer-lasting display, faux flowers or grass are convenient alternatives.
Add the bunny details
Apply paint to the outside of a clean, dry jar and let it dry before drawing or attaching the face. Keep the expression simple with small eyes, a nose, and whiskers, then add flowers once the decoration is ready.
- Try mint, soft pink, or butter yellow for a spring palette.
- Use a fine brush or paint marker for small facial details.
- Keep paint away from the jar’s inside if it will hold water.
- Group several jars together for a colorful table arrangement.
8. Turn Handprints into Bunny Greeting Cards

A handprint or footprint can become a keepsake bunny card that children are proud to give. Trace the shape onto cardstock and use the fingers or toes as long ears, with the palm or heel forming the bunny’s face and body. It’s a personal project that captures a moment in a child’s life while making a thoughtful Easter greeting.
These cards work well for grandparents, relatives, or anyone who enjoys handmade notes. You can keep the design simple with drawn features, or add a small bow and a short message inside. If using a child’s hand, let them choose the paper color and help decorate once the shape is cut out.
Turn the print into a card
Trace a hand or foot onto cardstock and cut around the outline. Add eyes, a nose, and a mouth, then fold a separate piece of card or attach the bunny shape to a folded blank card for a space to write.
- Use heavier cardstock so the ears stay upright.
- Choose washable ink or paint if you’re making a true print.
- Write the child’s name and date on the back as a keepsake.
- Add a short Easter greeting inside the folded card.
9. Craft an Egg Carton Flower Wreath

Egg carton cups can become a ring of cheerful flowers with a little trimming and paint. Cut each cup into petal shapes, color the flowers in spring shades, and arrange them around a wreath form. This project gives recyclable packaging a new purpose and makes a bright decoration for a door or wall.
The flower shapes don’t need to match perfectly; small differences make the wreath feel handmade. Children can paint the petals while an adult handles cutting and any hot-glue steps. Add a contrasting center to each flower to help the individual blooms stand out against the wreath base.
Assemble the flowers
Separate the carton cups and trim their edges into petals. Paint them and allow them to dry before attaching them around a wreath form, spacing the blooms evenly or clustering them for a fuller look.
- Use several paint colors to create a lively spring palette.
- Add a button or paper circle to the center of each flower.
- Arrange the flowers on the wreath before gluing them in place.
- Let the finished wreath dry completely before hanging it.
10. Paint Spring Rocks as Tiny Bunnies
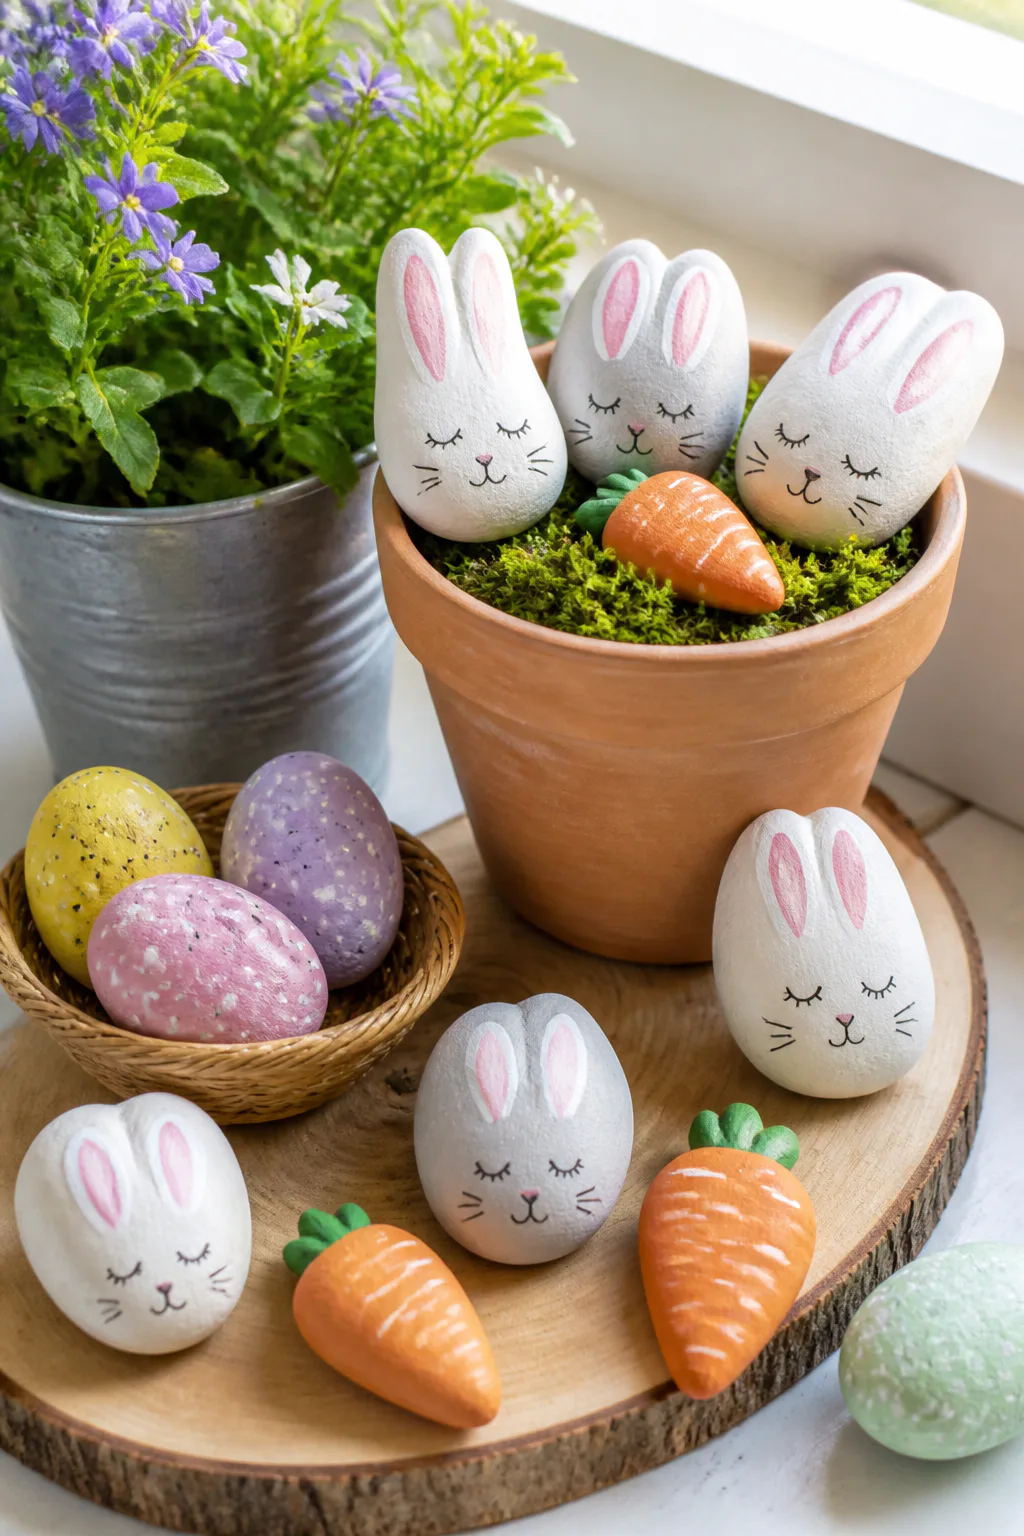
Smooth rocks make sturdy little canvases for Easter designs. Paint them as sleeping bunnies, speckled eggs, or pastel carrots, then display them on a windowsill, in a garden pot, or as part of a tabletop scene. Their small size makes it easy to create a collection without needing many supplies.
This is a relaxed project for mixed ages: young children can paint simple color blocks, while older crafters can add ears, speckles, and fine details. Choose clean, dry rocks with relatively smooth surfaces so the paint goes on more easily and small features are easier to see.
Choose a simple rock design
Start with a base coat and let it dry before adding the character details. Fine brushes or paint pens can help with faces and patterns, while a few simple marks are often enough to make each rock recognizable.
- Paint a sleeping bunny with closed eyes and long ears.
- Make speckled egg designs with dots in a contrasting color.
- Use orange paint and green tops for tiny carrot rocks.
- Keep the designs bold enough to show on a small surface.
11. Make Paper Plate Bunny Masks

A paper plate bunny mask turns a familiar craft supply into a playful accessory. Cut an opening for the face, add long ears, and decorate with whiskers and a nose. Children can use the mask for pretend play, a holiday photo, or a simple Easter-themed activity at home.
Because the mask is held by a craft stick, there’s no need to fit elastic around a child’s head. That makes it easy to pick up and put down, and it gives kids room to personalize their design. An adult should cut the face opening and attach the handle securely.
Decorate a mask for pretend play
Trim the center of a paper plate to create a frame around the face, then attach paper ears to the top. Add a craft-stick handle at the bottom and let the decorations dry before using the mask.
- Cut long ears from cardstock so they keep their shape.
- Add a pink nose, paper whiskers, or short yarn pieces.
- Use markers, crayons, or paint to decorate the plate.
- Check that the handle is firmly attached before play.
12. Sew a Felt Easter Egg Basket
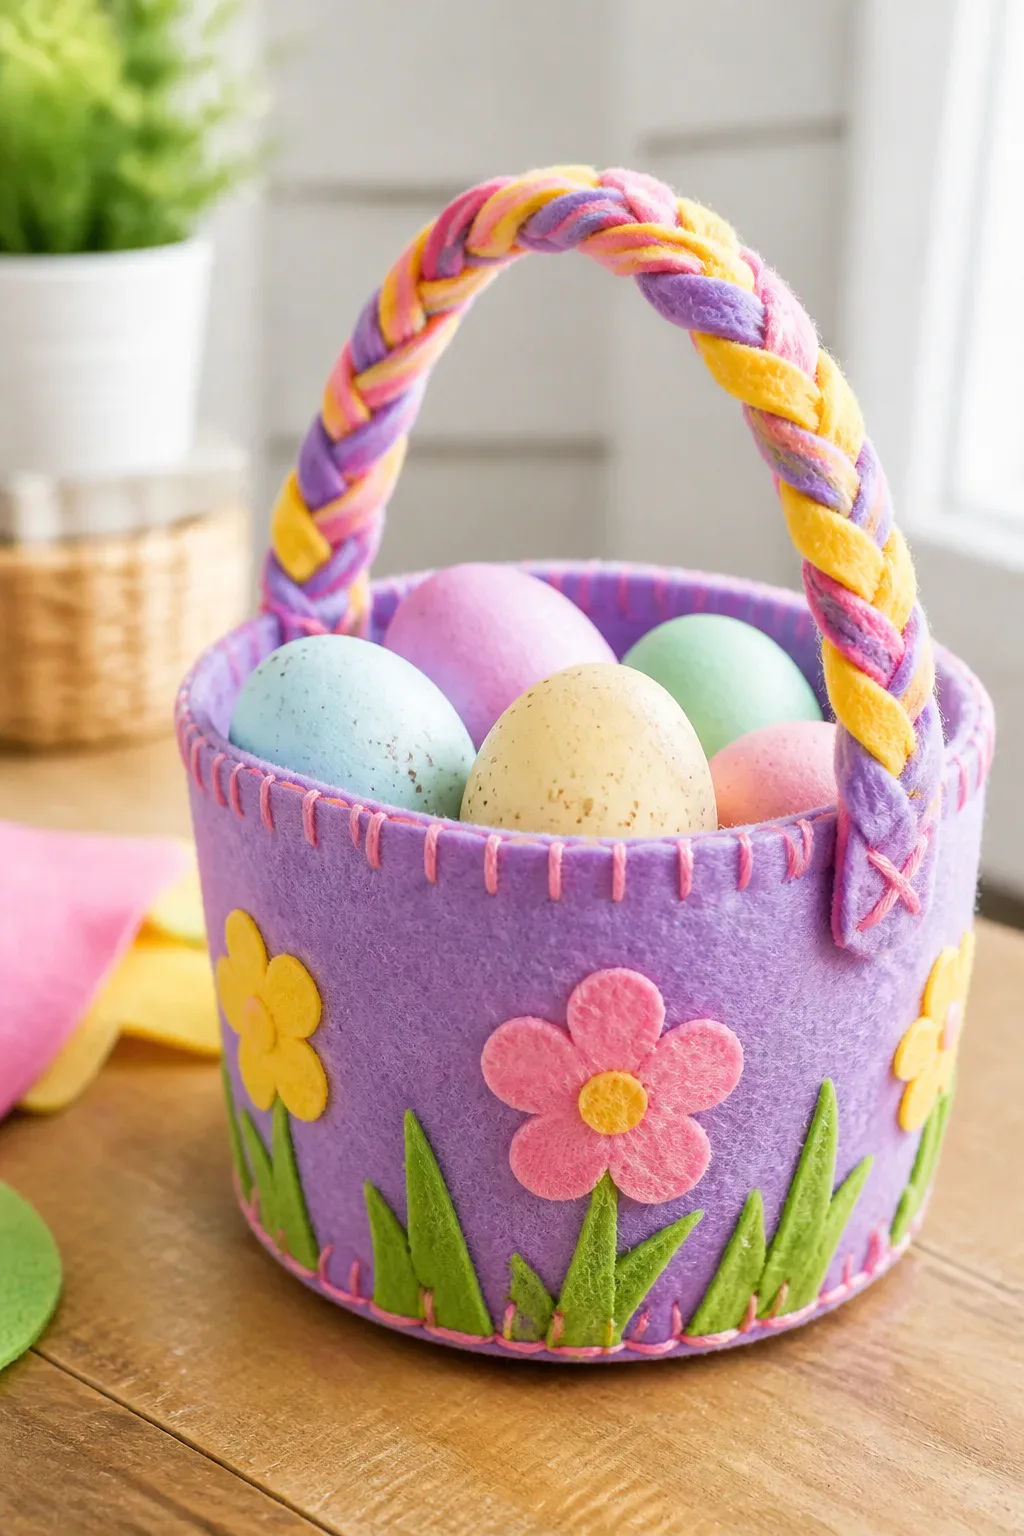
A small felt or fabric basket gives children a reusable place to carry Easter eggs. Felt is especially handy because it holds its shape and can be decorated with simple cutout shapes. A braided handle adds a colorful detail and makes the basket easier to carry on an egg hunt.
This project suits crafters who enjoy sewing or want to try a straightforward hand-sewn item. For a no-sew version, use sturdy felt and fabric glue, allowing plenty of drying time before filling the basket. Keep the basket size modest so it remains comfortable for a child to hold.
Shape and finish the basket
Cut matching felt pieces for the sides and base, then sew or glue them together to form a small container. Add a braided strip of felt for the handle and decorate the outside with contrasting shapes or simple stitching.
- Choose thick felt that can support the basket’s shape.
- Make the base wide enough to hold a few eggs securely.
- Attach both handle ends firmly to opposite sides.
- Test the basket with lightweight items before the egg hunt.
13. Hang Pressed-Flower Egg Suncatchers

Pressed-flower egg suncatchers bring a light, botanical touch to an Easter window. Arrange spring flowers between clear layers inside an egg-shaped frame, then hang the finished piece where daylight can shine through. The colors and delicate outlines are especially pretty against a bright window or glass door.
This craft works well when you want a decoration that feels softer than painted eggs. Use pressed flowers saved from earlier projects or faux blooms if you don’t have real ones. Children can help choose the arrangement, while an adult can cut the frame and handle any sharp tools.
Layer the flowers
Cut the center from two matching paper egg shapes to make a frame. Place flowers on clear contact paper, add a second clear layer, and position the paper frames over the edges before trimming and hanging.
- Arrange the flowers before sealing the clear layers together.
- Leave a little open space so sunlight can pass through.
- Trim the contact paper neatly around the egg shape.
- Hang the suncatcher with a loop of thread or ribbon.
Final Thoughts
These Easter crafts offer plenty of ways to make the season feel festive, whether you’re working with children, using up craft supplies, or adding a handmade touch to your home. Try one project for a quick afternoon activity, or combine a few into a colorful display of eggs, flowers, and springtime characters.
Choose the ideas that fit your materials, space, and patience, and don’t worry about making every detail perfect. The best part is creating something together and giving each piece its own personality.



