16 Beautiful DIY Valentine’s Day Decoration Ideas
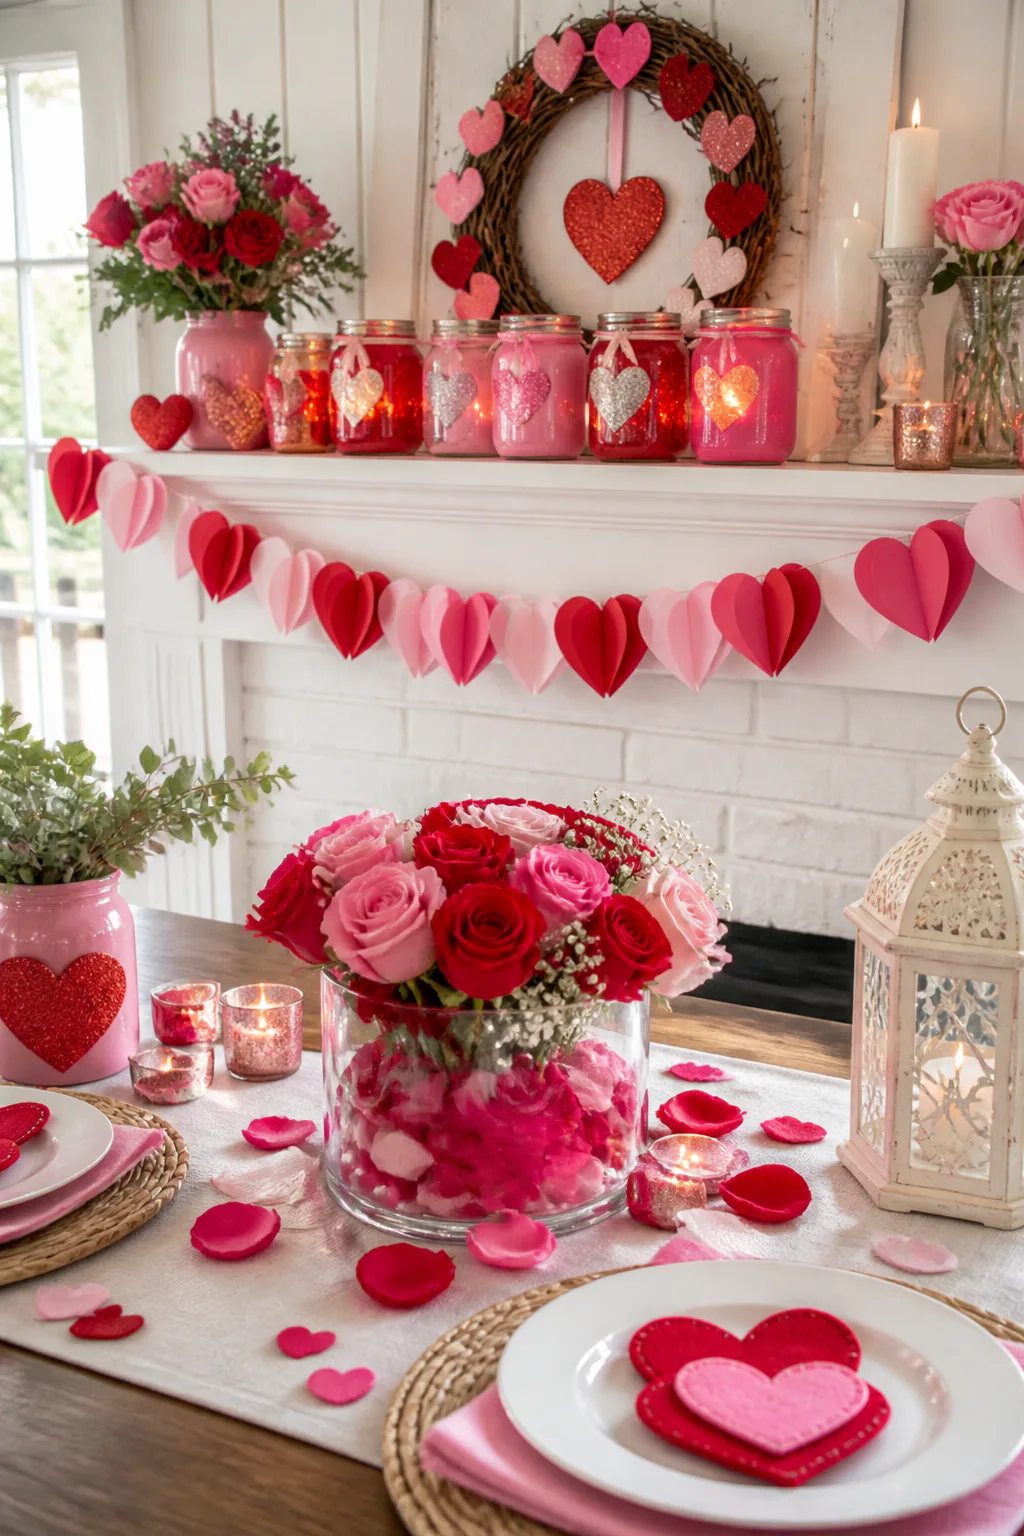
Valentine’s Day decorating can be as simple as adding a few handmade details to the rooms you already use. These DIY ideas range from soft and romantic to colorful and playful, with options for mantels, walls, windows, front doors, and the dining table.
Most projects use approachable materials such as paper, felt, yarn, glass jars, and paint. You can adapt the colors and scale to suit your home, whether you want a small seasonal accent or a more noticeable focal point.
These ideas are for anyone who enjoys making decorations at home, including beginners looking for straightforward projects and experienced crafters ready to personalize the finishing touches. Choose one that fits your space, gather the basic supplies, and make it your own.
1. Style a Mantel with Glitter Heart Mason Jars
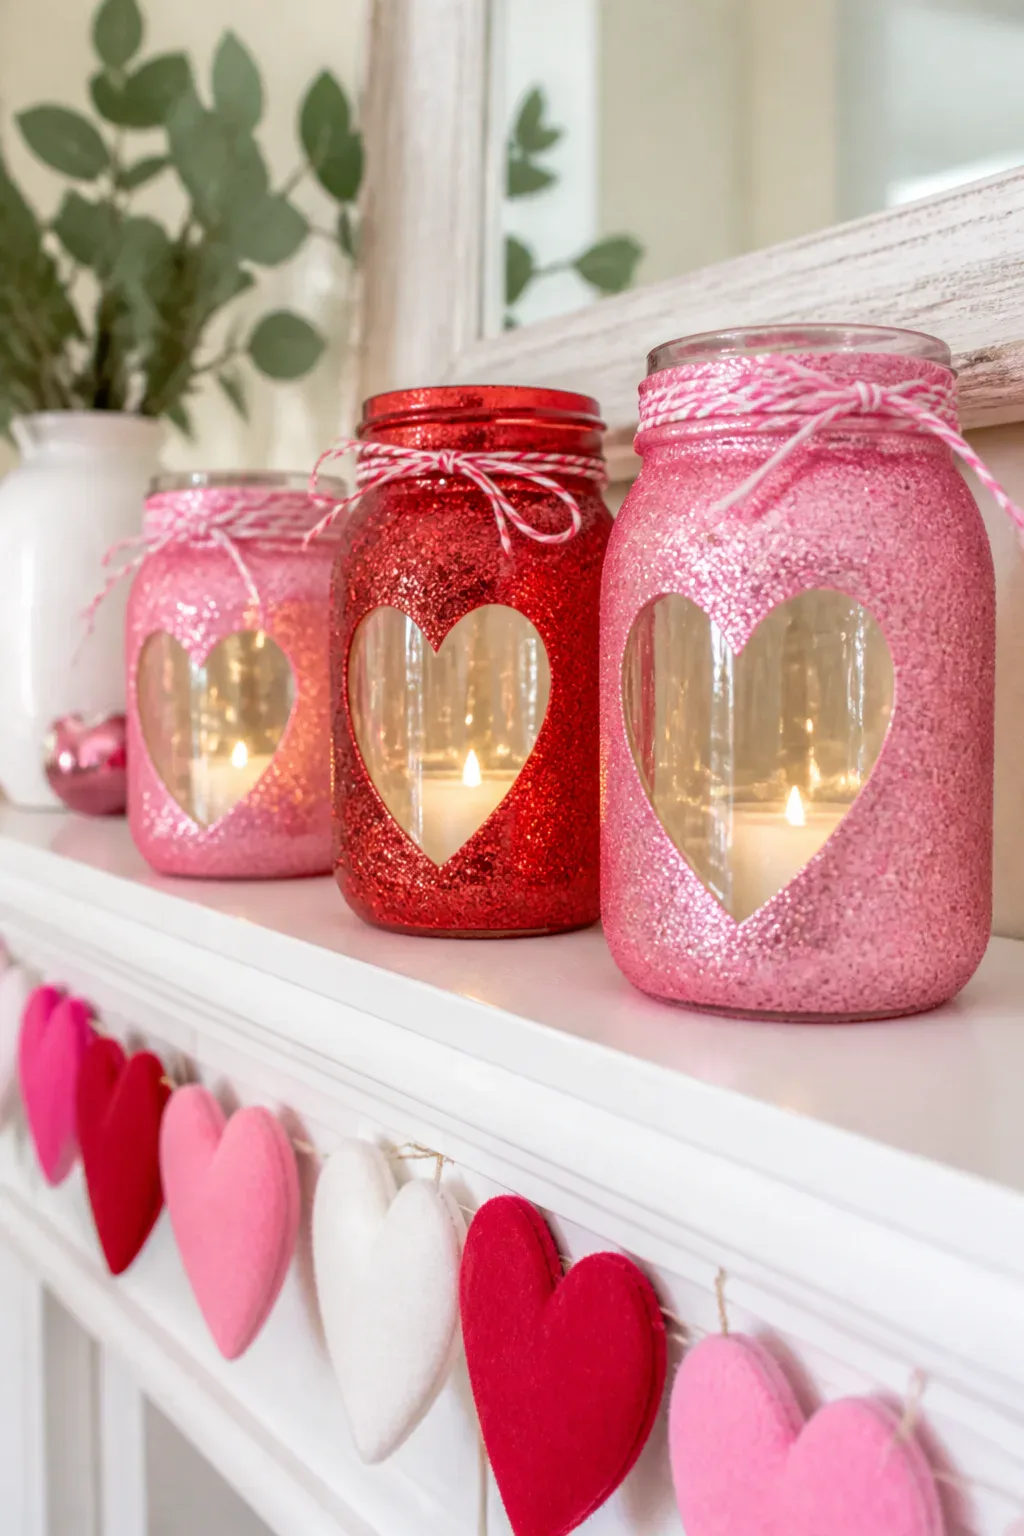
Glitter heart Mason jars bring a little sparkle to a mantel without requiring a large display. Make a matching set or vary the jar sizes, then arrange them with a few simple accents so the glitter remains the star. This idea works especially well on a shelf or console table if you do not have a fireplace mantel.
For a crisp look, use white paint beneath pink, red, or metallic glitter. A heart-shaped sticker or vinyl cutout can create a clean silhouette; remove it after painting to reveal a clear-glass heart, or use it as a mask while adding glitter around the shape.
How to pull it off
Clean and dry the jars before decorating so paint and adhesive can adhere evenly. Protect your work surface, follow product instructions, and allow each layer to dry before adding the next. A clear sealer helps contain loose glitter during display.
- Choose jars with similar shapes for a coordinated group.
- Use painter’s tape or heart stickers to define your design.
- Add battery-operated lights or paper stems for extra detail.
Leave some breathing room between the jars so the display feels bright rather than crowded.
2. Create a Yarn-Wrapped LOVE Sign

A yarn-wrapped LOVE sign turns simple cardboard letters into a soft, tactile focal point. Set the letters on a mantel, bookshelf, or entryway console, where their color and texture can stand out against a plain wall. This project is easy to customize by choosing a palette that complements your existing decor.
Blush, cream, and red yarn create a classic Valentine’s combination, while a single-color version can feel more understated. Wrapping each letter in a different shade adds variety, but keeping the yarn consistent across all four letters gives the sign a more unified appearance.
Design tips
Secure the yarn at the back of each letter with a small amount of hot glue, then wrap it snugly around the shape. Pay special attention to corners and narrow sections, where gaps can show the cardboard. Work in short lengths if that makes the yarn easier to manage.
- Use large block letters for a bold shelf display.
- Change colors between letters or create subtle stripes.
- Wrap tricky edges before covering the broad faces.
- Arrange the letters upright or lean them against a wall.
The finished sign can stand alone or sit beside a small vase or a few paper hearts.
3. Hang a Layered Paper Heart Garland
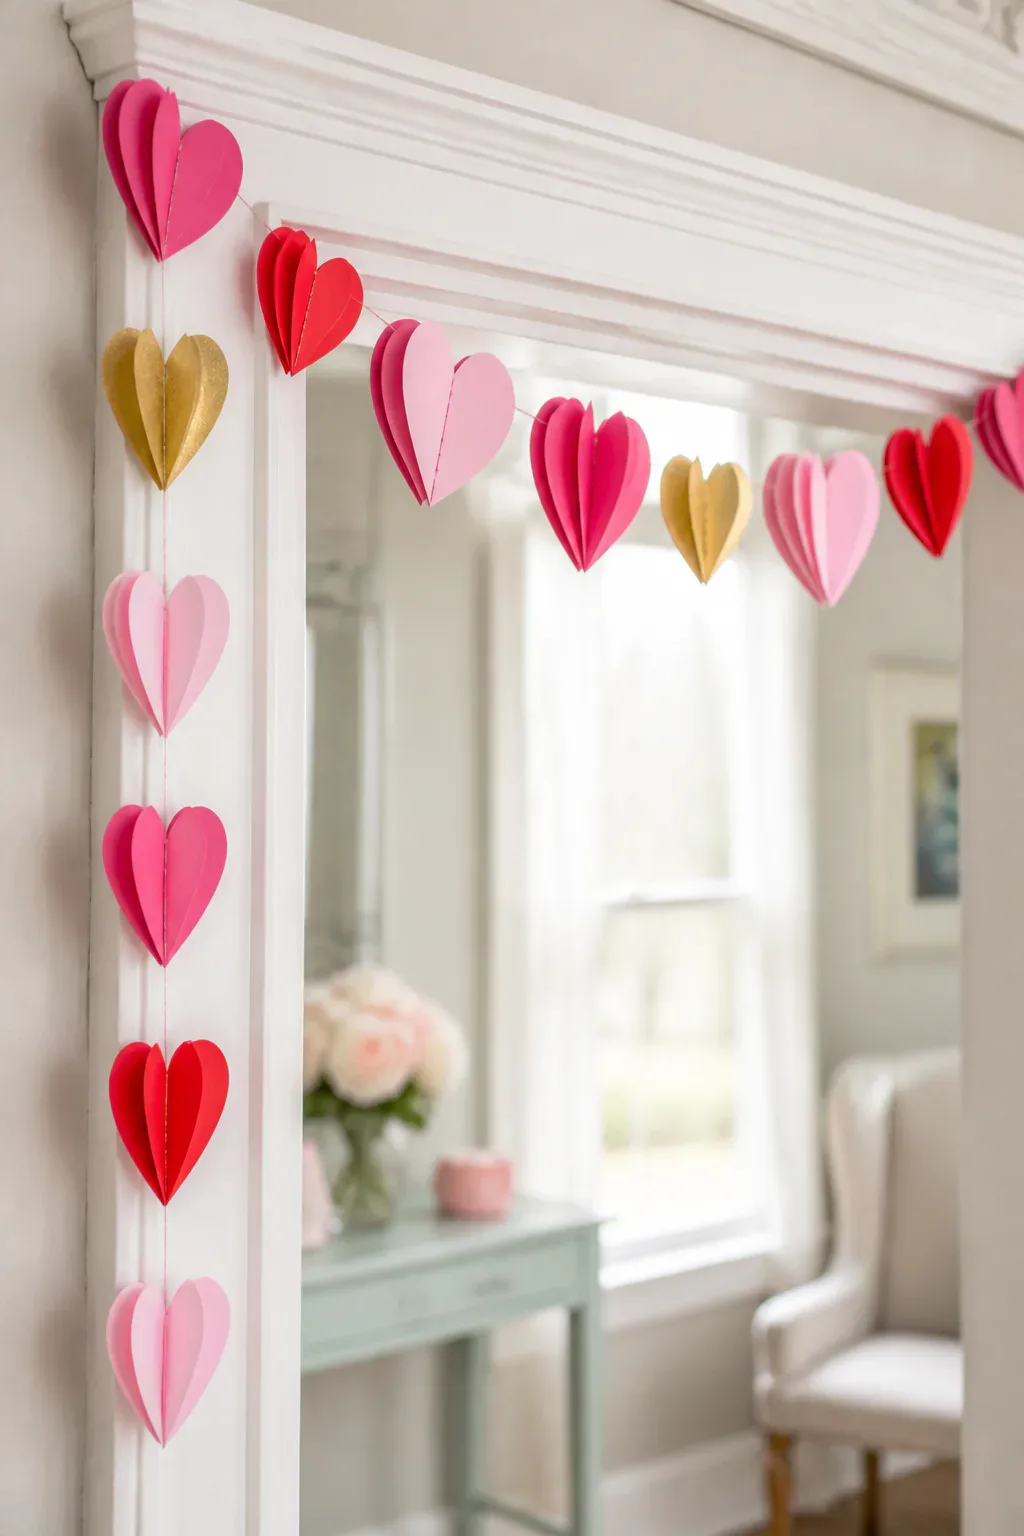
A paper heart garland is a cheerful way to bring Valentine’s color to a doorway, window, or mantel. Because the materials are lightweight, the strand is easy to hang and can be sized to fit a small nook or span a wider area. Mixing pink, red, and gold makes the hearts feel festive without needing extra decorations.
Cut or punch hearts from cardstock, varying their size for a more relaxed, layered look. You can sew a line down the center of each heart to make a connected garland, or attach them to twine with glue. Both approaches create a playful decoration that can be stored flat after the holiday.
How to pull it off
Lay out the hearts before attaching them so you can balance the colors and spacing. If sewing, leave enough thread at each end for hanging; if using twine, apply glue sparingly and let it dry fully before lifting the strand.
- Combine solid cardstock with metallic gold accents.
- Alternate small and large hearts along the strand.
- Hang it across a mantel, doorway, or window frame.
A few carefully placed strands can brighten a room while keeping the rest of the decor simple.
4. Welcome Guests with a Conversation Heart Wreath
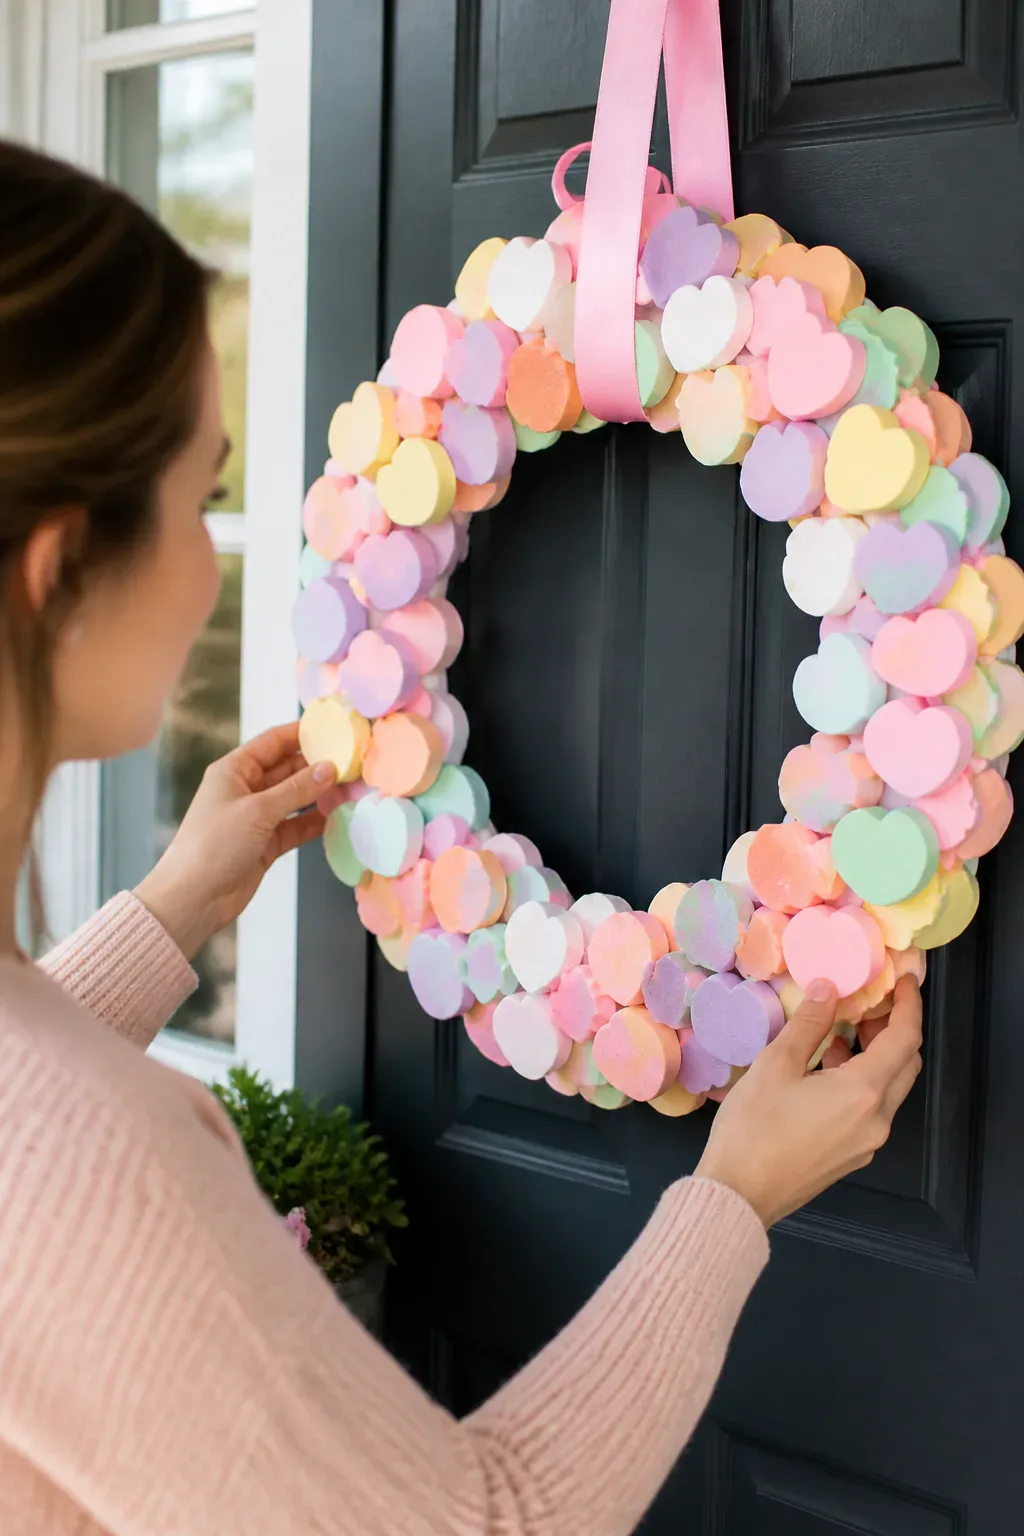
A conversation heart wreath brings a playful Valentine’s touch to the front door or an indoor entryway. Pastel candy colors make it easy to spot from a distance, while the familiar heart shape gives the decoration an instantly seasonal feel. It also works as a cheerful accent on a kitchen wall or above a console table.
For a quick version, cover a foam wreath form with faux conversation hearts. If you prefer a reusable decoration, painted wooden hearts can stand in for candy and can be stamped with short messages. Choose a tight arrangement for a full, colorful finish, or leave small spaces to show a little of the wreath form.
Things to consider
Use faux or craft materials if the wreath will be displayed for an extended period. Attach pieces securely and keep the finished wreath protected from damp weather if it is hung outside. A ribbon loop makes it easy to hang and adds another layer of color.
- Pick a pastel palette or mix in brighter pink and red.
- Arrange larger hearts first, then fill smaller gaps.
- Add simple stamped phrases to wooden heart shapes.
- Hang the wreath where it will not obstruct the door.
This welcoming project adds personality before guests even step inside.
5. Build a Candlelit Rose Petal Table Centerpiece
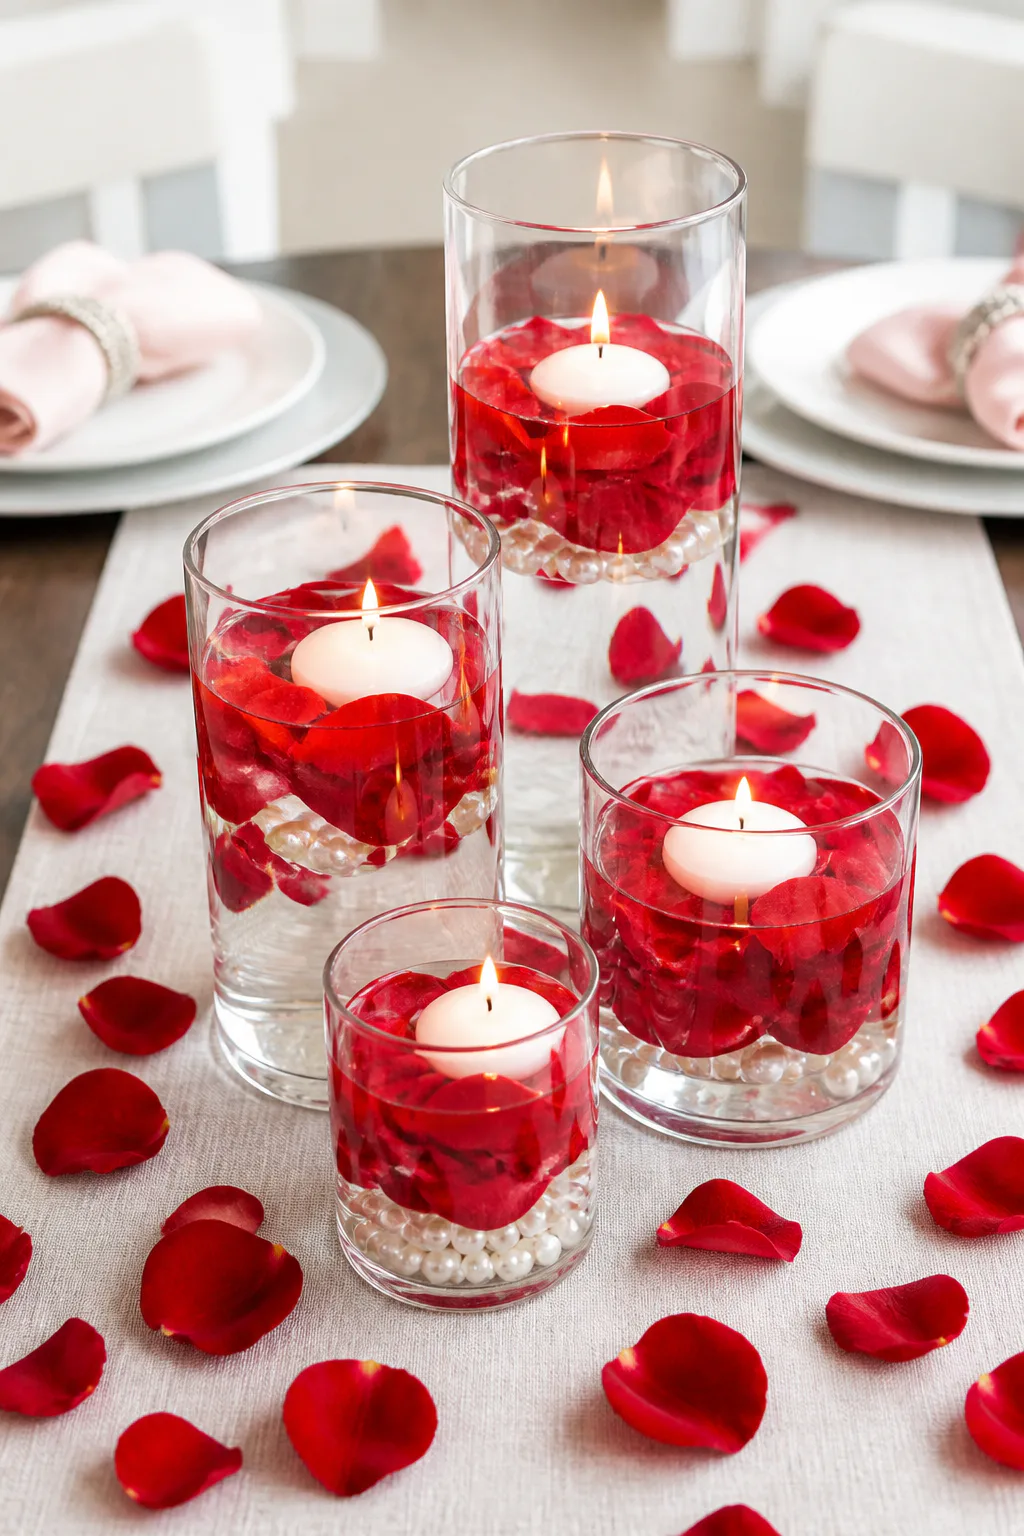
A centerpiece of floating candles and rose petals makes a dining table feel special for a Valentine’s meal. Clear glass vases let the water, petals, and candlelight remain visible, so the arrangement looks delicate without needing a complicated floral design. Use one vase as a focal point or group several together along the center of the table.
Fresh red petals create a classic romantic look, while silk petals can be reused for future displays. A few faux pearls at the bottom of the vase can add detail, but leaving them out keeps the arrangement clean and simple. Choose vases that leave enough room for place settings and conversation.
Setting up the display
Fill the vases partway with water, add petals, and place floating candles on top. Keep the candles stable and away from loose decorations, napkins, and other flammable items. Never leave a lit candle unattended, and consider battery-operated floating candles for a lower-maintenance option.
- Use clear cylinders to show the layers inside.
- Keep the centerpiece low enough for easy conversation.
- Mix fresh and faux petals only if they look cohesive.
A restrained arrangement lets the warm glow provide the main atmosphere.
6. Make Vintage Paper Heart Wall Art
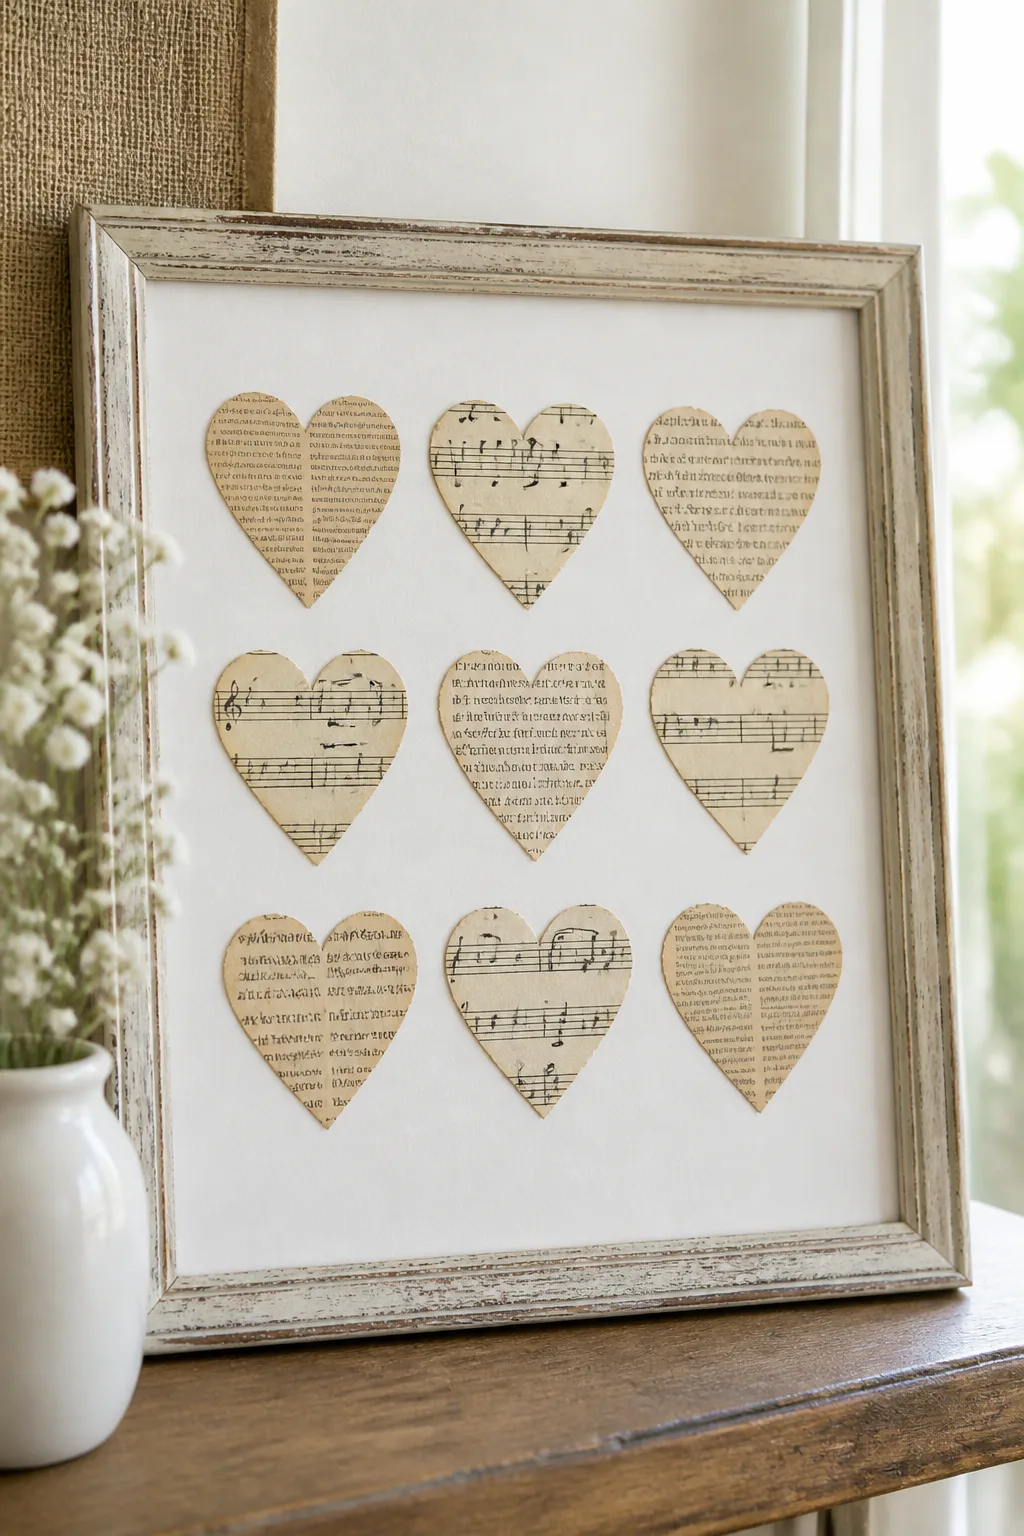
Vintage paper heart art brings a nostalgic, quiet note to Valentine’s decorating. Cut heart shapes from book pages, sheet music, or printed love poems, then mount them in a frame to create a display for a bedroom, hallway, or living room. The paper’s lettering and markings become part of the design, adding visual interest without bold color.
Try placing one large heart in the center of a frame, or arrange several smaller hearts in a neat pattern. A white backing makes the paper shapes stand out, while burlap can give the finished piece a softer, more rustic look. Use paper you are comfortable cutting, such as an old book or a printed copy of a favorite page.
Design tips
Test the layout on a table before attaching anything. Leave a little space between shapes so their outlines remain clear, and consider repeating the same heart size for a tidy, gallery-like effect.
- Pair sheet music with a simple, light frame.
- Use a contrasting background to define pale paper.
- Arrange small hearts in a larger heart silhouette.
Hang the art by itself or combine it with other understated seasonal accents.
7. Hang a Pom-Pom Heart Wall Display
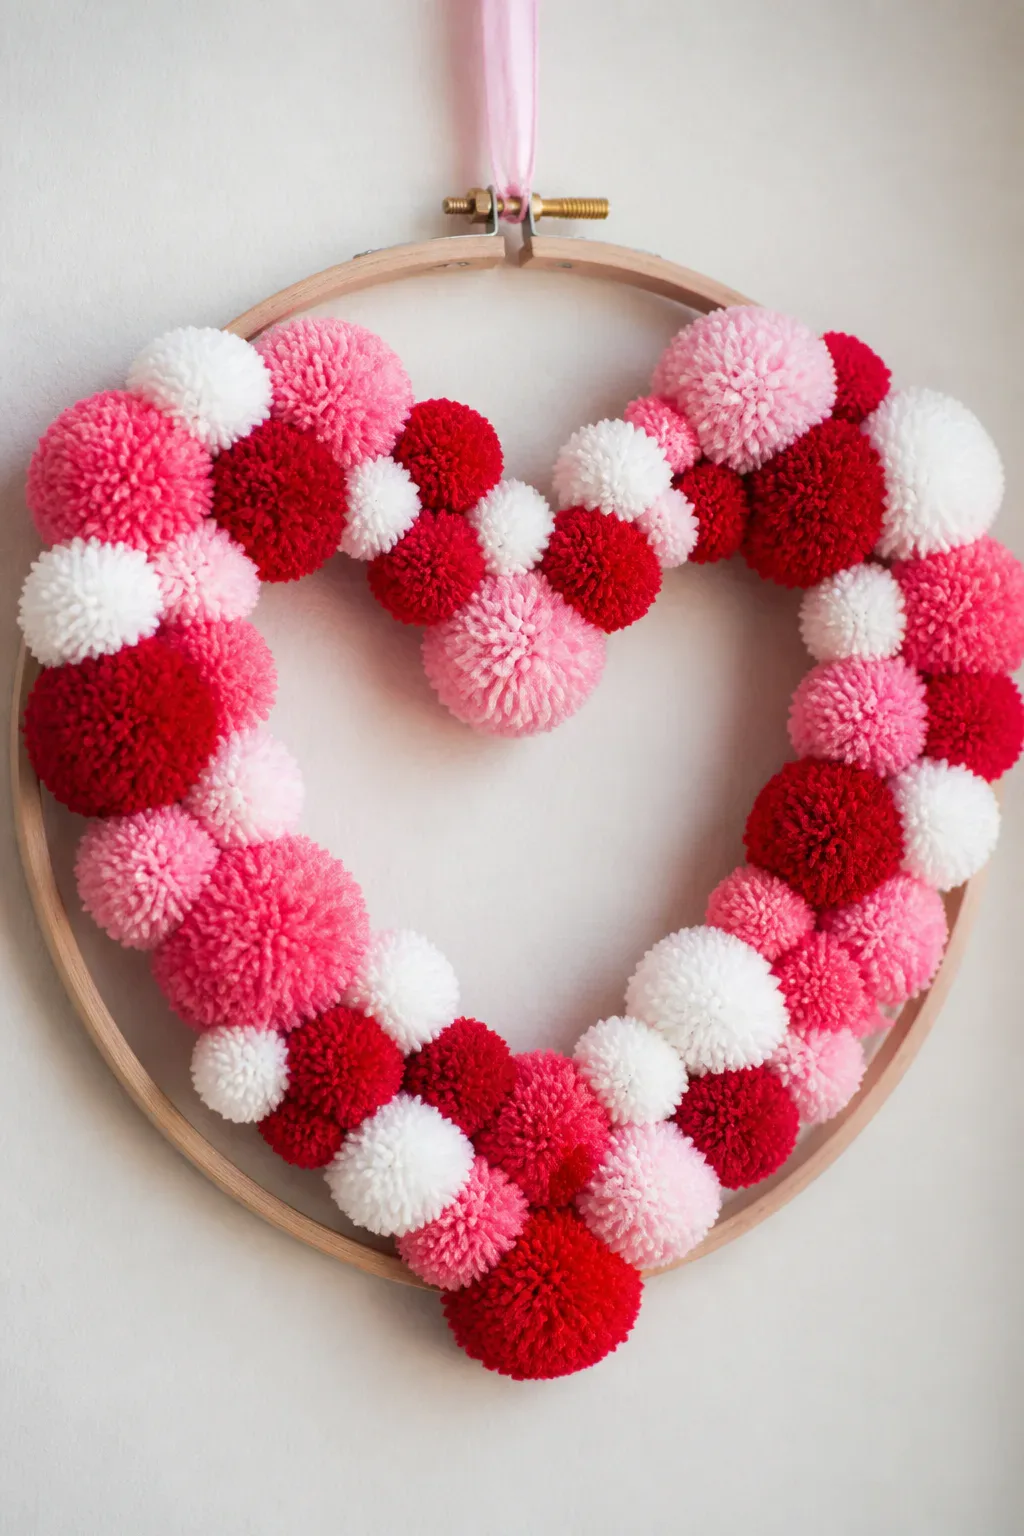
A pom-pom heart wall display adds softness and texture to a bedroom, craft room, or living-room wall. Arrange red, white, and pink yarn pom-poms in a heart shape on an embroidery hoop or piece of driftwood. The fluffy surface contrasts nicely with smooth furniture and framed art, making the piece a noticeable but cozy seasonal accent.
You can make pom-poms in one consistent size for a polished outline, or vary their sizes for a fuller, more playful look. A hoop provides a clear frame around the design, while driftwood gives it a relaxed, natural feel. Either base can be hung from a ribbon or a sturdy wall hook.
How to pull it off
Lay out the pom-poms in a heart shape before attaching them so the outline looks balanced. Secure them firmly to the hoop or driftwood, and adjust the color distribution until the arrangement feels even. Making the pom-poms ahead of time helps keep the assembly stage simple.
- Use two or three yarn colors for a coordinated palette.
- Fill gaps with smaller pom-poms if needed.
- Choose a base that suits the style of your room.
The soft texture makes this a lovely alternative to a flat paper decoration.
8. Create a Felt Envelope Note Banner
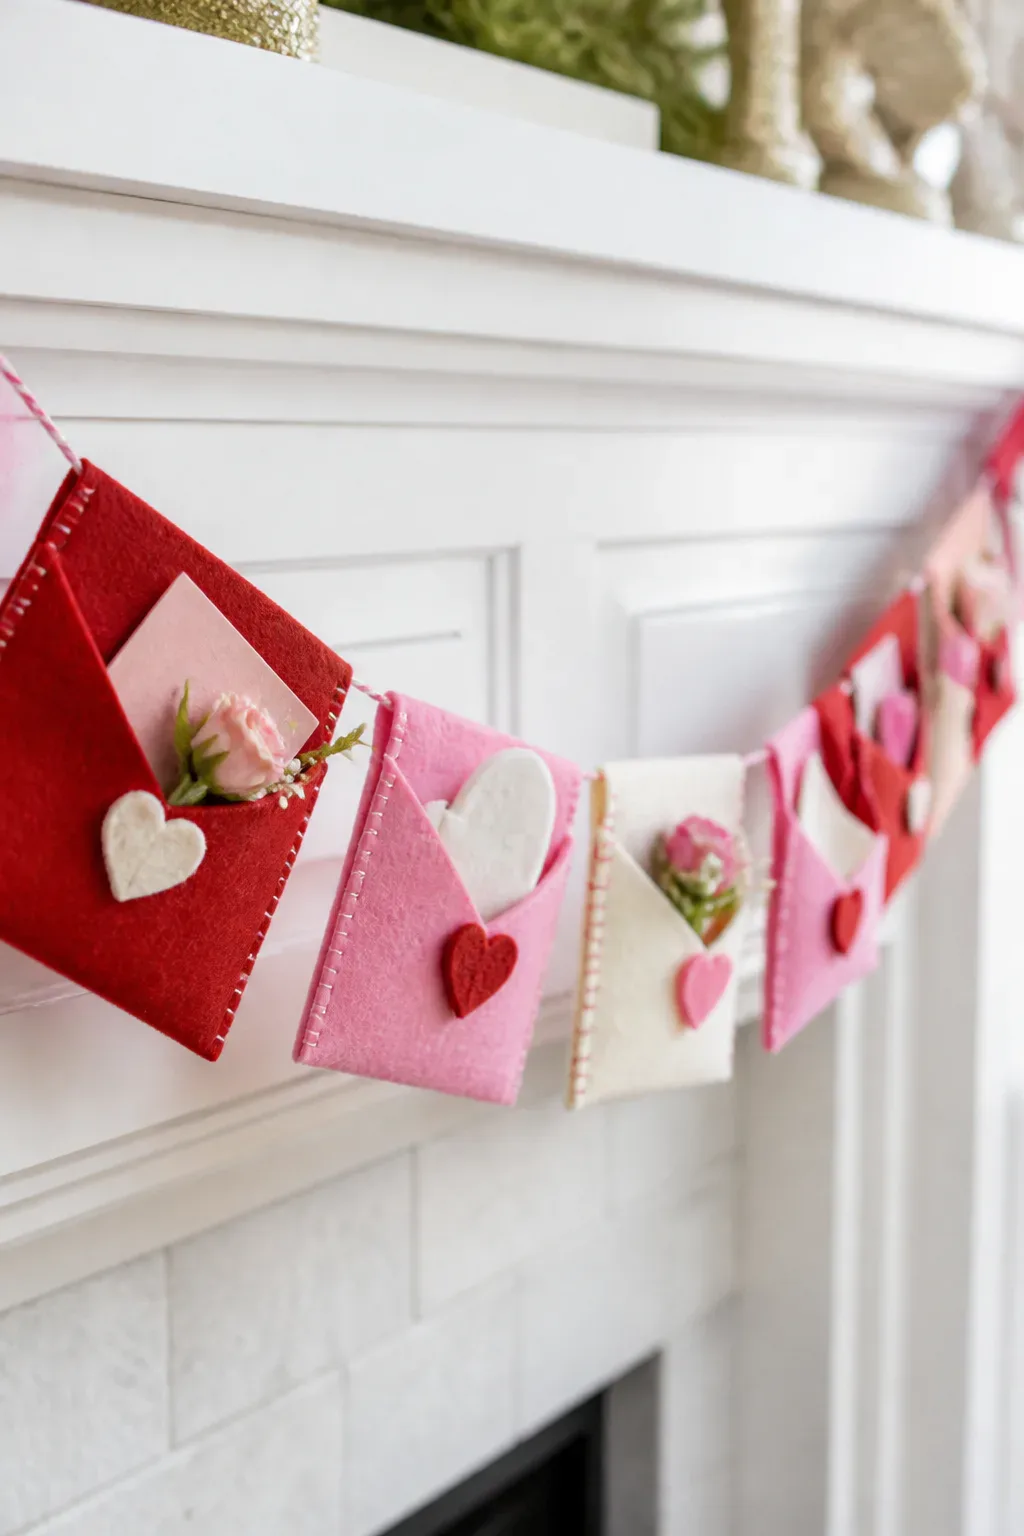
A felt envelope banner turns small pockets into both decoration and a place for personal notes. Hang the row across a mantel, bedroom wall, or doorway, then tuck a message or faux flower into each pocket. The felt gives the banner a cozy texture, and the envelopes make the display feel interactive rather than purely ornamental.
Use pink and red felt for a traditional palette, or mix in cream to give the pockets more contrast. You can make every envelope the same size for a tidy garland or vary their colors while keeping their shapes consistent. Leave the pockets open at the top so you can change the contents throughout the season.
Making the banner
Cut felt into envelope shapes, fold and stitch or glue the sides, and attach each pocket to a length of string or ribbon. Keep the pockets light, especially if the banner will be hung with removable hooks. Add notes before hanging if the display will be difficult to reach.
- Write short compliments or friendly messages.
- Tuck in faux flowers, paper hearts, or tiny cards.
- Space the envelopes evenly along the string.
It’s a sweet decoration for sharing small moments of affection.
9. Display a Branch Tree with Hanging Hearts

A branch tree makes a graceful Valentine’s display for an entry table, mantel, or dining-room corner. Place bare branches in a vase and suspend small hearts from the twigs, creating a lightweight seasonal arrangement that draws the eye upward. The bare shape keeps the display airy, while the hanging decorations bring in color and movement.
Use paper hearts for a simple, easy-to-change version or felt hearts for a softer finish. Vary the heart sizes and hanging lengths to keep the branches from looking too uniform. A sturdy vase with a weighted base helps support the arrangement, especially if the branches extend well above the opening.
Arranging the branches
Choose branches with several side twigs so there are natural places to hang the hearts. Set the branches securely in the vase before adding decorations, then distribute the hearts around the arrangement rather than clustering them all in front.
- Use a mix of red, pink, and neutral hearts.
- Cut strings at varied lengths for gentle movement.
- Keep the arrangement clear of busy walkways.
The result brings a little seasonal color to a room without taking up much surface space.
10. Arrange Painted Heart Planters on a Windowsill

Painted heart planters bring Valentine’s color together with greenery, making them a bright choice for a sunny windowsill. Decorate small terracotta pots with a light base color and simple hearts or polka dots, then fill them with succulents or fresh herbs. A few pots grouped together can create a cheerful display without overwhelming the window.
Keep the painting simple if you want the plants to remain the focus. Small red hearts on white or soft-pink pots feel seasonal, while repeated dots or stripes can make the group look coordinated. Be sure the plants you choose suit the light and care conditions in the spot where you plan to display them.
Design and care tips
Let the paint dry fully before adding soil or plants, and protect the work surface while decorating. If you water the plants in place, use a saucer beneath each pot to protect the sill from moisture. Keep painted surfaces on the outside of the pots.
- Repeat one motif across several pots.
- Mix plant shapes for a varied group display.
- Arrange taller pots behind shorter ones.
These planters can stay on display beyond Valentine’s Day by simply changing the surrounding accents.
11. Dress the Dining Table with Burlap and Lace
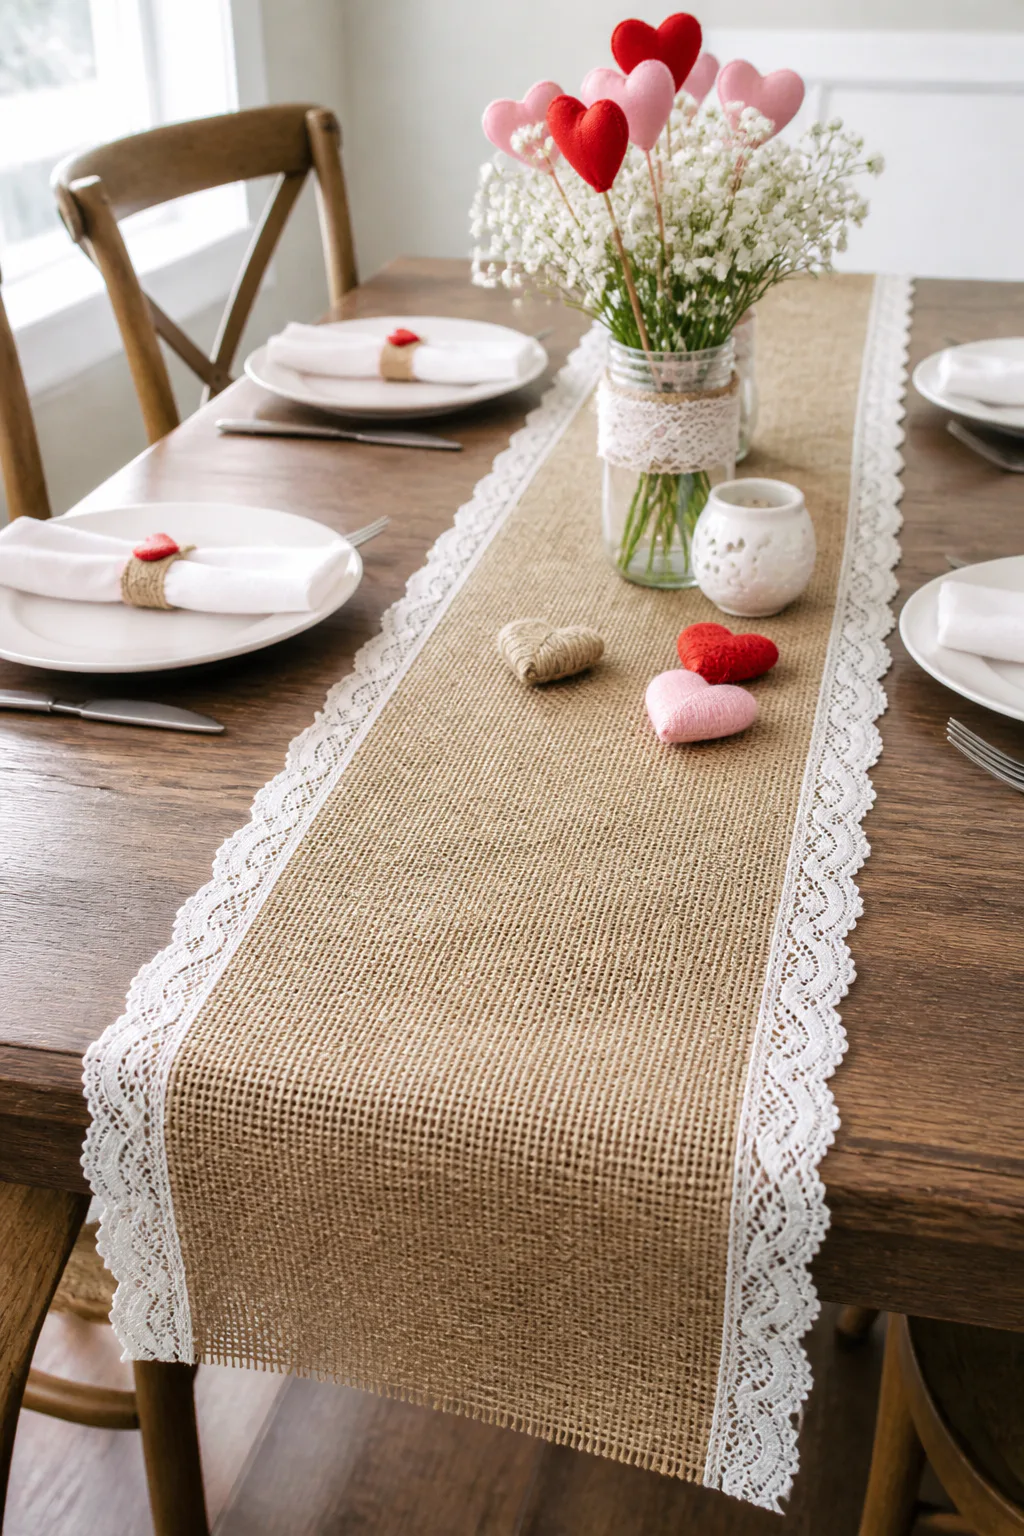
A burlap runner edged with lace gives a dining table a rustic Valentine’s look. The contrast between coarse, natural-looking fabric and delicate trim keeps the setting warm without relying on bright colors or elaborate decorations. This approach suits a relaxed dinner, a family meal, or a small gathering with friends.
Lay the runner down the center of the table, then build around it with simple dishes and a few seasonal details. White or cream lace softens the burlap, while red or pink accents elsewhere on the table can connect the runner to the holiday. Keep the arrangement low so guests can see one another across the table.
Styling the table
Before adding trim, check that the runner is the right length for your table and that it lies flat. Secure lace along the edges with a sewing machine or fabric-safe adhesive, following the product directions. If you prefer a simpler project, place a length of lace over the burlap rather than attaching it.
- Pair the runner with plain plates and cloth napkins.
- Add small hearts or flowers as restrained accents.
- Keep candles and centerpieces clear of fabric edges.
The layered textures create a welcoming foundation for the rest of your table decor.
12. Fill a Glass Jar with Origami Love Notes

An origami love-note jar is a small tabletop accent with a personal touch. Fill a clear apothecary jar with folded paper stars or tiny notes, then set it on a side table, desk, or dining-room shelf. The colorful folds create an attractive display, and the messages make the project feel more meaningful than a purely decorative container.
Choose patterned or solid paper in a palette that suits your room. You might write a short compliment or favorite memory inside each folded note, or leave the pieces blank and use origami stars for a simple color-filled jar. A clear container keeps the folds visible and makes the finished arrangement part of the decor.
Making it personal
Fold several pieces of paper before filling the jar so you can test the colors and see how much space they take up. If you include written messages, use paper small enough to fold neatly but large enough for the note to remain legible when opened.
- Mix a few patterns with coordinating solid colors.
- Add a handwritten label or ribbon around the jar.
- Place the jar somewhere it can be reached easily.
It can also become a little activity: invite family or guests to choose and read a note.
13. Frame Pressed Flowers in a Heart Silhouette
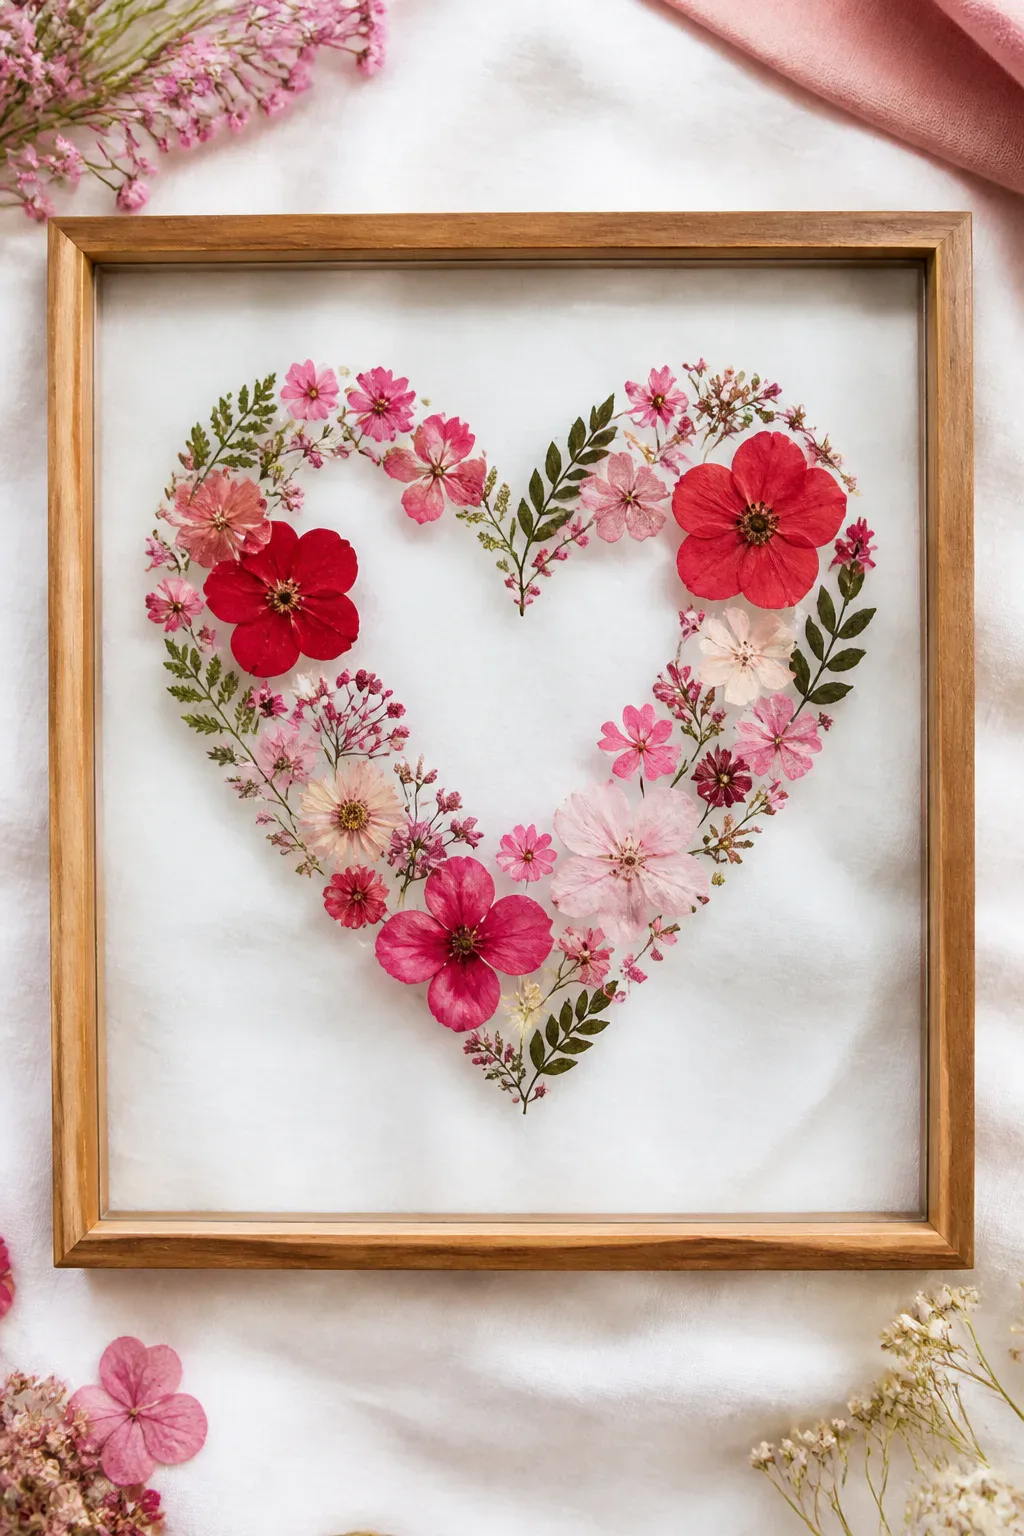
Pressed flowers arranged into a heart silhouette make delicate wall art for a bedroom, hallway, or quiet corner. Place the botanicals between two panes of glass in a floating frame so their shapes and colors remain visible from both sides. Red and pink flowers give the piece a Valentine’s feel, while small leaves can help define the outline.
Plan the heart shape before positioning the flowers, since a careful outline keeps the design readable. You can work with pressed botanicals you already have or use faux pressed flowers for a more durable craft option. A simple frame lets the natural shapes remain the focus.
Arranging the flowers
Lay the flowers out on a flat surface first, moving them gently until the heart looks balanced. Use a light touch when closing the frame so delicate petals do not shift. If you want to preserve open space inside the heart, keep most of the flowers along the outline rather than filling the entire shape.
- Combine different flower sizes for visual variety.
- Use leaves sparingly to fill small gaps.
- Choose a frame that can be displayed securely.
This airy project brings a natural detail to your seasonal wall decor.
14. Mount a Glowing Neon Wire Heart

A glowing heart made from flexible LED wire or EL wire adds a modern Valentine’s accent to a bedroom or living room. Its outline is simple and graphic, so it can stand out against a plain wall without making the whole space feel overly decorated. Switch it on in the evening for a soft feature near a bed, reading nook, or seating area.
Shape the wire into a heart and secure it with clear fishing line or another suitable fastening method. A single-color glow feels minimal, while a brighter shade can make the heart more playful. Keep the design appropriately scaled to the wall so it complements nearby art and furnishings.
Mounting and safety
Follow the lighting product’s instructions when bending, securing, and powering the wire. Use fasteners suited to the wall surface and avoid pinching or sharply bending the light strand. Keep the cord and power source arranged neatly and out of high-traffic areas.
- Sketch the heart shape before mounting the wire.
- Choose a clear stretch of wall for the outline.
- Check that the power source is easy to access.
The simple silhouette can stay up for the holiday or become a year-round accent if it suits your room.
15. Set the Table with Cupid’s Arrow Place Settings

Cupid’s arrow place settings add a playful handmade detail to a Valentine’s dinner table. Lay a small arrow and felt heart across each cloth napkin, or place them neatly on the plates for a clear finishing touch. Repeating the same detail at every setting makes the table feel considered without needing a large centerpiece.
Make the arrows from paper or small wooden pieces, then pair them with felt hearts in colors that echo the rest of your table. You can keep the design simple and graphic or add small decorative details to the arrow ends. Make sure the pieces are light and comfortable to move when guests sit down.
Putting each setting together
Fold the napkins first, then place the arrow and heart across the center so they stay visible. If you are preparing several settings, assemble one as a sample and repeat its layout. Keep the place-setting decorations away from candles and food-serving areas.
- Coordinate felt hearts with your napkins or runner.
- Use lightweight materials that rest easily on fabric.
- Repeat the same arrangement at each seat.
This small touch can make even a simple meal feel festive and welcoming.
16. Hang a Stenciled Canvas Love Banner

A stenciled canvas love banner adds a handmade focal point to a wall or mantel. Paint romantic lettering or a bold heart on a simple canvas banner, then hang it where the design can be seen without competing with too many other decorations. Its fabric texture brings warmth, while the painted motif makes the message clear.
Red and pink paint creates a traditional Valentine’s palette, but you can choose shades that work with your room. A large central heart gives the banner a clean, graphic look; lettering feels more personal and can echo the style of your other seasonal decor. Stencils help keep shapes neat, especially for a first attempt.
Painting the banner
Lay the canvas flat and protect the surface underneath before painting. Position the stencil carefully, apply paint with a sponge brush using light dabs, and lift the stencil without dragging it. Allow the design to dry fully before hanging the banner by its top edge or a simple rod.
- Test paint colors and stencil placement on scrap material.
- Keep the lettering large enough to read from across the room.
- Pair the banner with a few smaller accents, not a crowded display.
A homemade banner is easy to personalize and can be brought out again each February.
Final Thoughts
These DIY Valentine’s Day decorations offer plenty of ways to add seasonal color and personality, whether you want to dress up a mantel, welcome guests at the door, or make the dining table feel special. Choose a project that fits the space and the time you have, then adjust its colors and materials to suit your home.
You do not need to decorate every room to make the holiday feel festive. One handmade focal point, paired with a few thoughtful details, can be enough to create a warm and welcoming atmosphere.